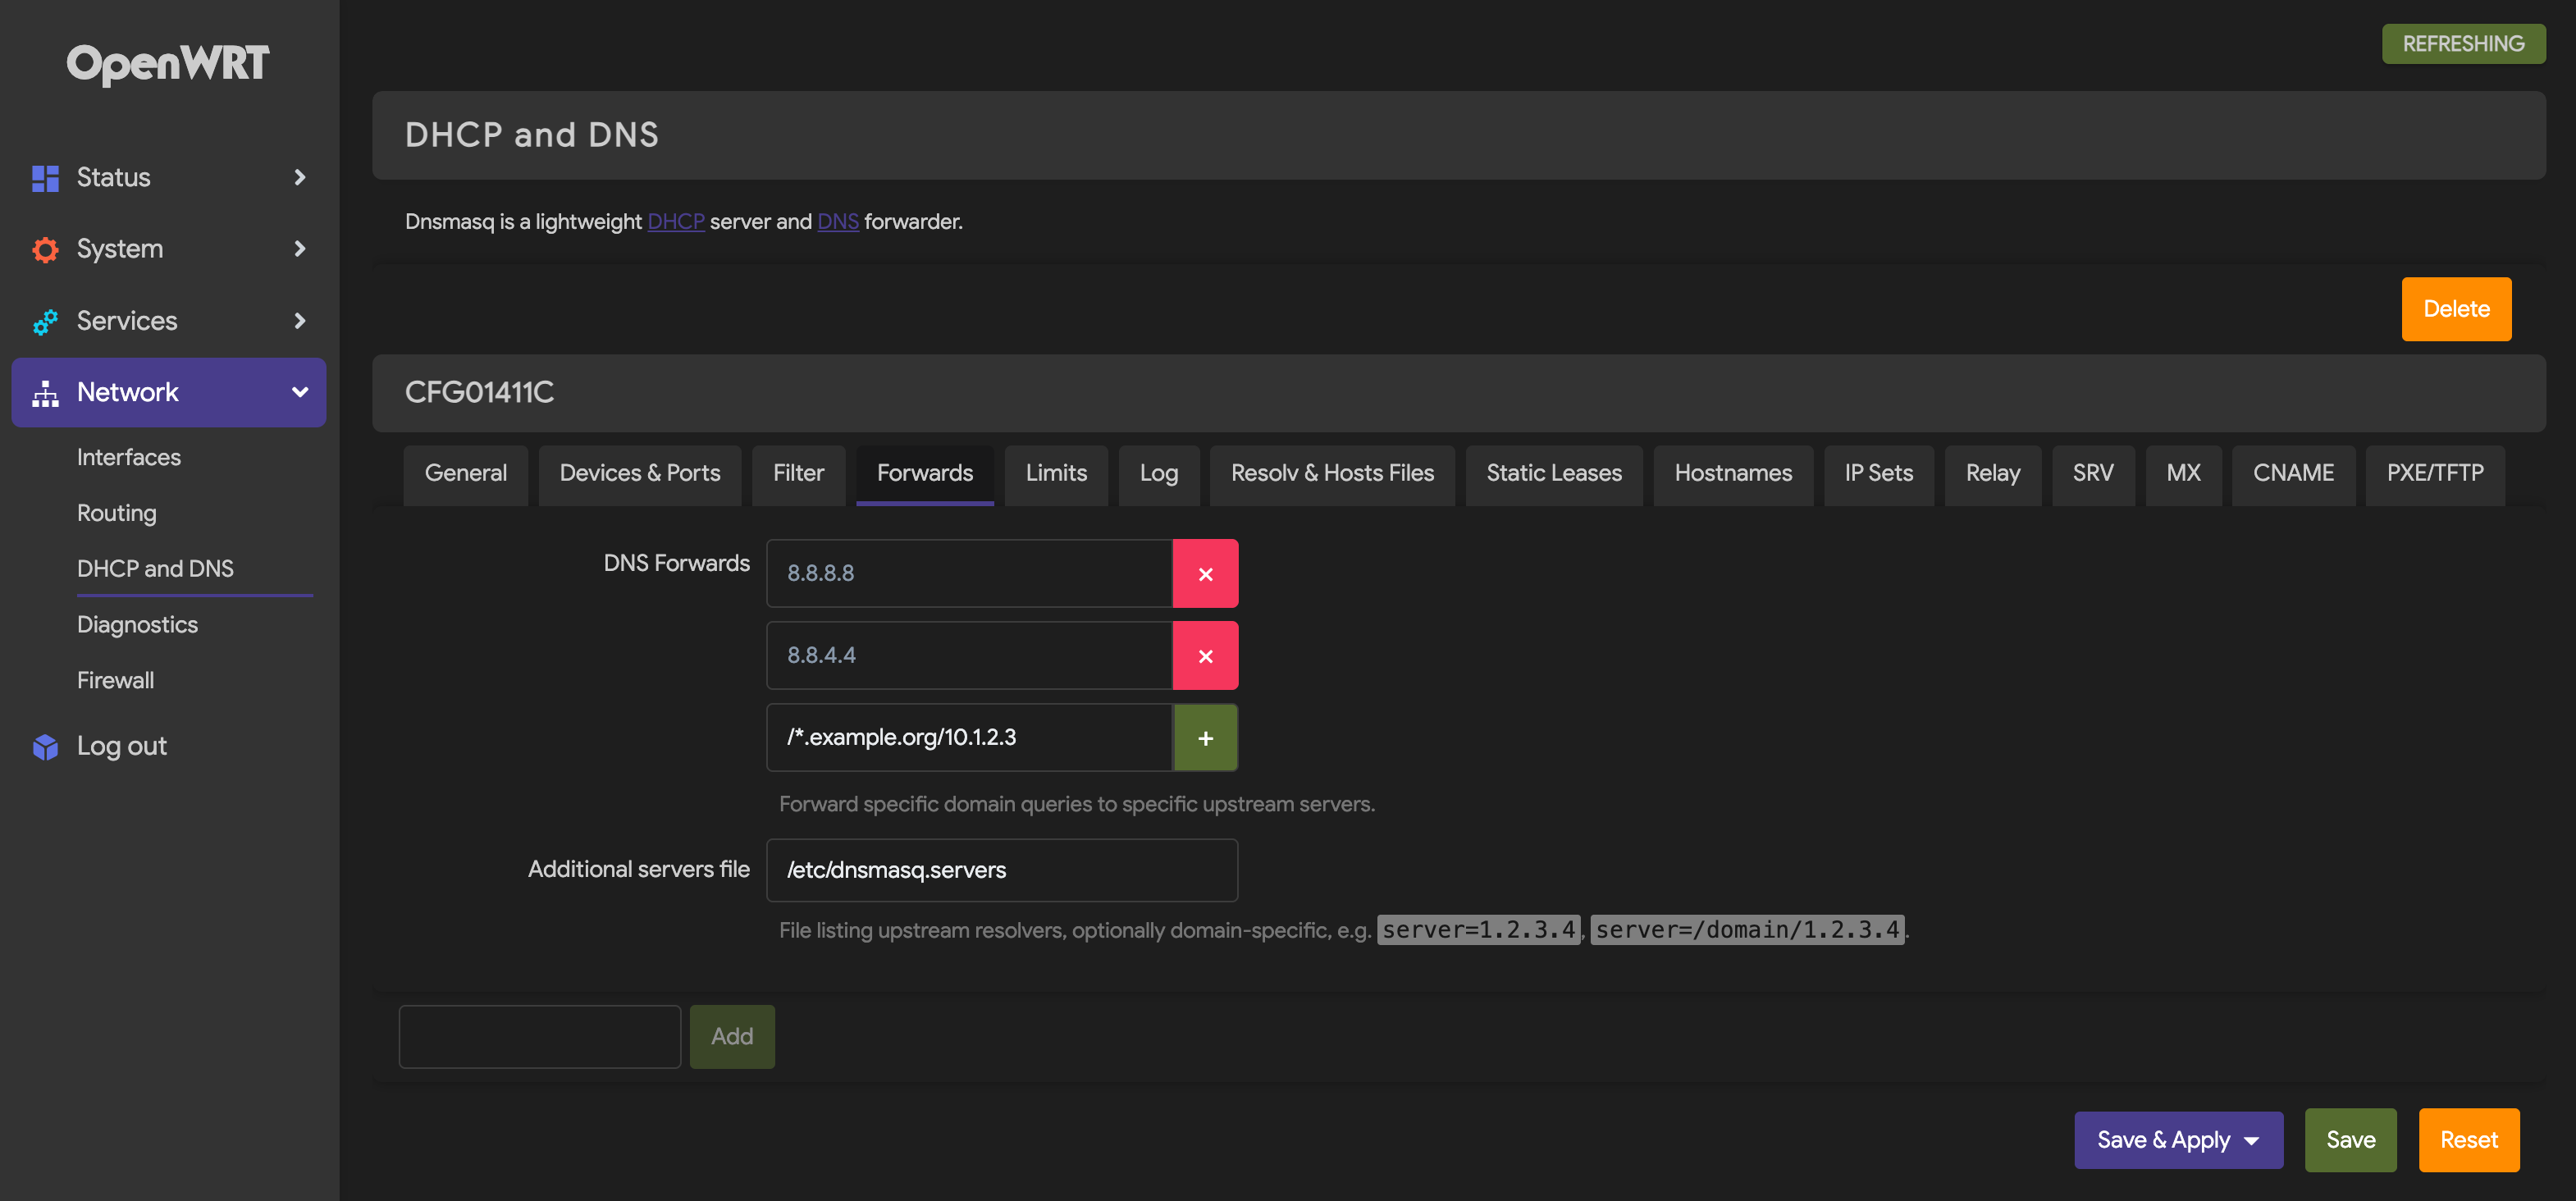
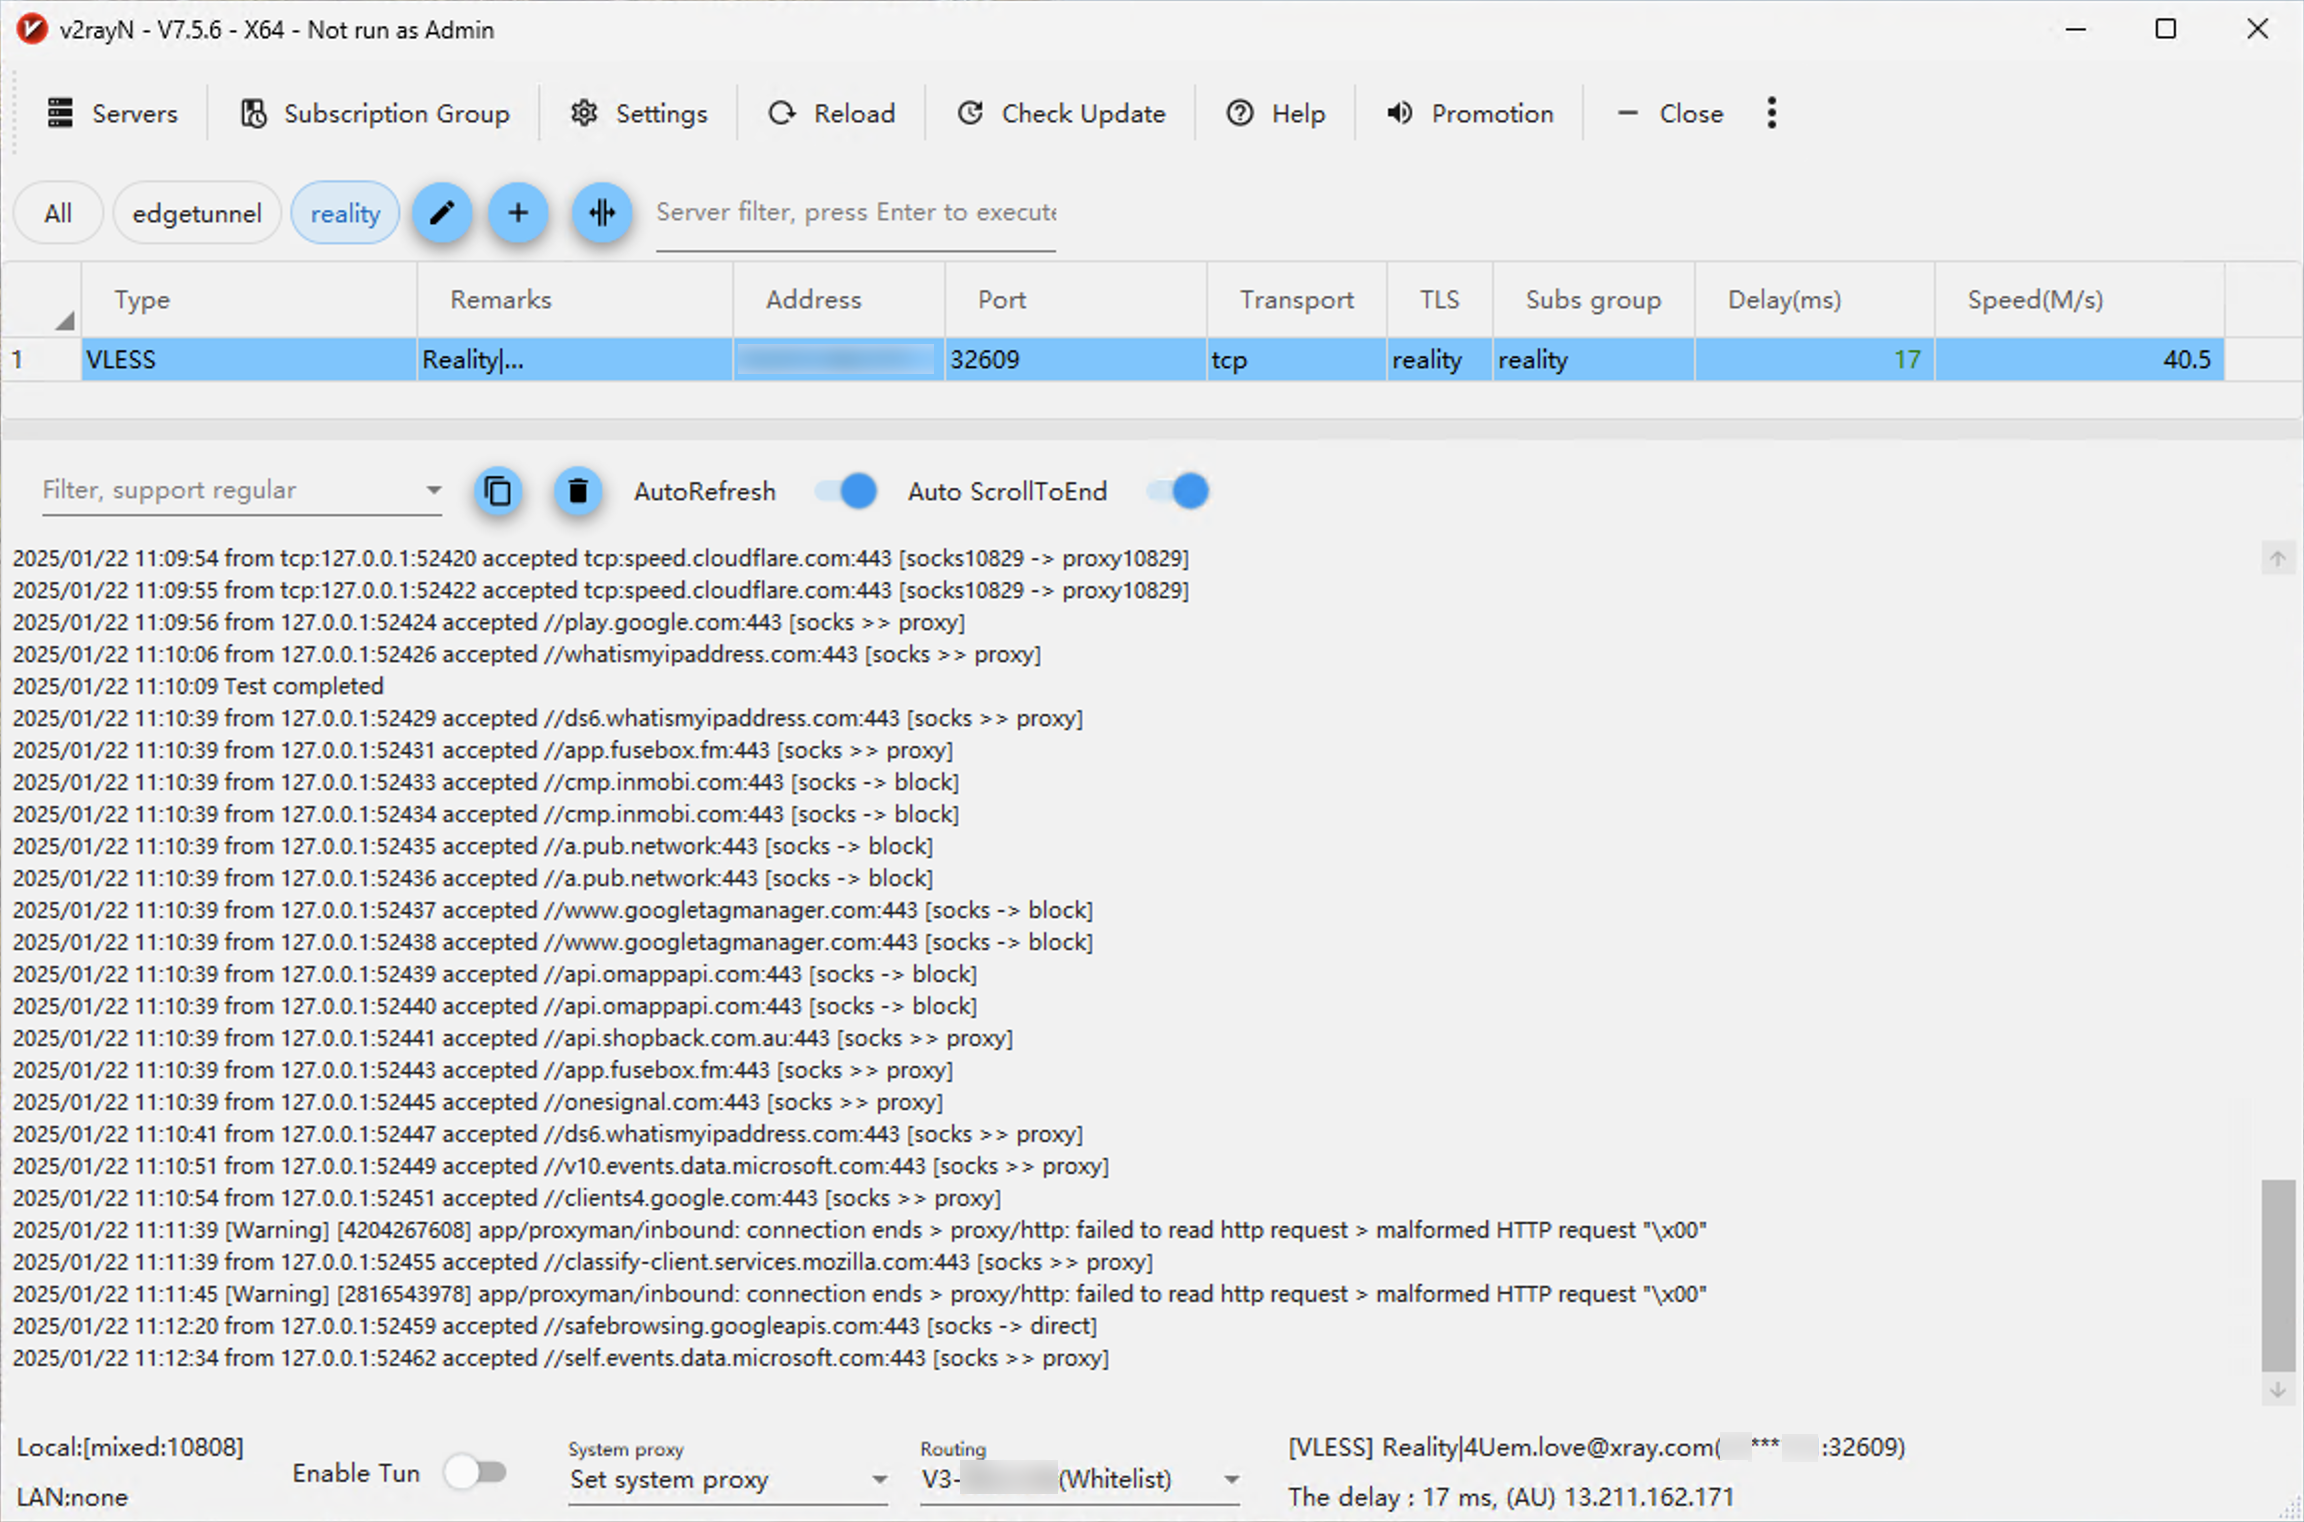
From time to time, not always, getting DNS_PROBE_FINISHED_NXDOMAIN error in browser especially when visit Chinese AI sites e.g. https://chat.qwen.ai/ and https://chat.z.ai/
The root reason is because some ISPs have slower or inconsistent DNS resolution.
The fix is switching to a faster public resolver like Google (8.8.8.8/8.8.4.4) or Cloudflare (1.1.1.1/1.0.0.1) in network settings.
[ec2-user@ip-10-215-240-19 ~]$ tic -x /tmp/ghostty.terminfo "/tmp/ghostty.terminfo", line 2, col 31, terminal 'xterm-ghostty': older tic versions may treat the description field as an alias
Ghostty uses TERM=xterm-ghostty which requires a terminfo entry on the remote system. Older Linux servers/macOS servers simply don’t have that entry in their terminfo database, so the other terminal utilities throw this “unknown terminal type“ error.
SAME issue also happens when run asitop in Ghostty. Error thrown:
1 2
'xterm-ghostty': unknown terminal type. /opt/homebrew/Cellar/asitop/0.0.24/libexec/lib/python3.14/site-packages/blessed/terminal.py:186: UserWarning: Failed to setupterm(kind='xterm-ghostty'): setupterm: could not find terminal
This is because asitop (via the blessed library) doesn’t recognize Ghostty‘s terminal type xterm-ghostty.
Either run as:
1
TERM=xterm-256color sudo asitop
or, add an alias to the shell config (~/.zshrc or ~/.bashrc):
1
alias asitop='TERM=xterm-256color sudo asitop'
Ghostty uses xterm-ghostty as its $TERM value, which isn’t in the terminfo database that blessed checks against. Falling back to xterm-256color gives it a fully compatible terminal description while keeping all the color/formatting support asitop needs.
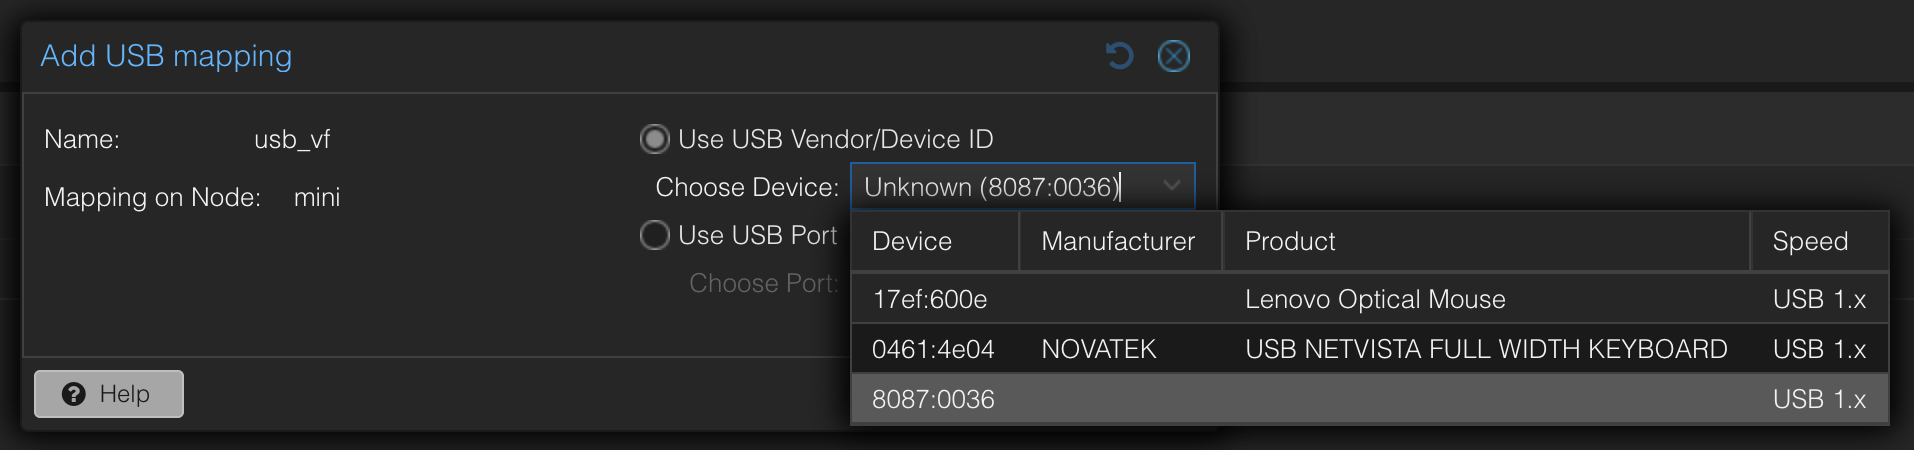
root@mini:~# lsusb Bus 004 Device 001: ID 1d6b:0003 Linux Foundation 3.0 root hub Bus 003 Device 006: ID 8087:0036 Intel Corp. Bus 003 Device 003: ID 0461:4e04 Primax Electronics, Ltd Lenovo Keyboard KB1021 Bus 003 Device 002: ID 17ef:600e Lenovo Optical Mouse Bus 003 Device 001: ID 1d6b:0002 Linux Foundation 2.0 root hub Bus 002 Device 001: ID 1d6b:0003 Linux Foundation 3.0 root hub Bus 001 Device 001: ID 1d6b:0002 Linux Foundation 2.0 root hub
auto wlp4s0f0 iface wlp4s0f0 inet dhcp wpa-ssid "igloo studio" wpa-psk "igloo studio password"
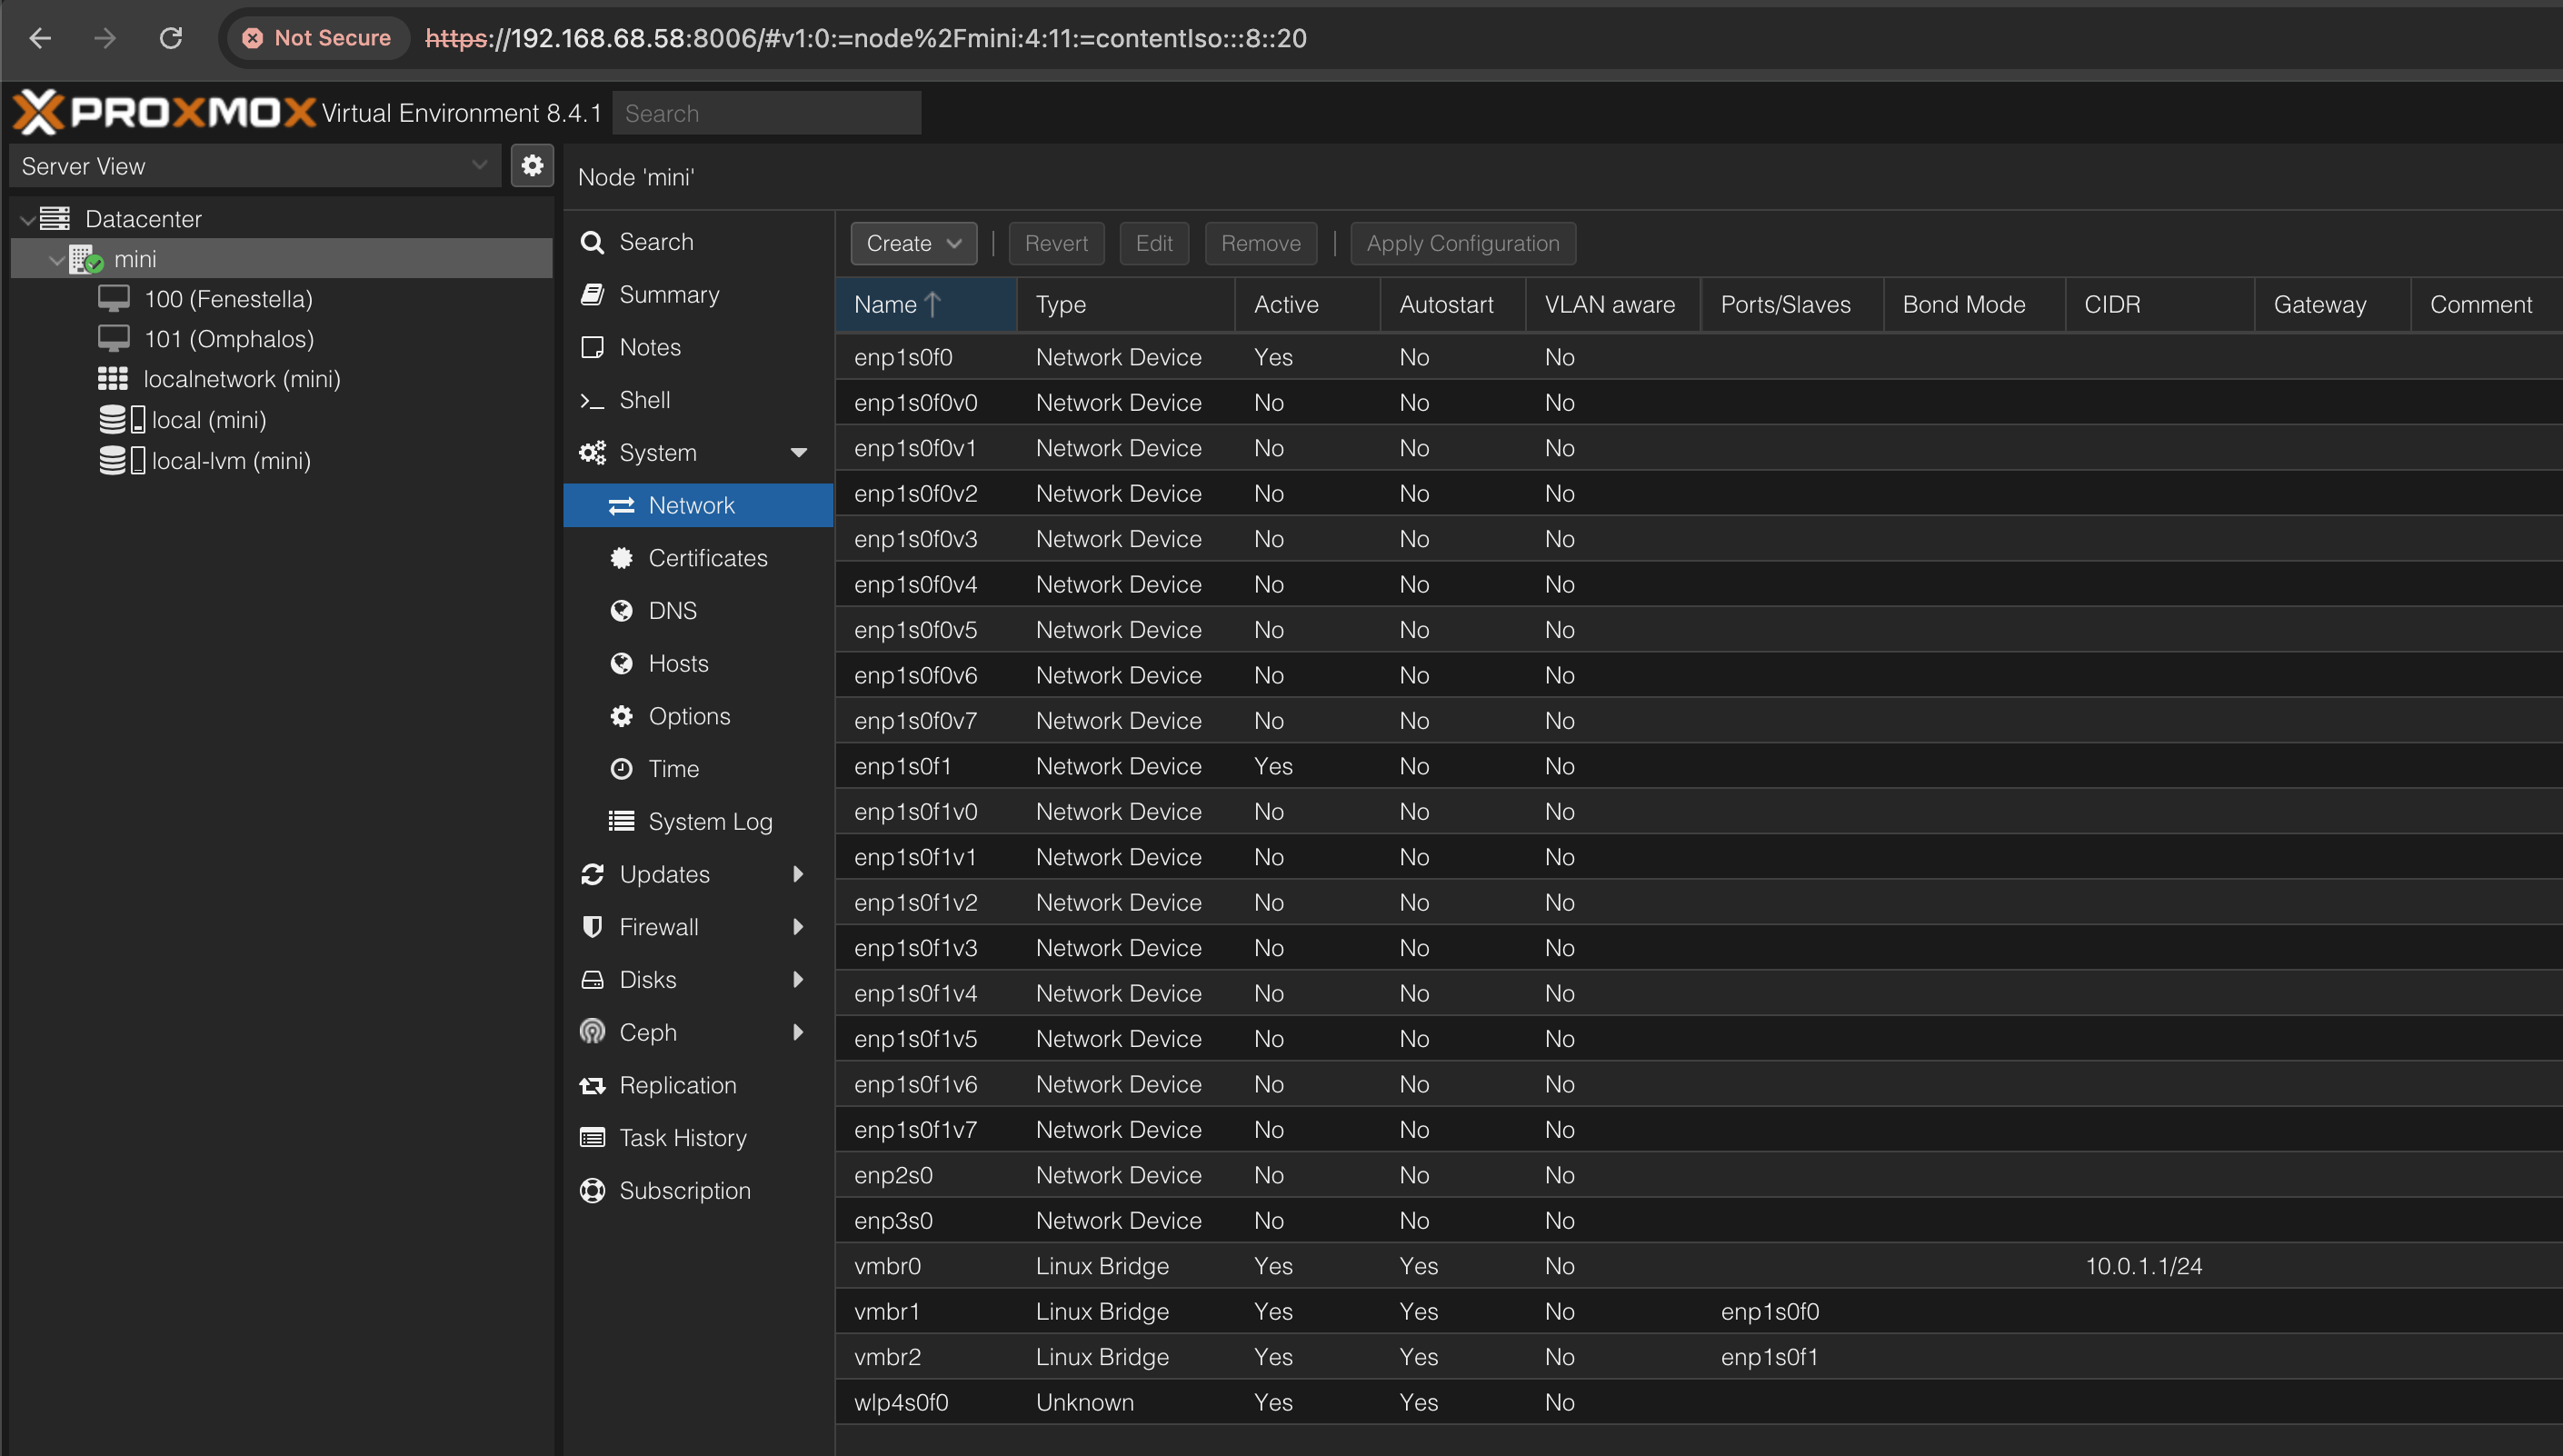
auto vmbr0 iface vmbr0 inet static address 10.0.1.1/24 bridge-ports none bridge-stp off bridge-fd 0
# Enable IP forwarding post-up echo 1 > /proc/sys/net/ipv4/ip_forward
# Allow all forwarding from VM network to WAN post-up iptables -A FORWARD -i vmbr0 -o wlp4s0f0 -j ACCEPT post-down iptables -D FORWARD -i vmbr0 -o wlp4s0f0 -j ACCEPT
# Single NAT rule for all traffic post-up iptables -t nat -A POSTROUTING -s '10.0.1.0/24' -o wlp4s0f0 -j MASQUERADE post-down iptables -t nat -D POSTROUTING -s '10.0.1.0/24' -o wlp4s0f0 -j MASQUERADE
auto vmbr1 iface vmbr1 inet manual bridge-ports enp1s0f0 bridge-stp off bridge-fd 0
auto vmbr2 iface vmbr2 inet manual bridge-ports enp1s0f1 bridge-stp off bridge-fd 0
source /etc/network/interfaces.d/*
Configure dnsmasq for VMs’ DNS and DHCP management:
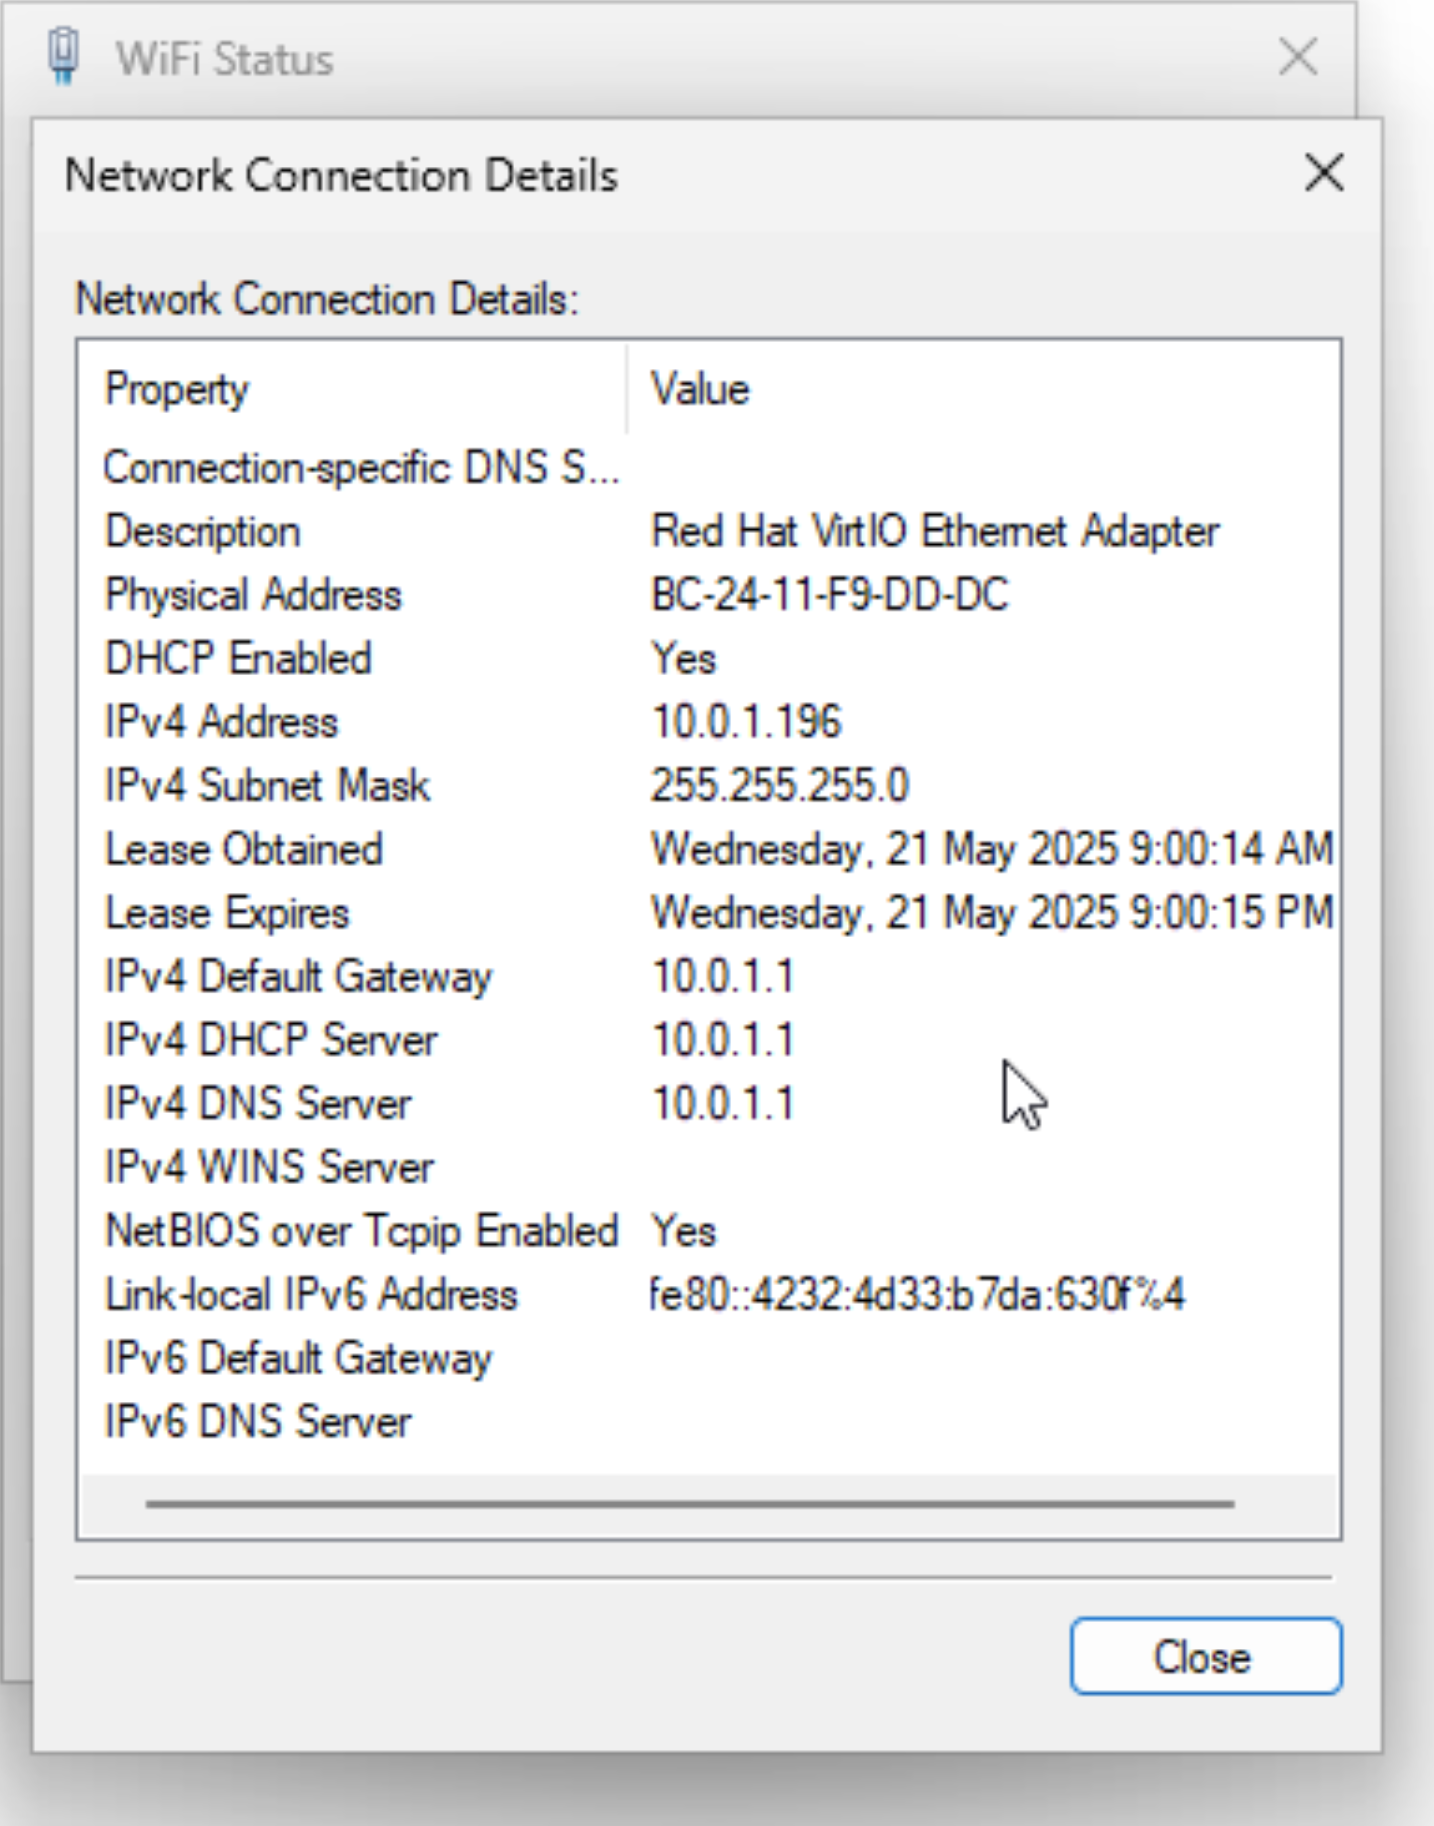
# The IP-address range that should be used for the clients (virtual machines/containers): # dhcp-range=first_available_ip, last_available_ip, net_mask, lease_time (<number>h) dhcp-range=10.0.1.100, 10.0.1.200, 255.255.255.0, 12h
# Just making sure dnsmasq knows the routers IP-address # dhcp-option=3,vmbr0_ip dhcp-option=3,10.0.1.1
Proxmox host allocated wireless IP e.g. 192.168.68.58. Set this IP in /etc/hosts:
1
2
3
4
5
6
7
8
9
10
11
12
root@mini:~# cat /etc/hosts 127.0.0.1 localhost.localdomain localhost 192.168.68.50 mini.local mini
# The following lines are desirable for IPv6 capable hosts
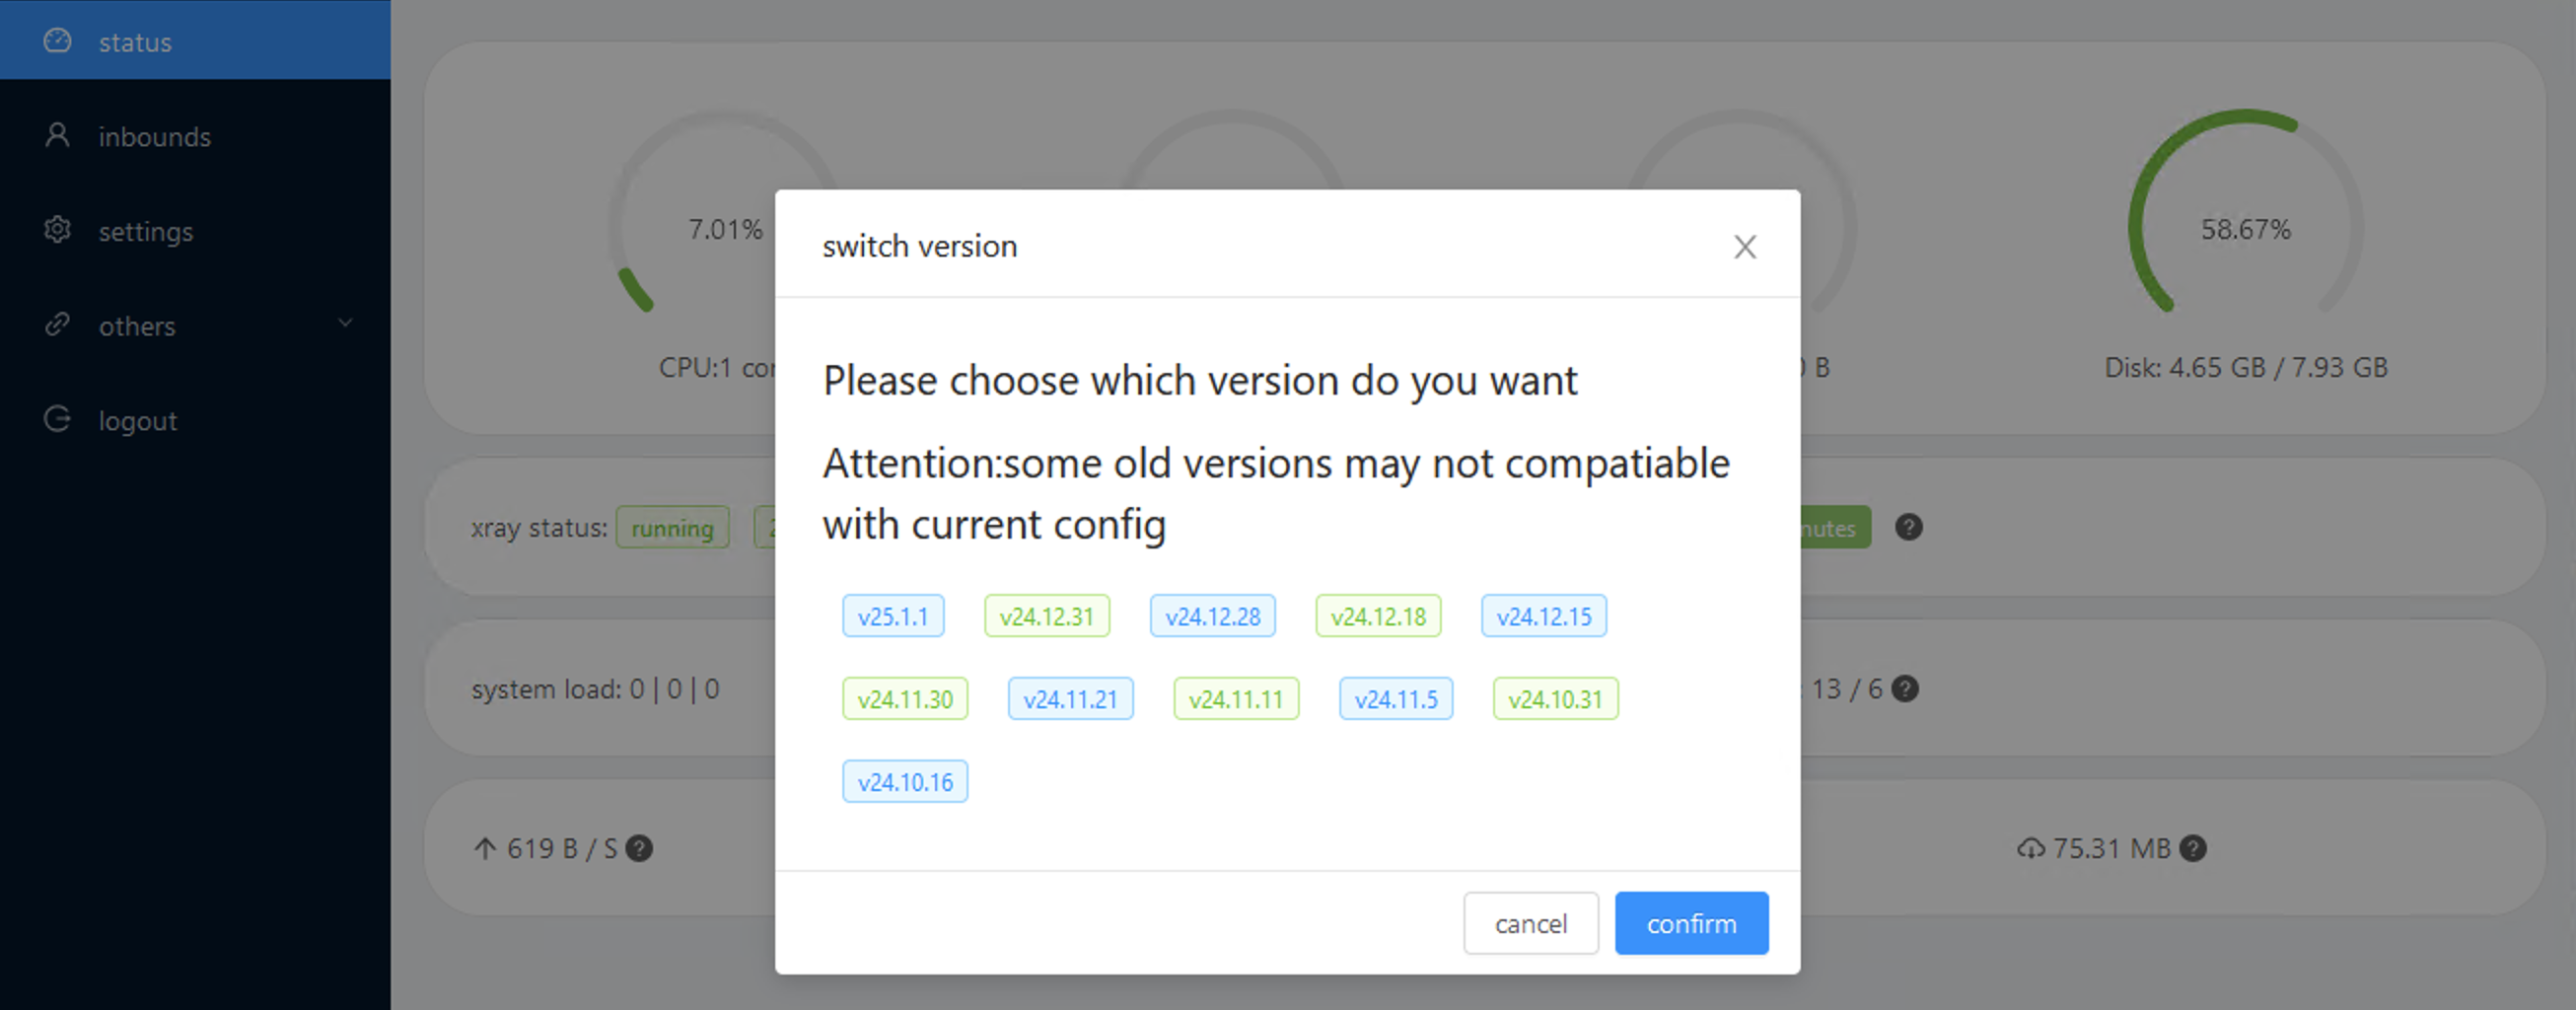
Install/update finished need to modify panel settings out of security are you continue,if you type n will skip this at this time[y/n]: y please set up your username: admin your username will be: admin please set up your password: password your password will be: password please set up the panel port: 10080 your panel port is: 10080 initializing,wait some time here... set username and password success account name and password set down! set port 10080 successpanel port set down! x-ui v0.3.4.4 install finished,it is working now...
x-ui control menu usages: ---------------------------------------------- x-ui - Enter control menu x-ui start - Start x-ui x-ui stop - Stop x-ui x-ui restart - Restart x-ui x-ui status - Show x-ui status x-ui enable - Enable x-ui on system startup x-ui disable - Disable x-ui on system startup x-ui log - Check x-ui logs x-ui update - Update x-ui x-ui install - Install x-ui x-ui uninstall - Uninstall x-ui x-ui geo - Update geo data ----------------------------------------------
Install/update finished need to modify panel settings out of security are you continue,if you type n will skip this at this time[y/n]: y please set up your username: admin your username will be: admin please set up your password: password your password will be: password please set up the panel port: 10080 your panel port is: 10080 initializing,wait some time here... set username and password success account name and password set down! set port 10080 successpanel port set down! x-ui v0.3.4.4 install finished,it is working now...
x-ui control menu usages: ---------------------------------------------- x-ui - Enter control menu x-ui start - Start x-ui x-ui stop - Stop x-ui x-ui restart - Restart x-ui x-ui status - Show x-ui status x-ui enable - Enable x-ui on system startup x-ui disable - Disable x-ui on system startup x-ui log - Check x-ui logs x-ui update - Update x-ui x-ui install - Install x-ui x-ui uninstall - Uninstall x-ui x-ui geo - Update geo data ----------------------------------------------
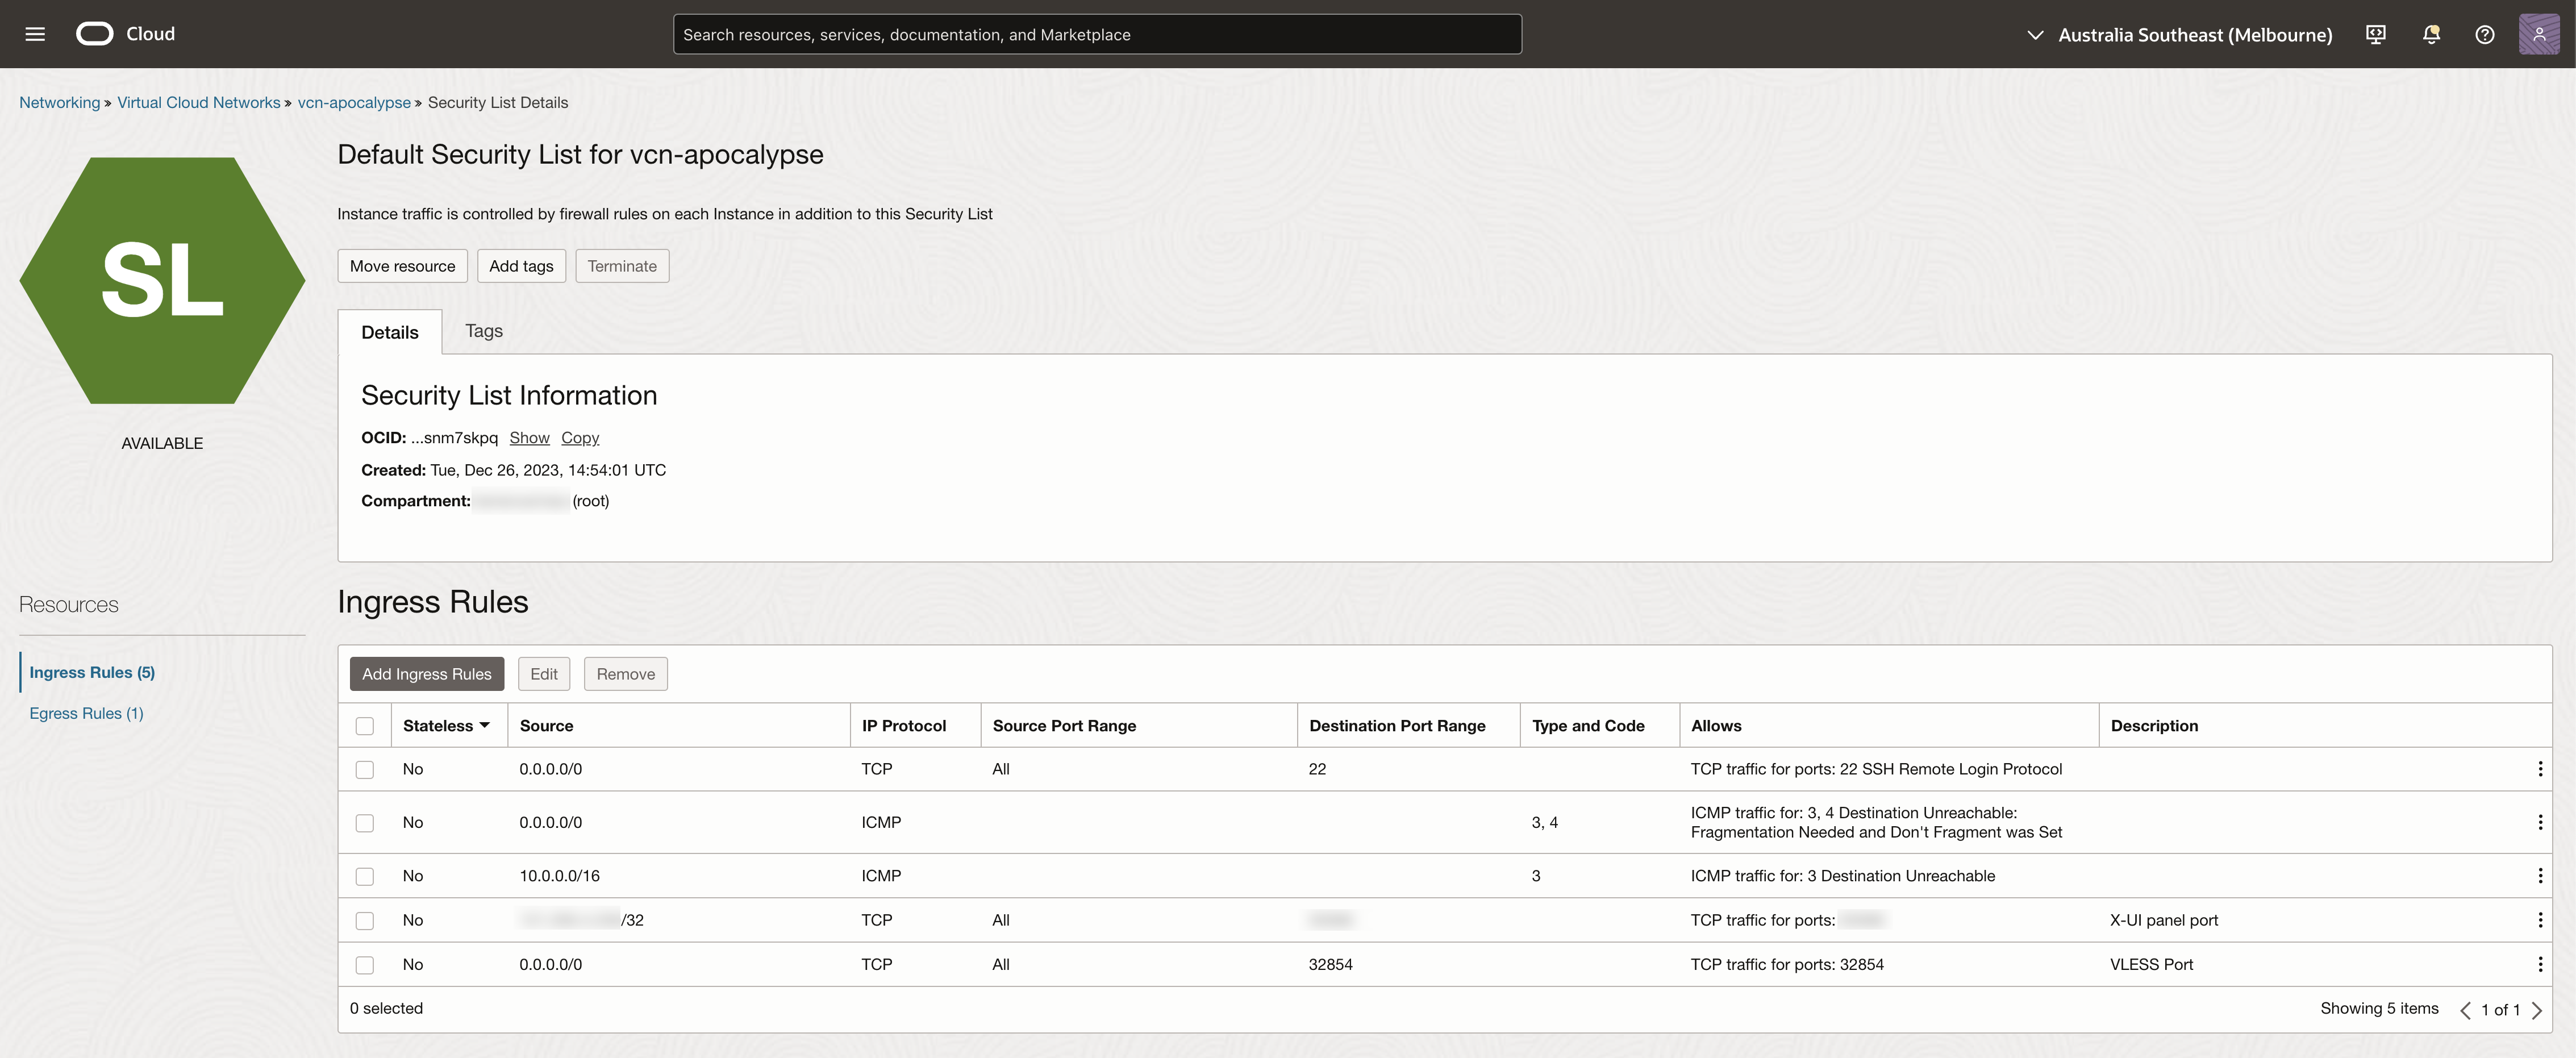
Change AWS security group, and open EC2 instance port 10080 to admin user’s IP address only.
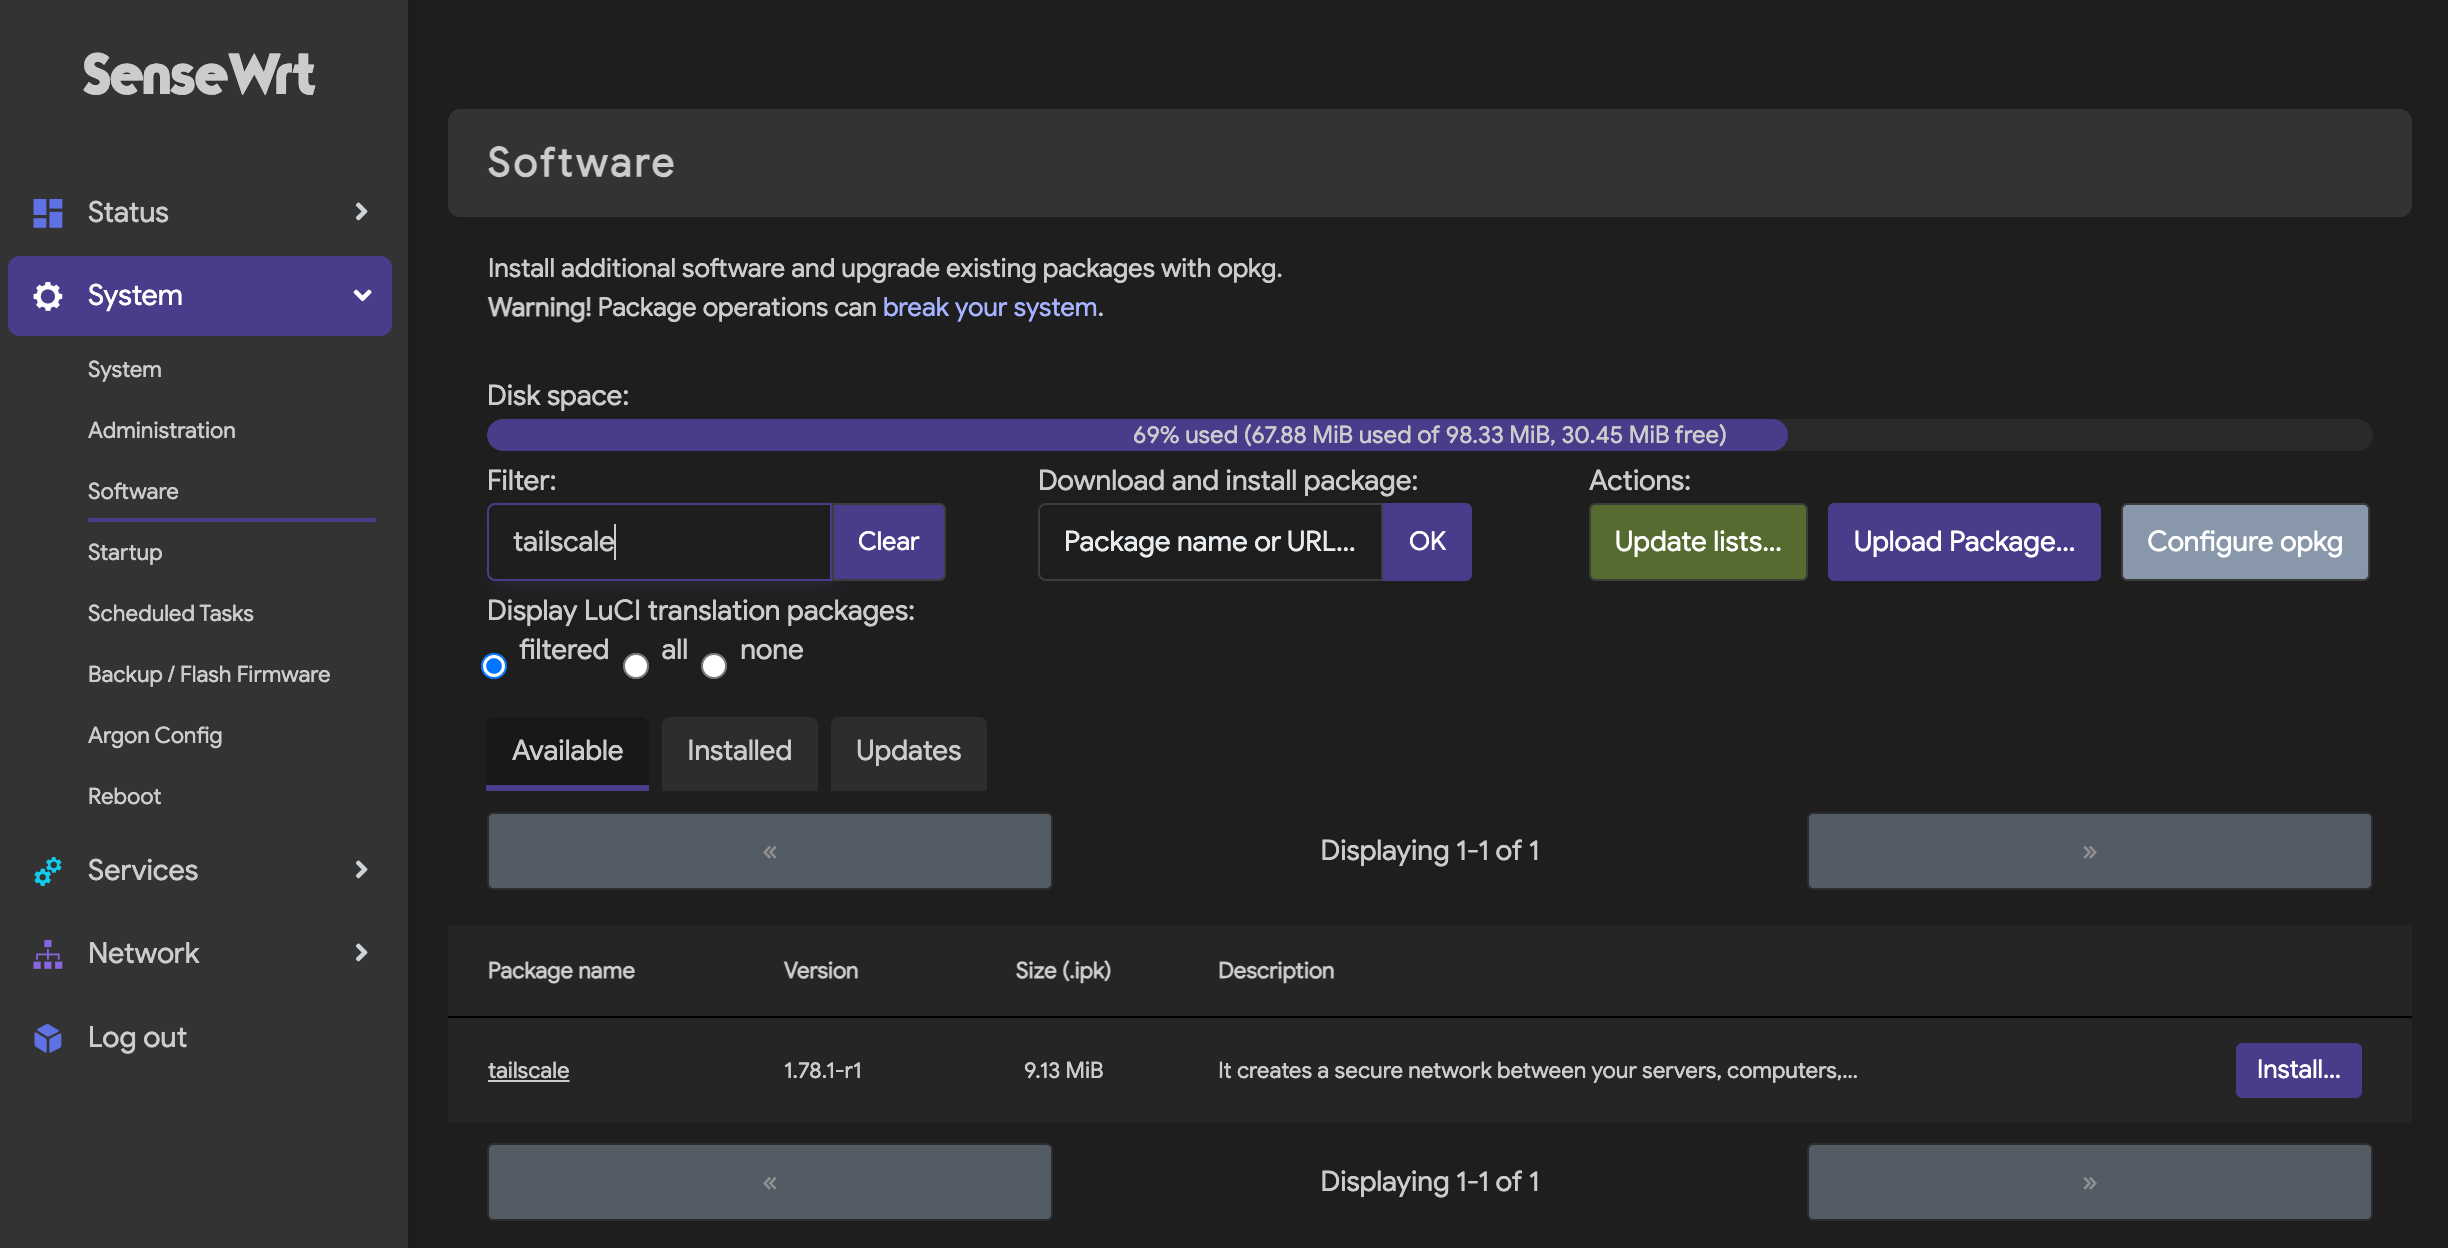
_______ ________ __ | |.-----.-----.-----.| | | |.----.| |_ | - || _ | -__| || | | || _|| _| |_______|| __|_____|__|__||________||__| |____| |__| W I R E L E S S F R E E D O M ----------------------------------------------------- OpenWrt 24.10.0-rc2, r28161-ea17e958b9 ----------------------------------------------------- root@SenseWrt:~# tailscale up --netfilter-mode=off --advertise-routes=192.168.88.0/24 --accept-routes Warning: netfilter=off; configure iptables yourself. Warning: UDP GRO forwarding is suboptimally configured on eth1, UDP forwarding throughput capability will increase with a configuration change. See https://tailscale.com/s/ethtool-config-udp-gro
To authenticate, visit:
https://login.tailscale.com/a/98c452901c4ba
Success.
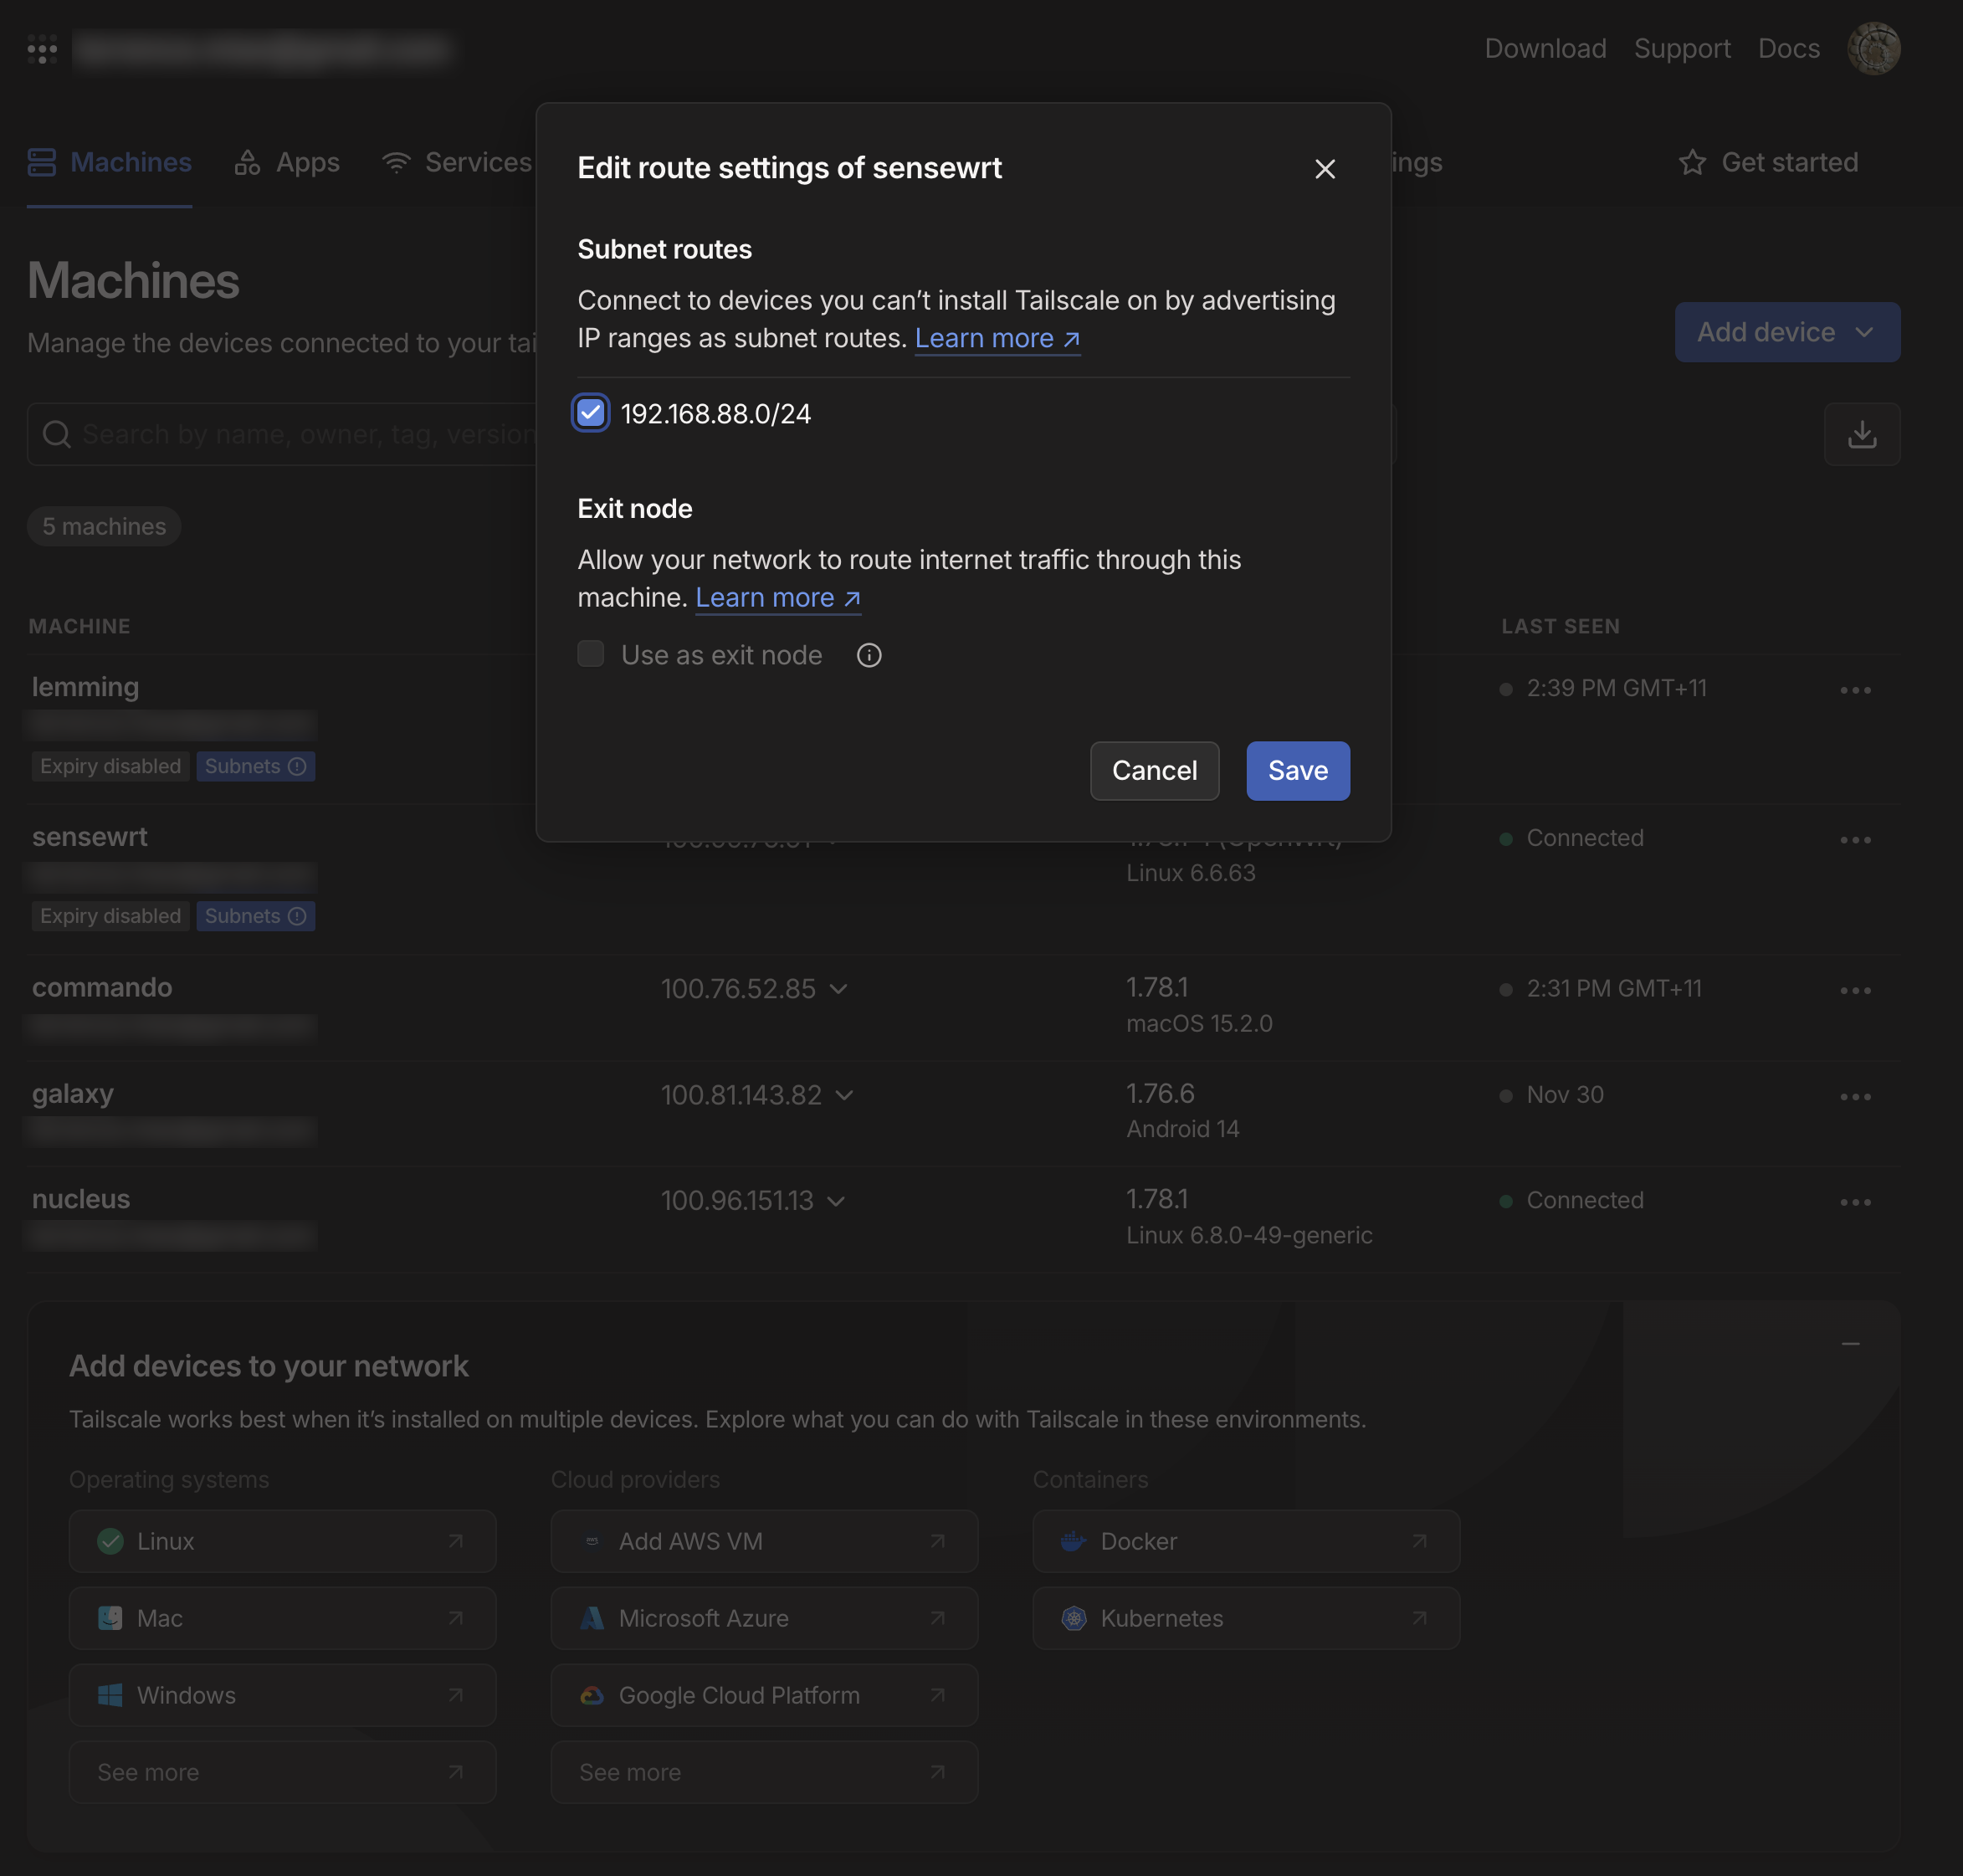
NOTE:192.168.88.0/24 is the ip range of local network setup in OpenWrt.
Disable key expiry for OpenWrt machine in Tailscale console, then enable all OpenWrt clients access Tailscale network:
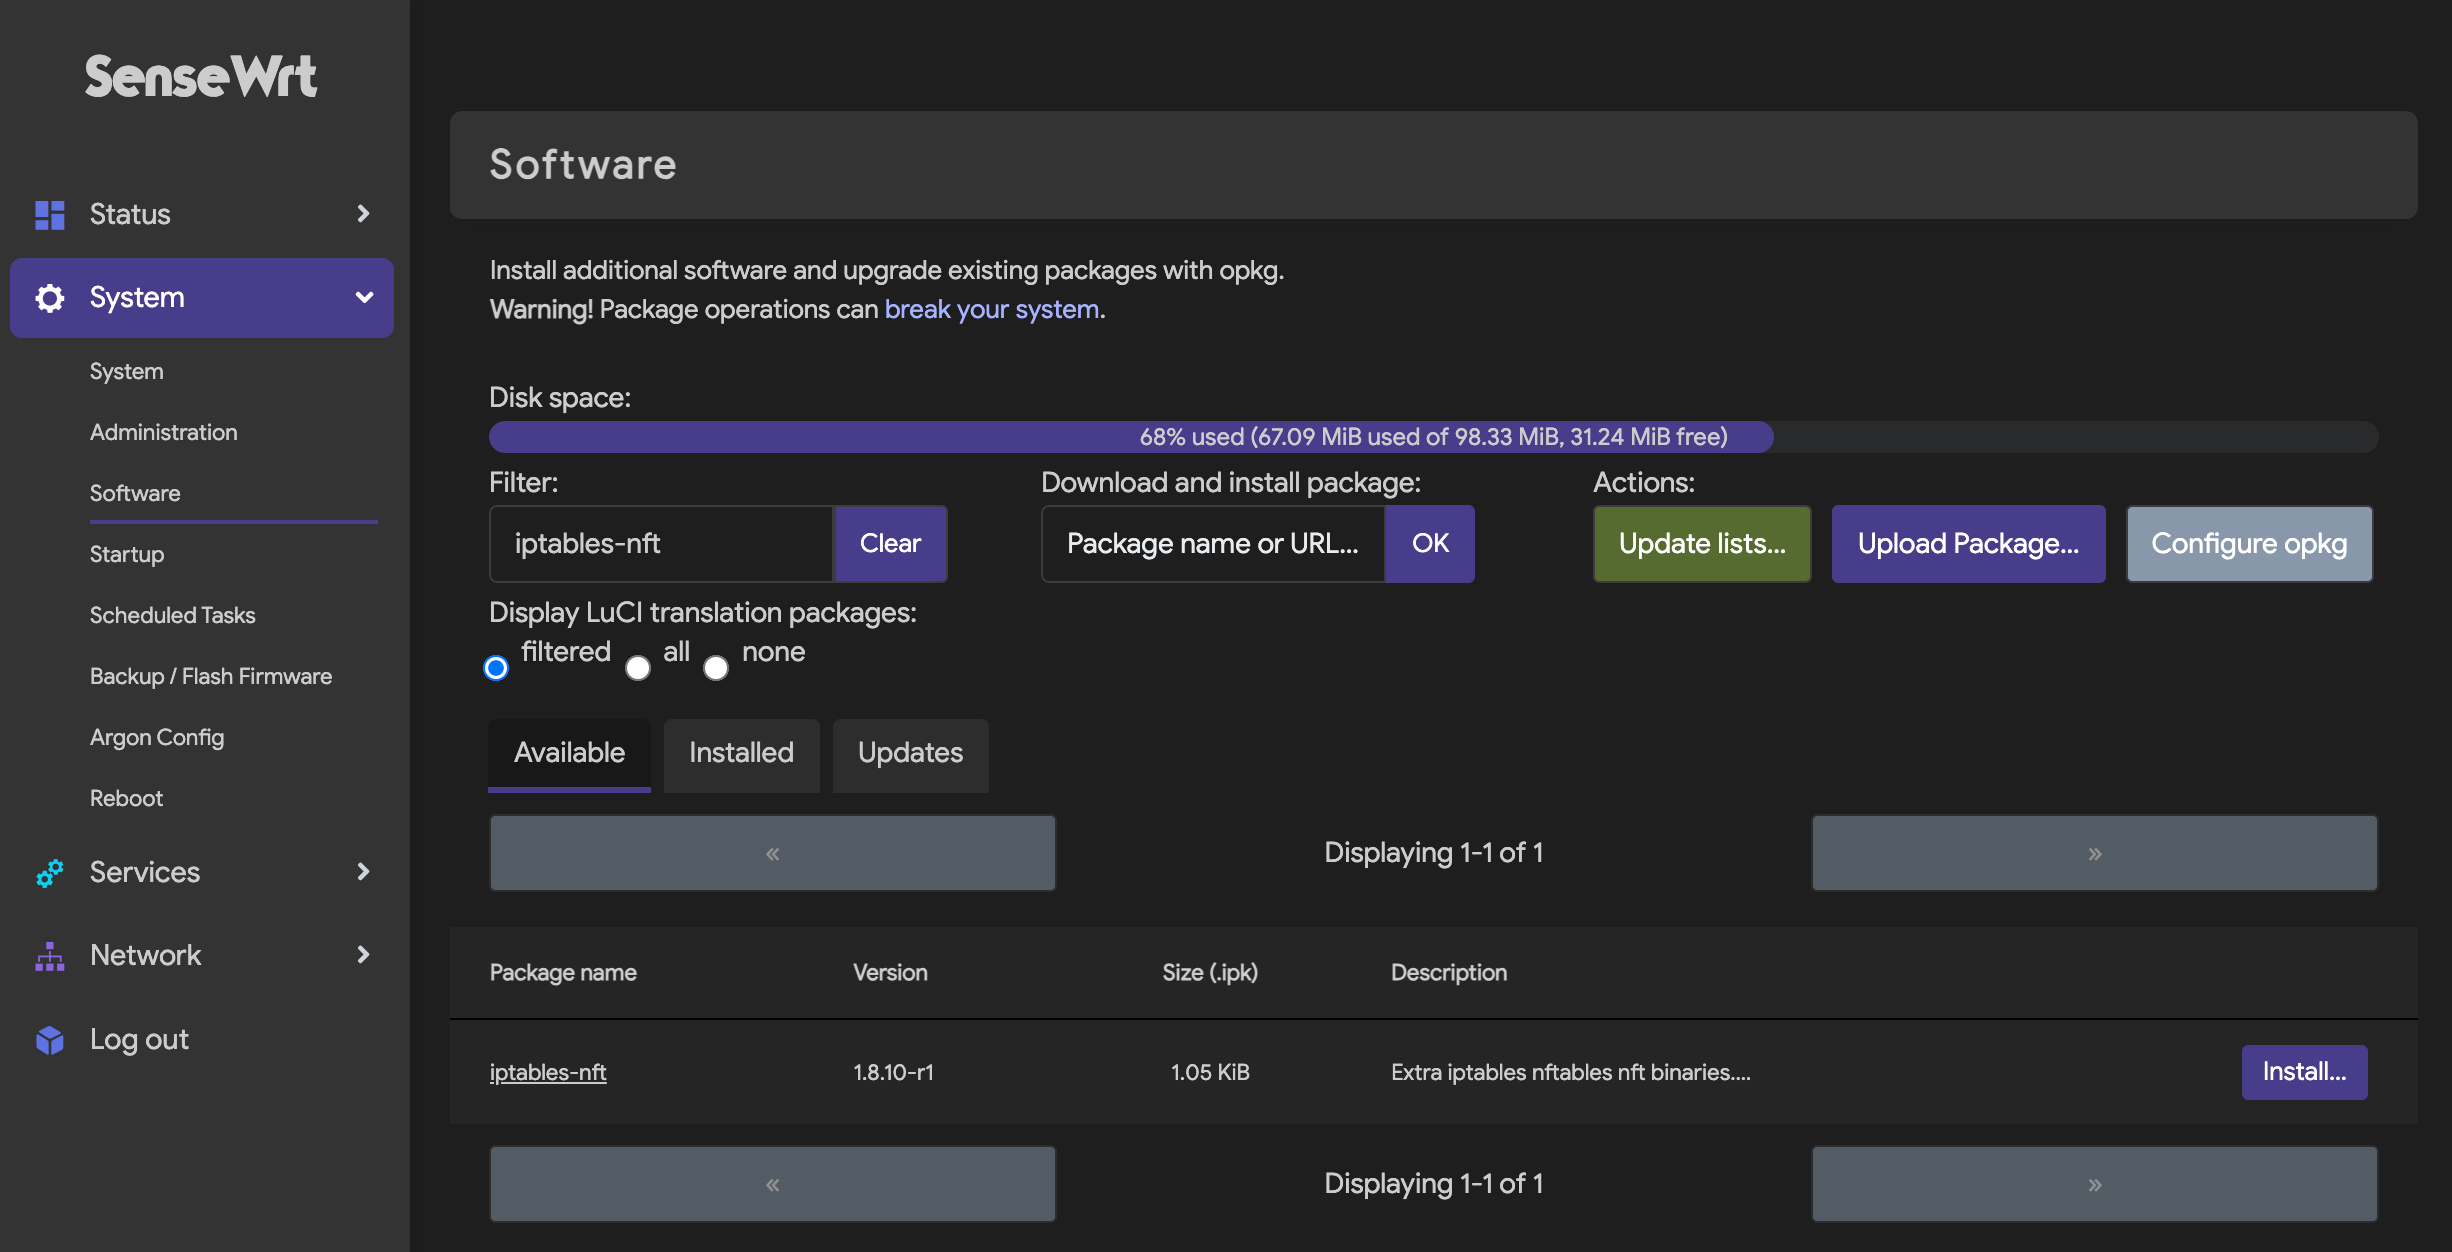
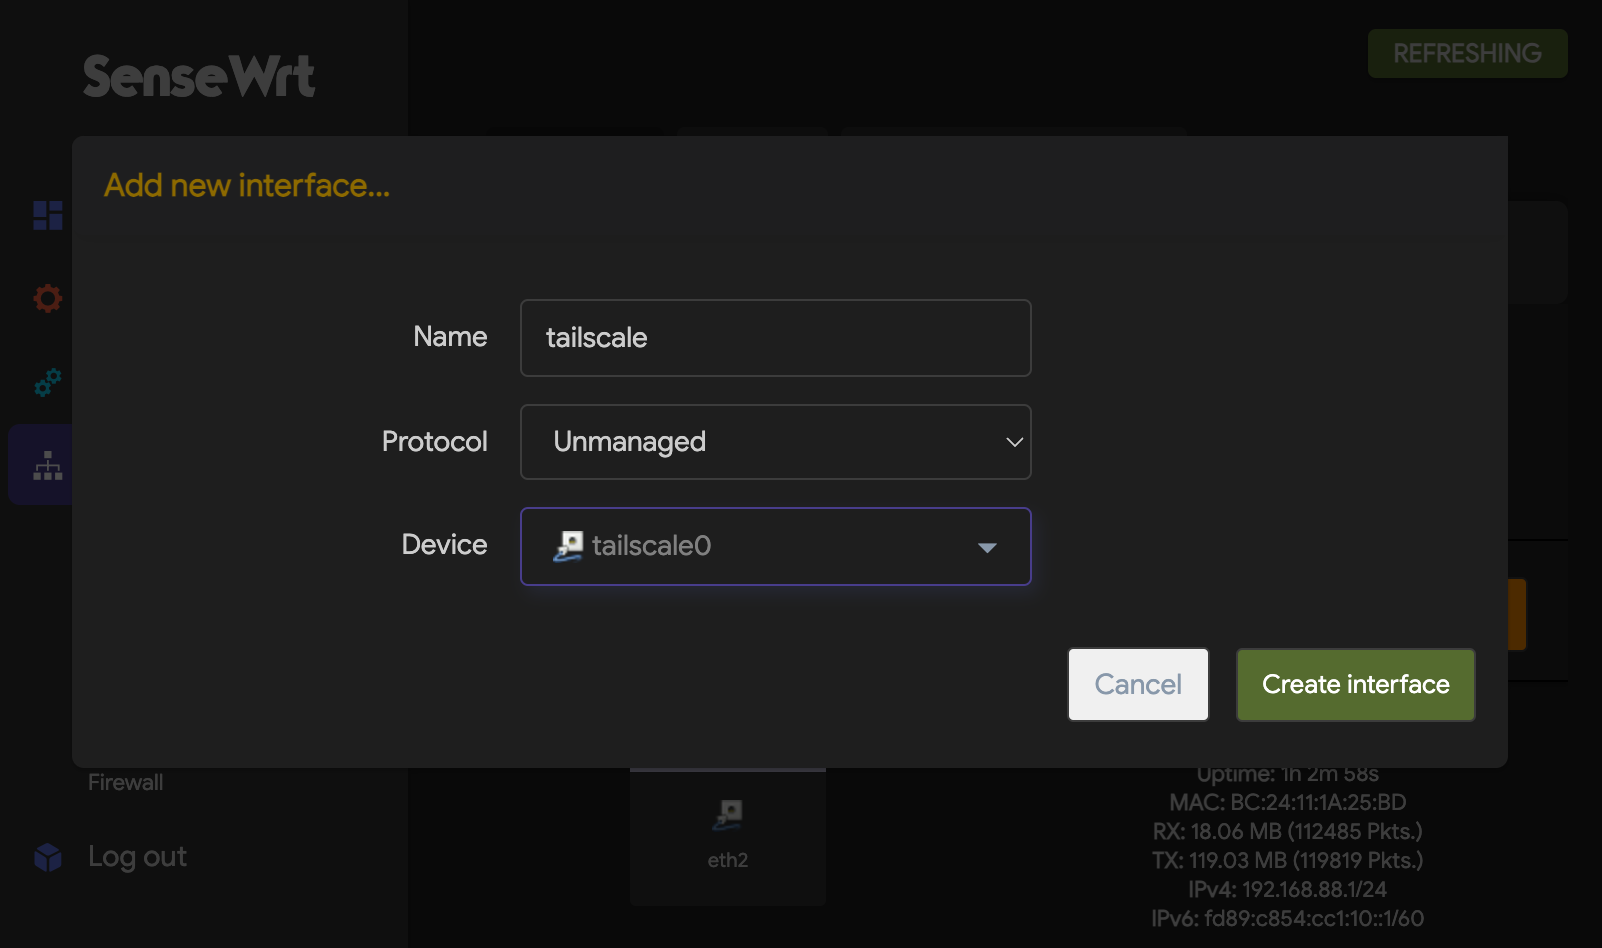
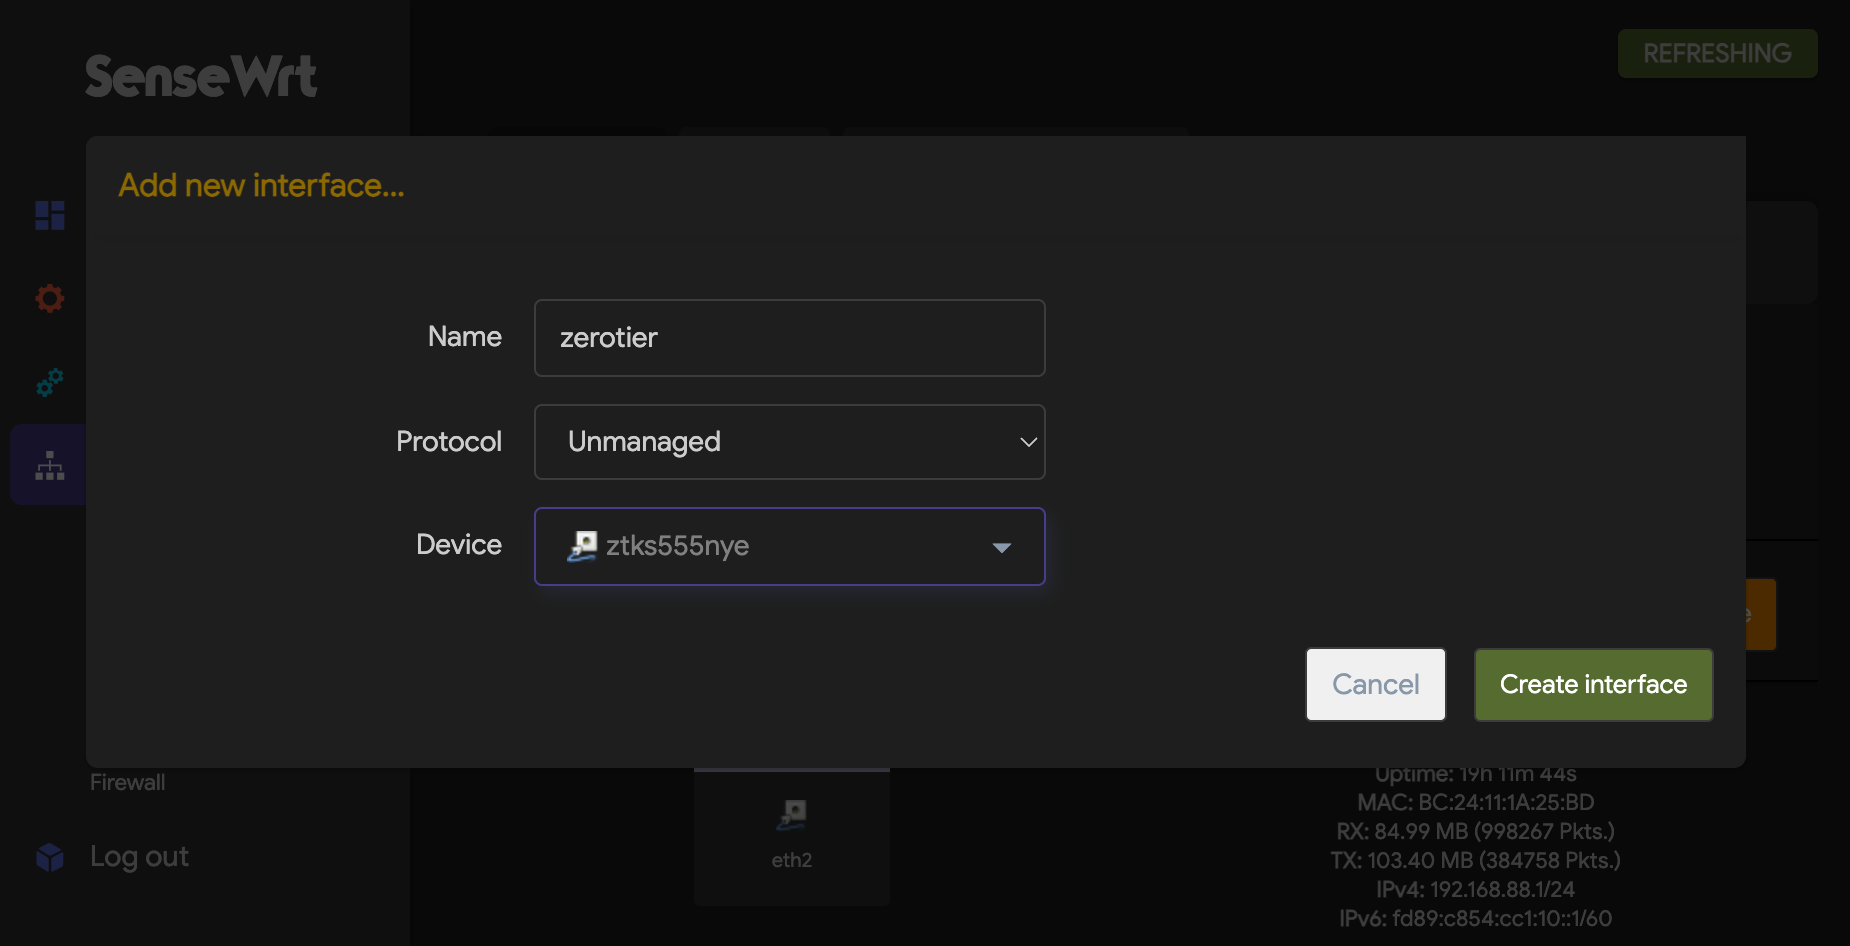
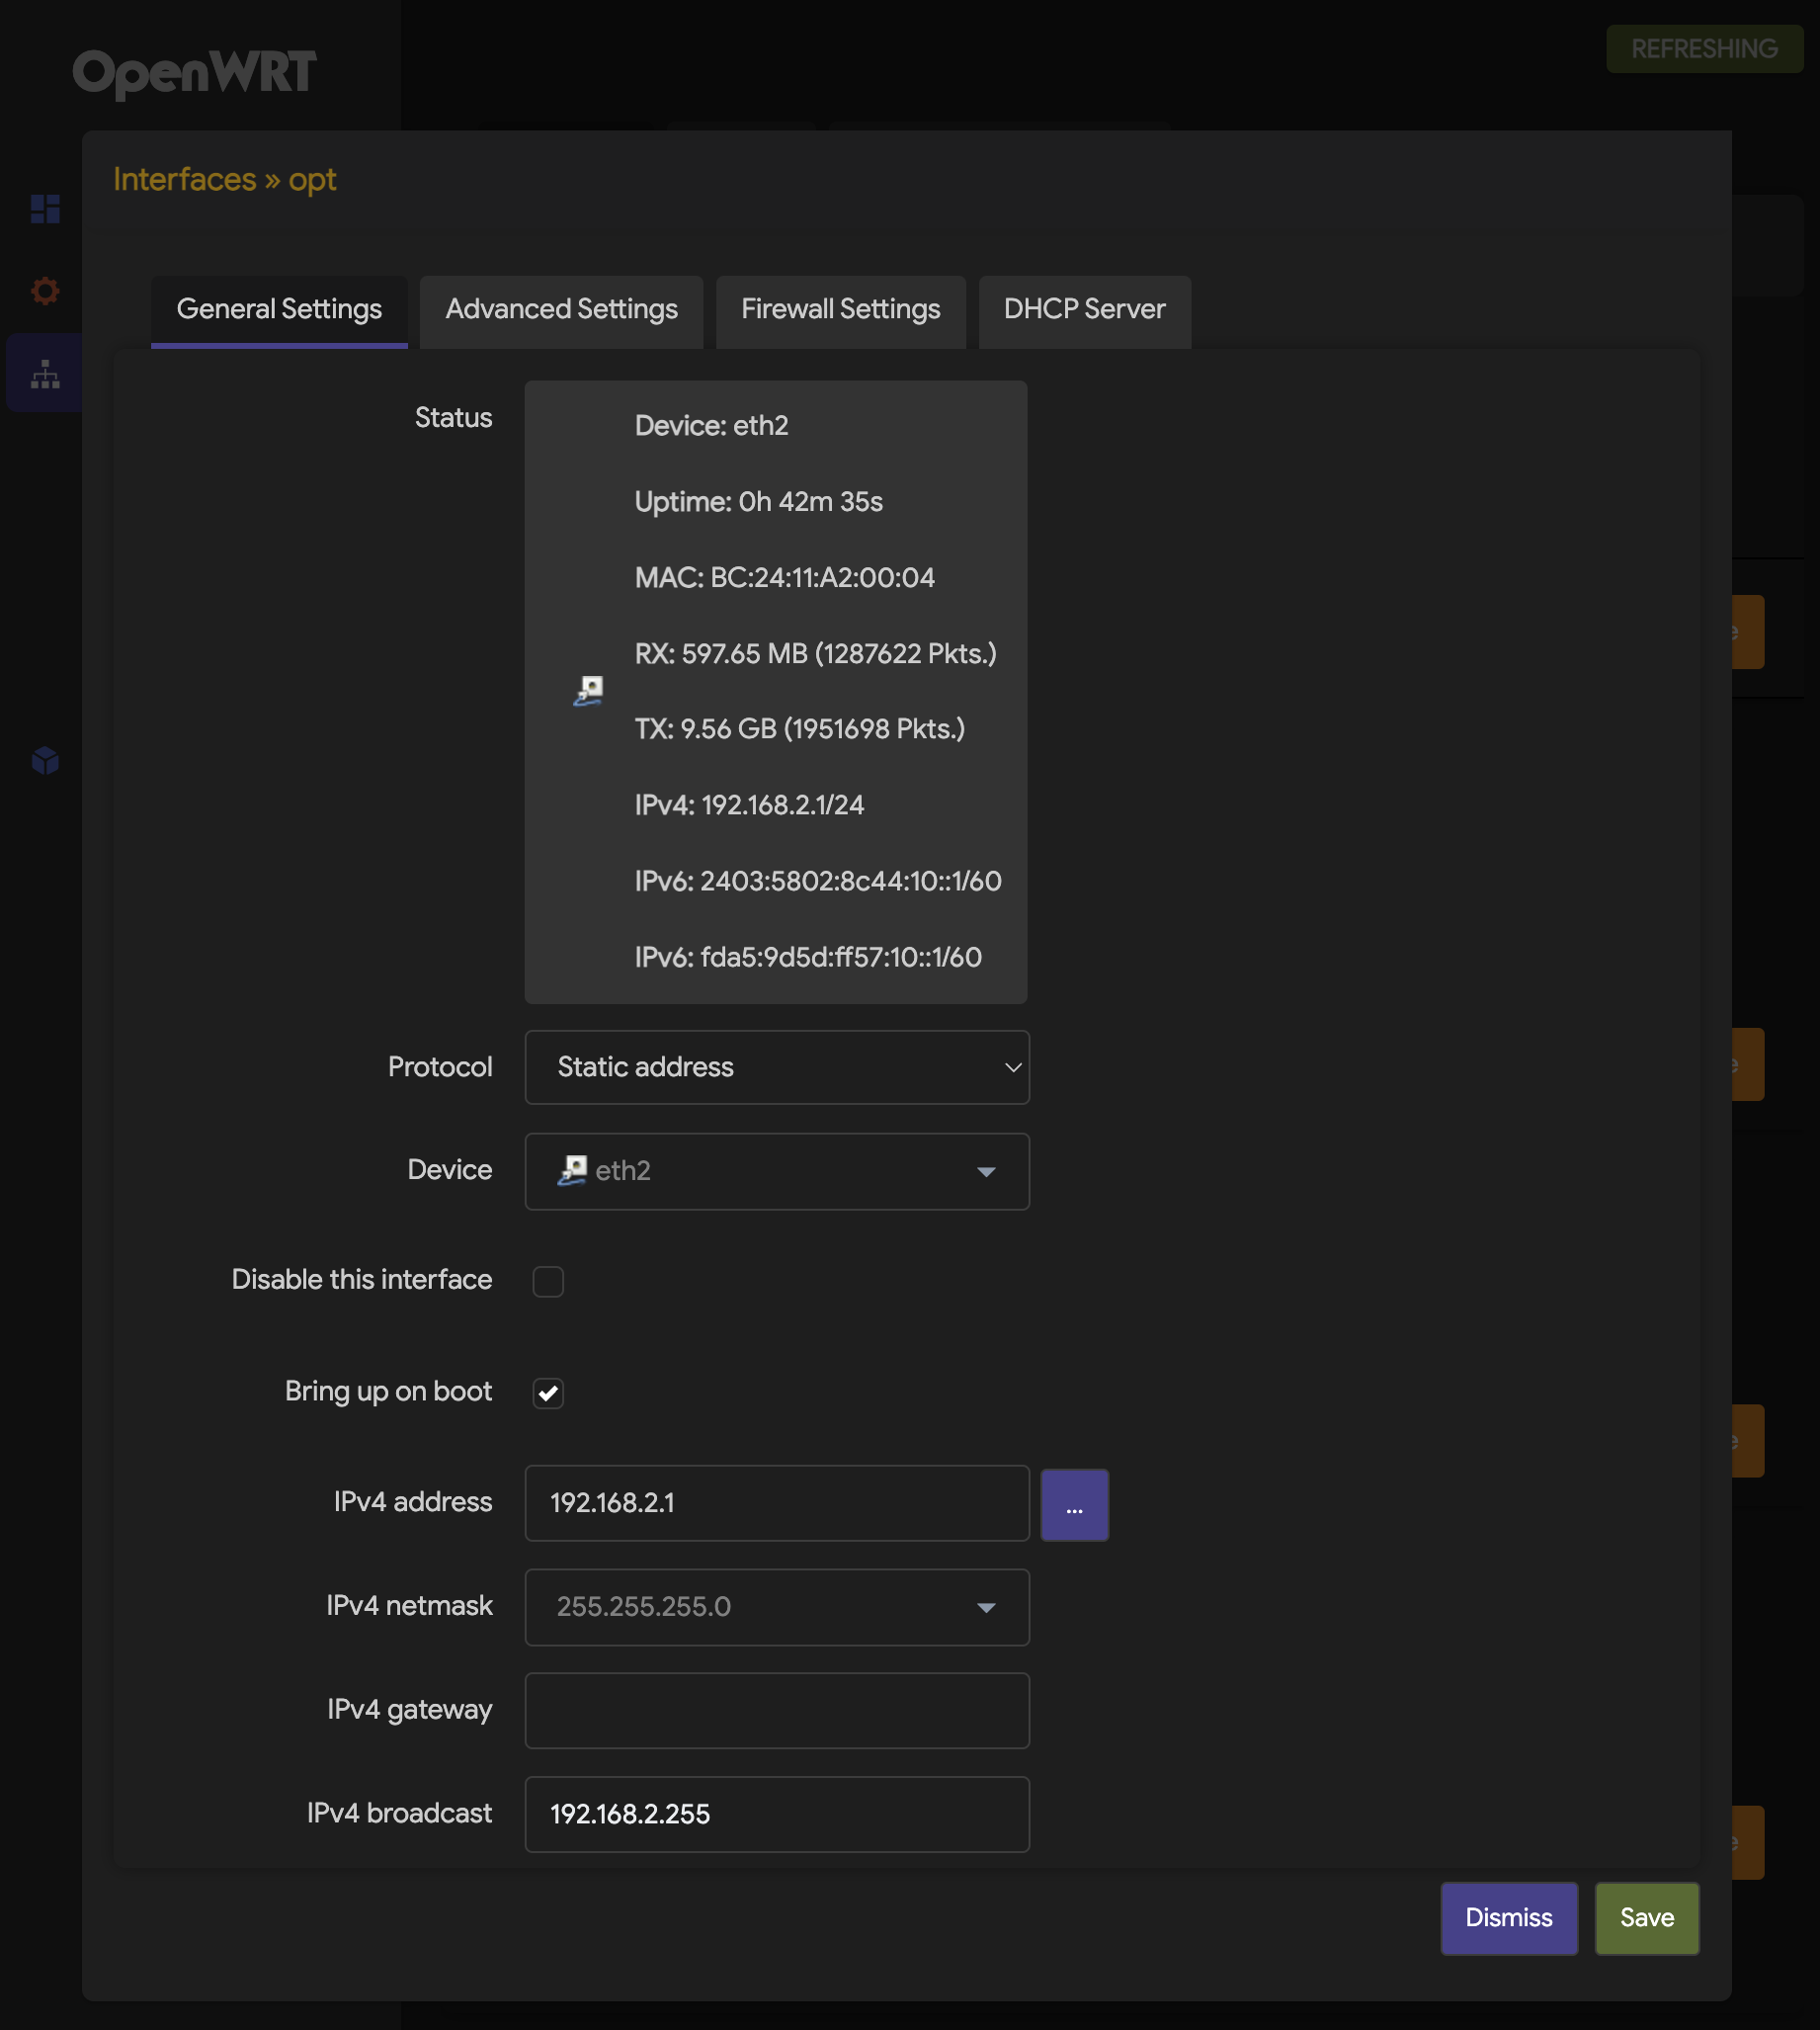
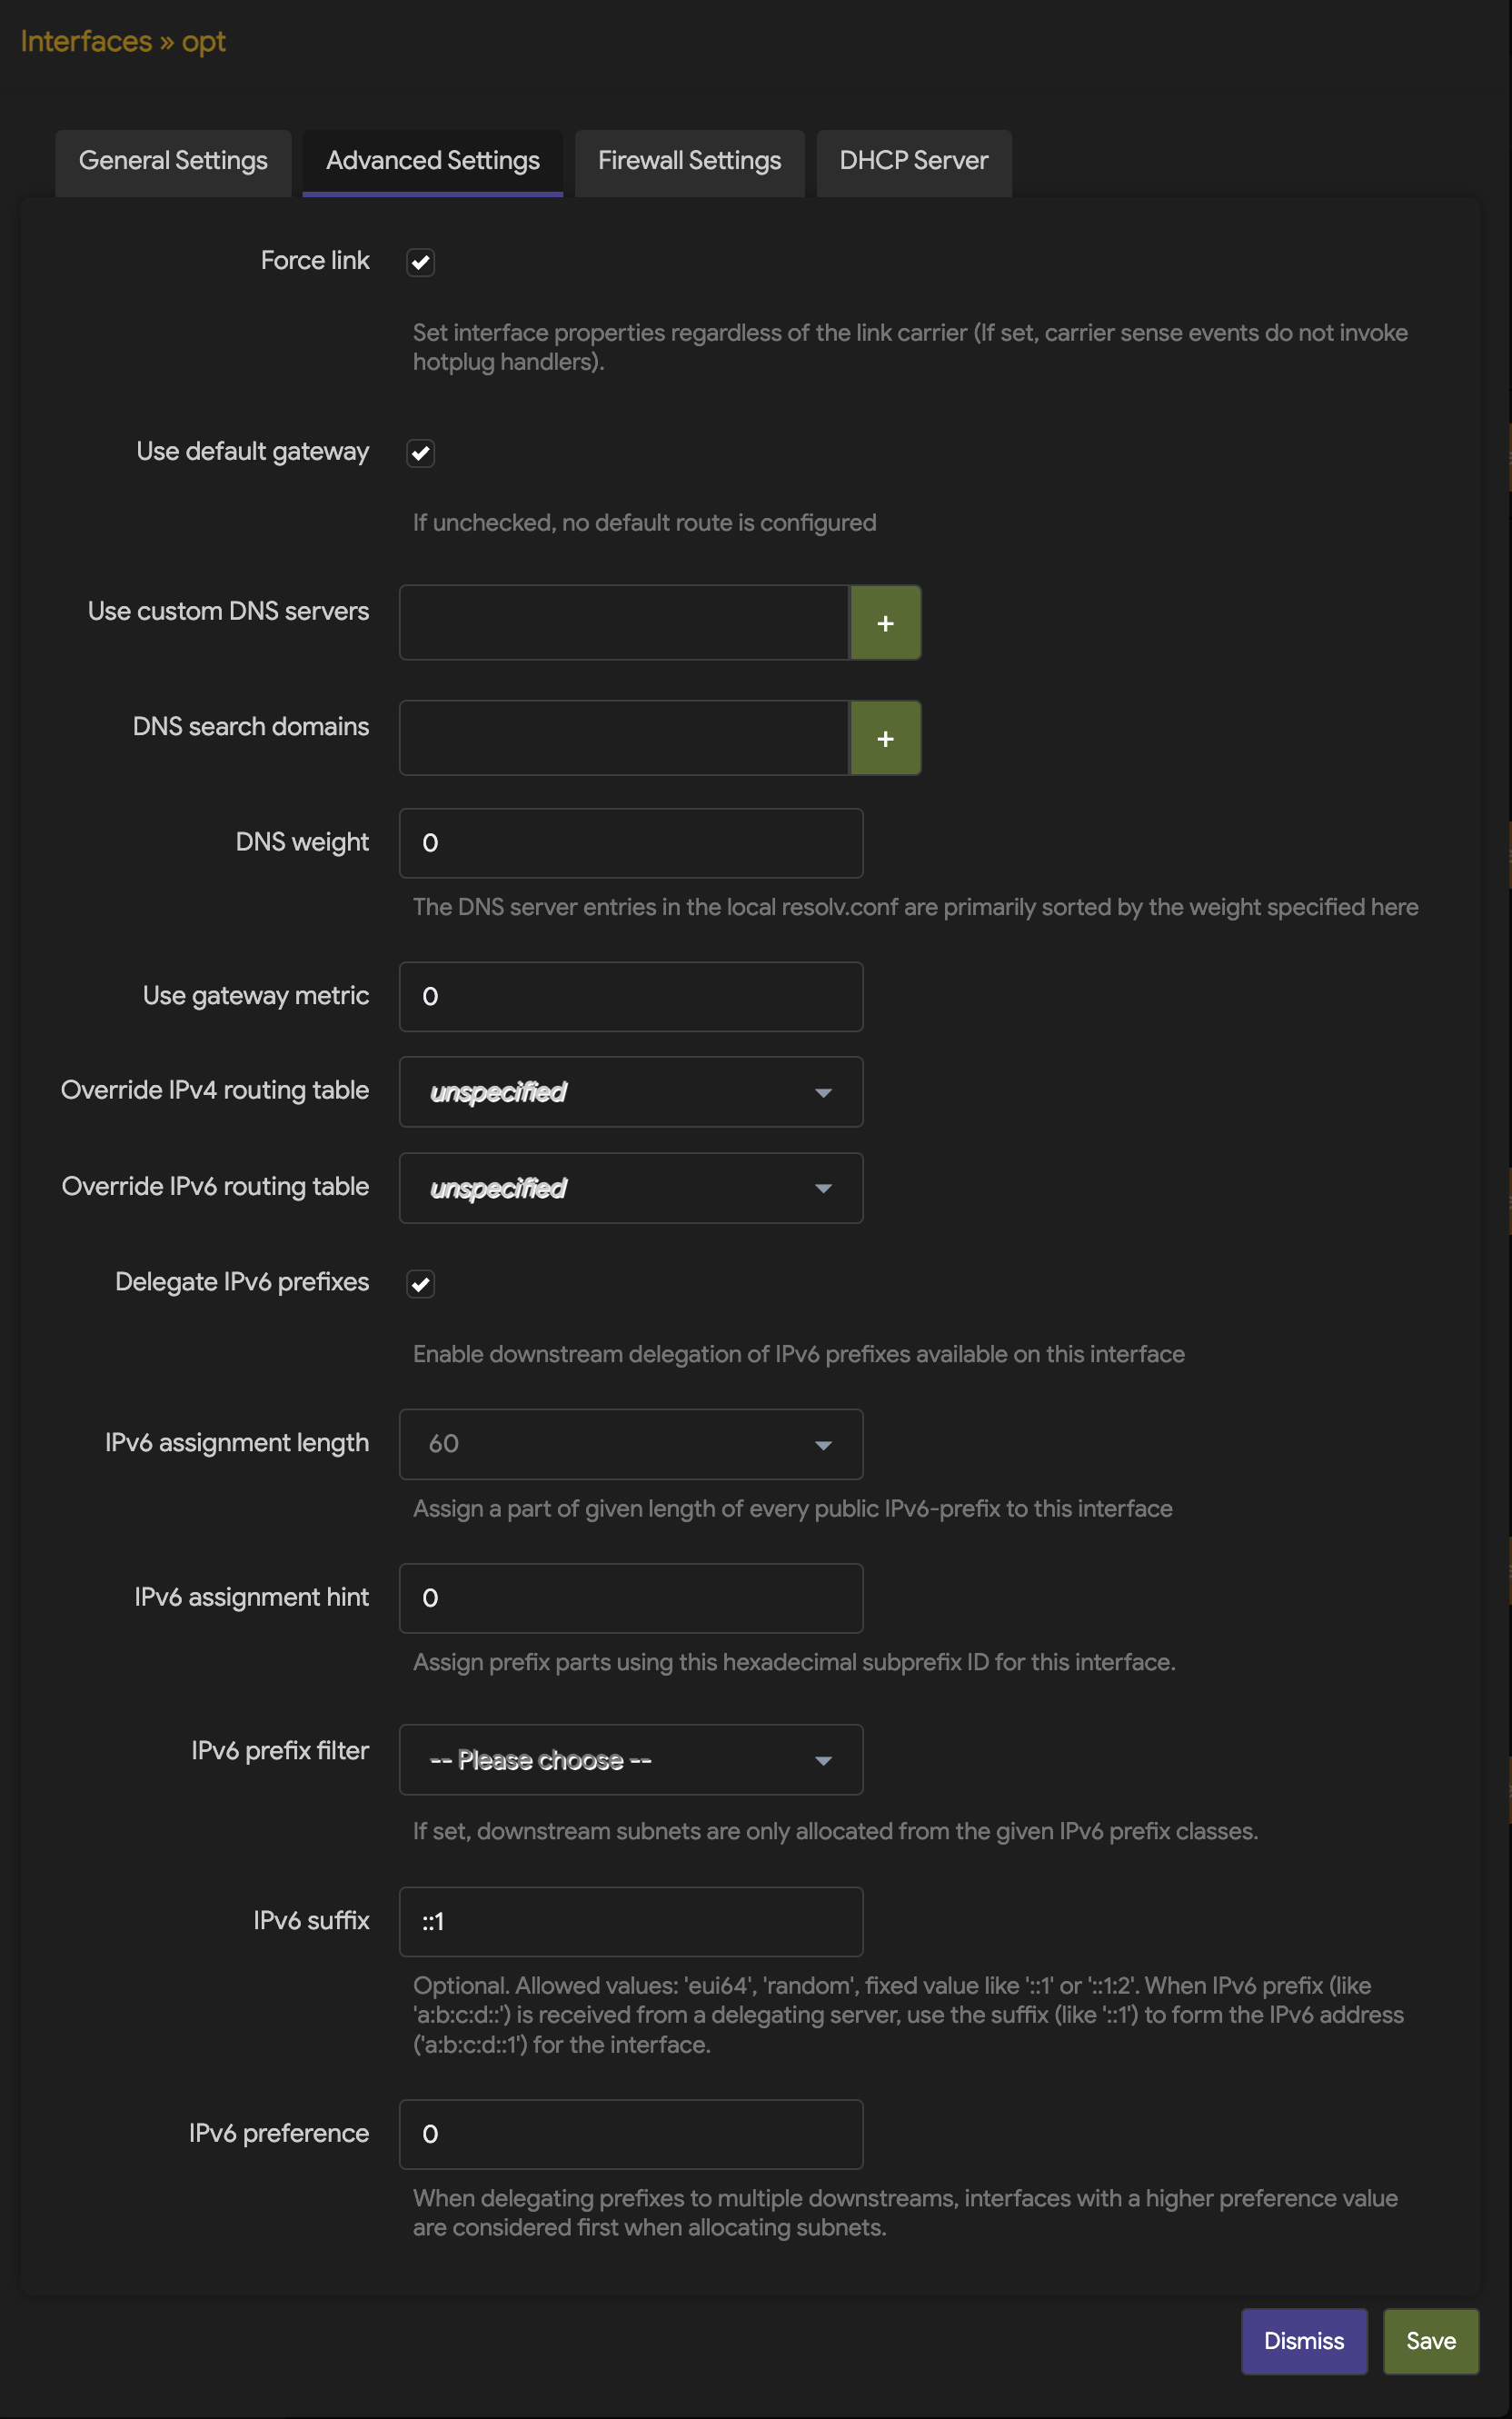
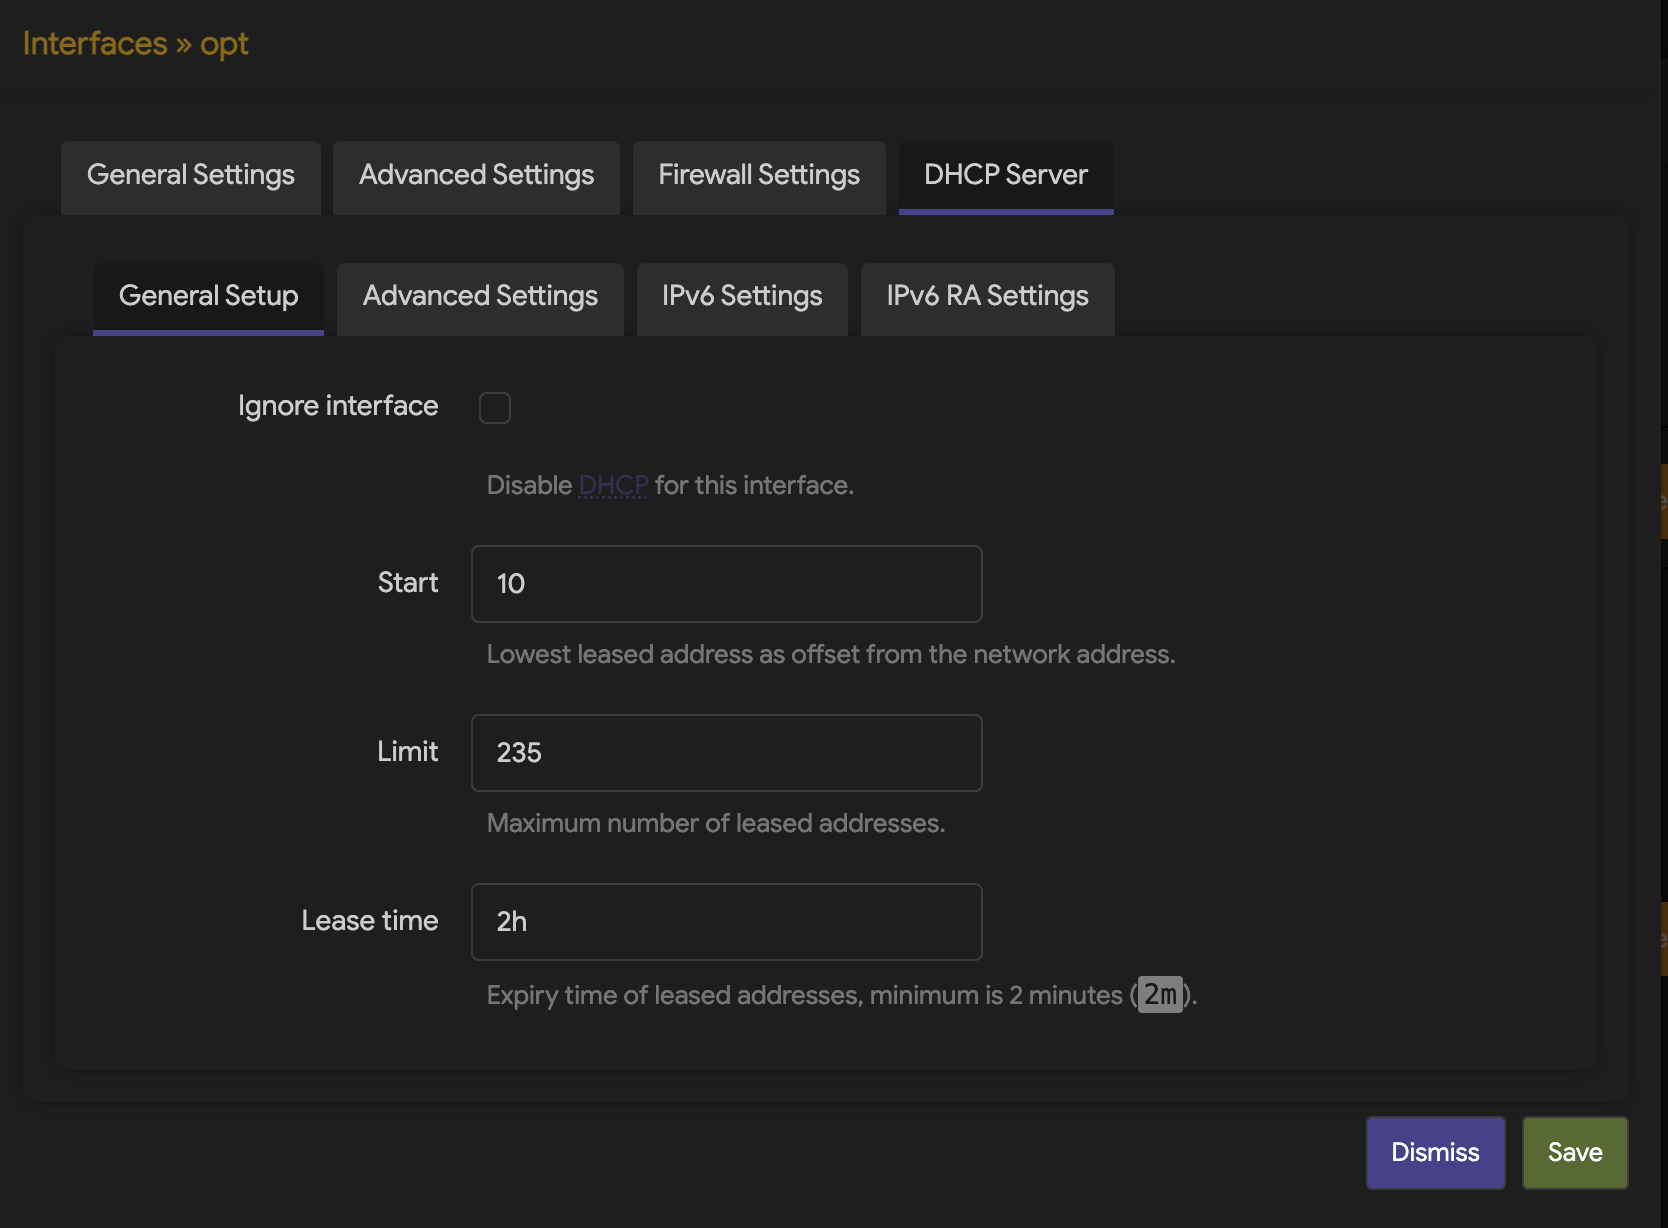
Now add Tailscale virtual network as a new interface in OpenWrt:
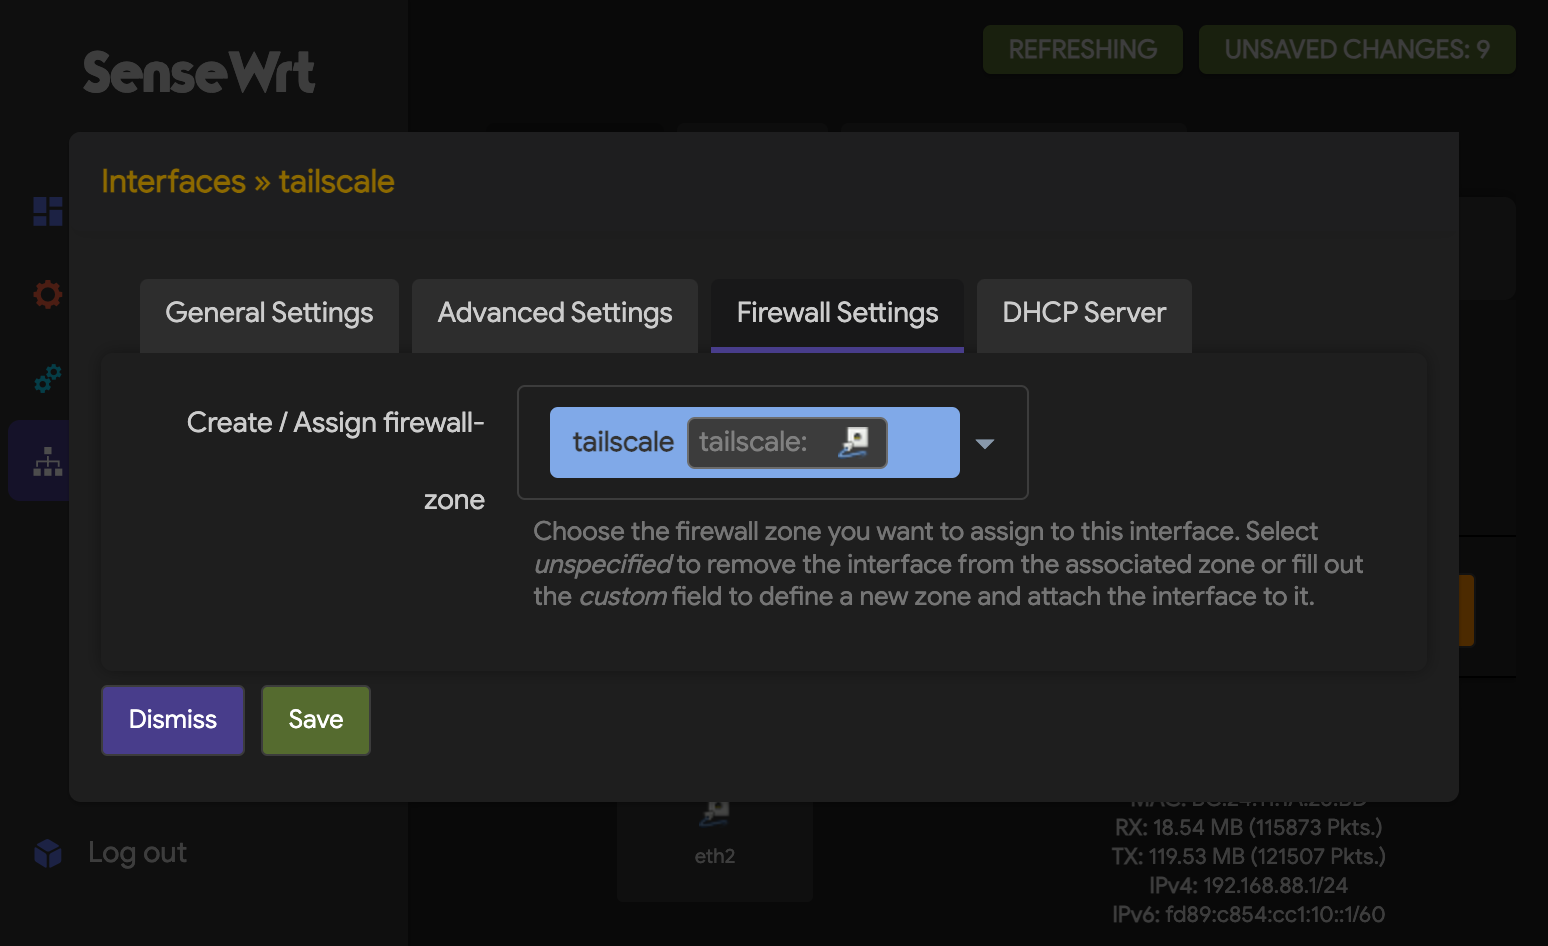
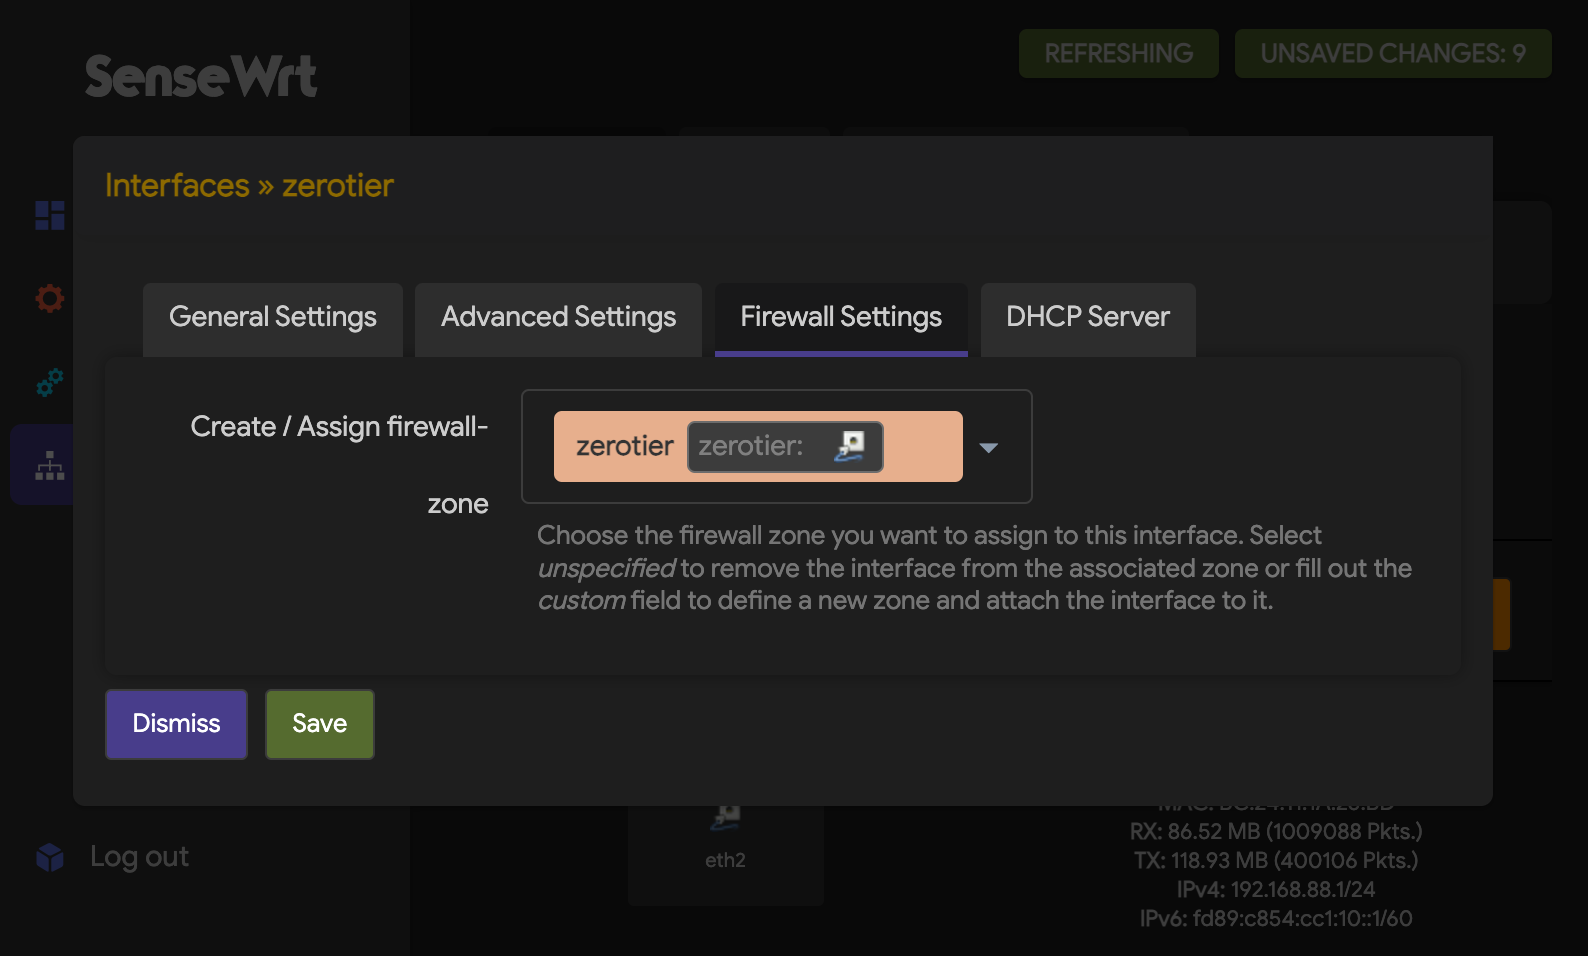
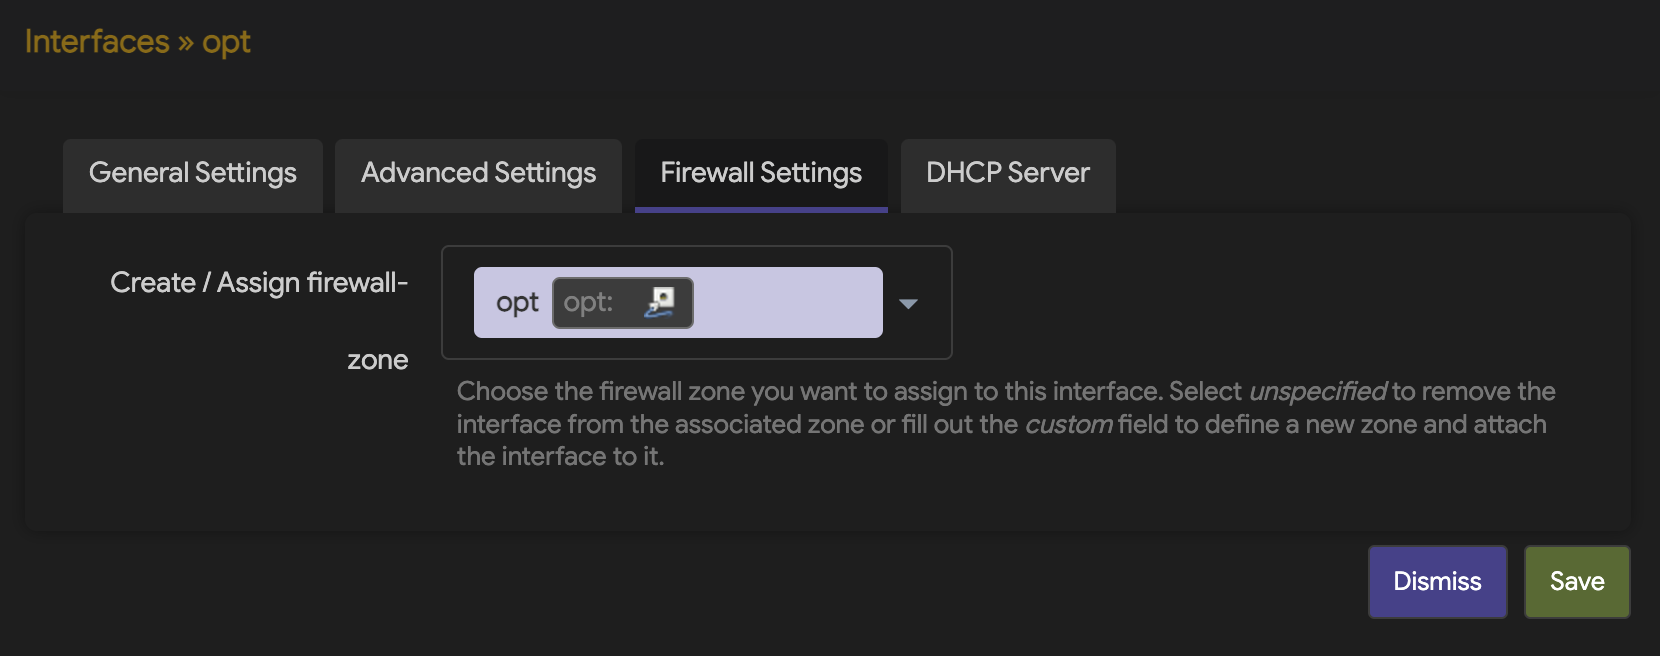
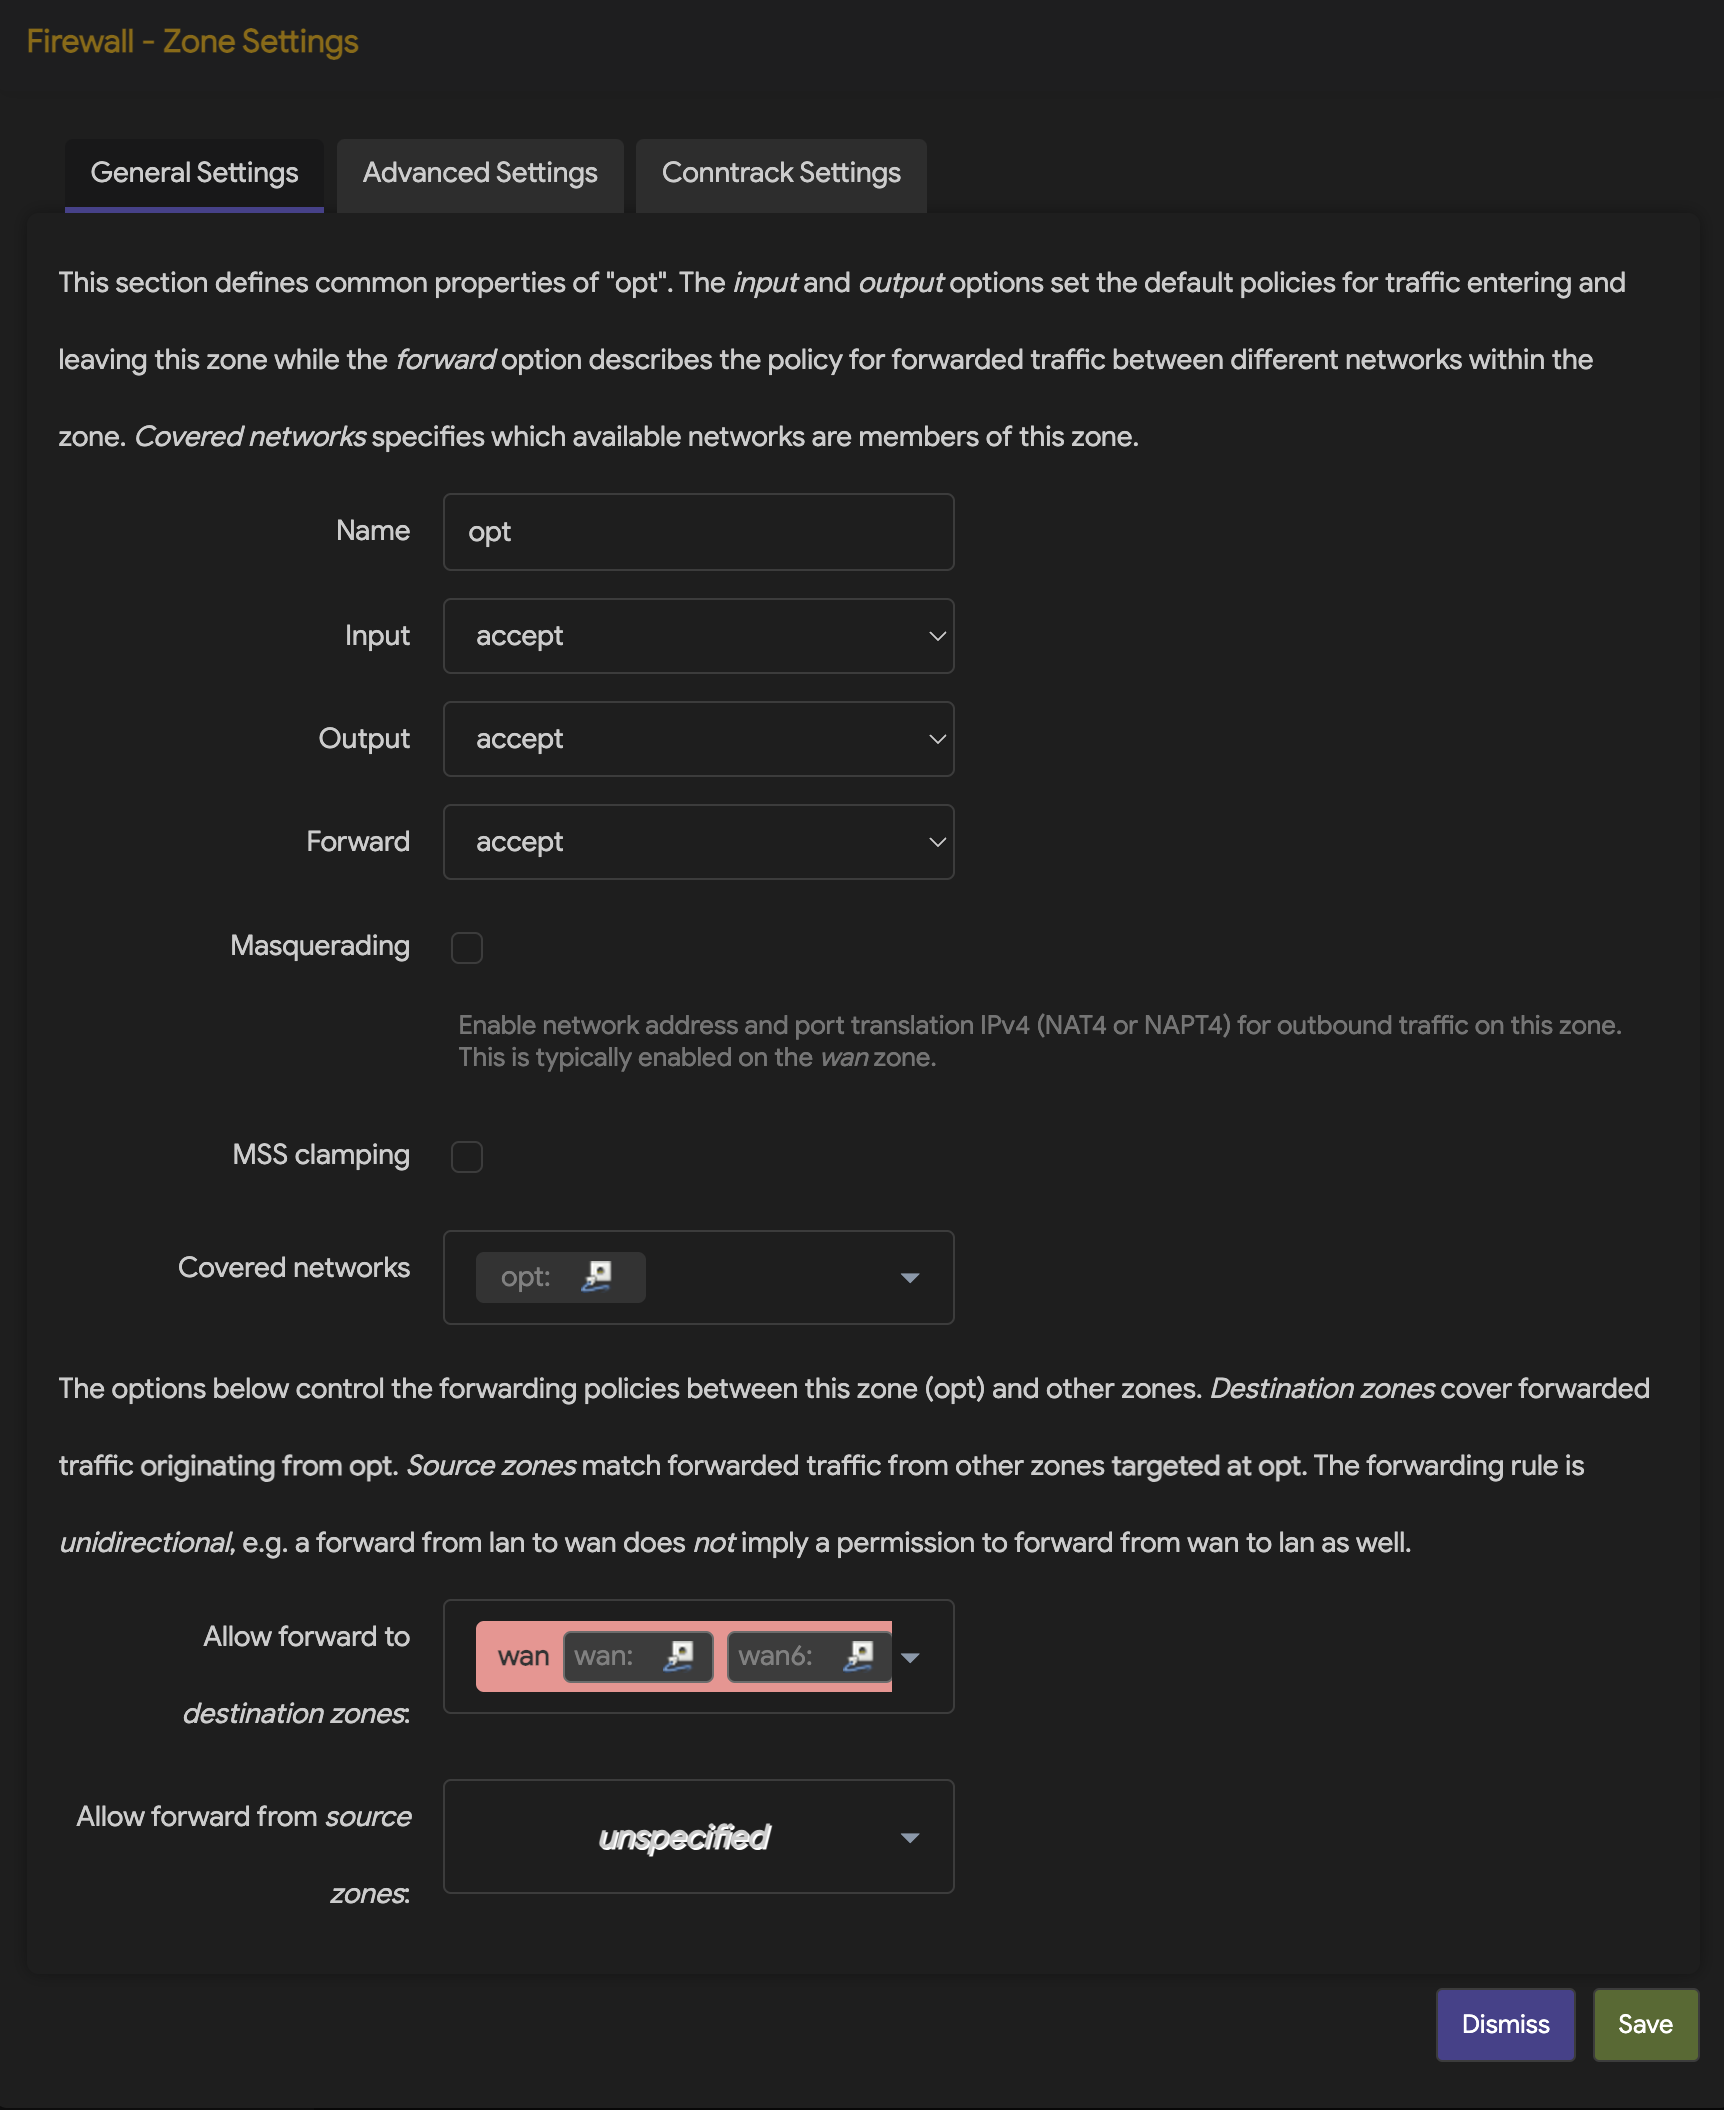
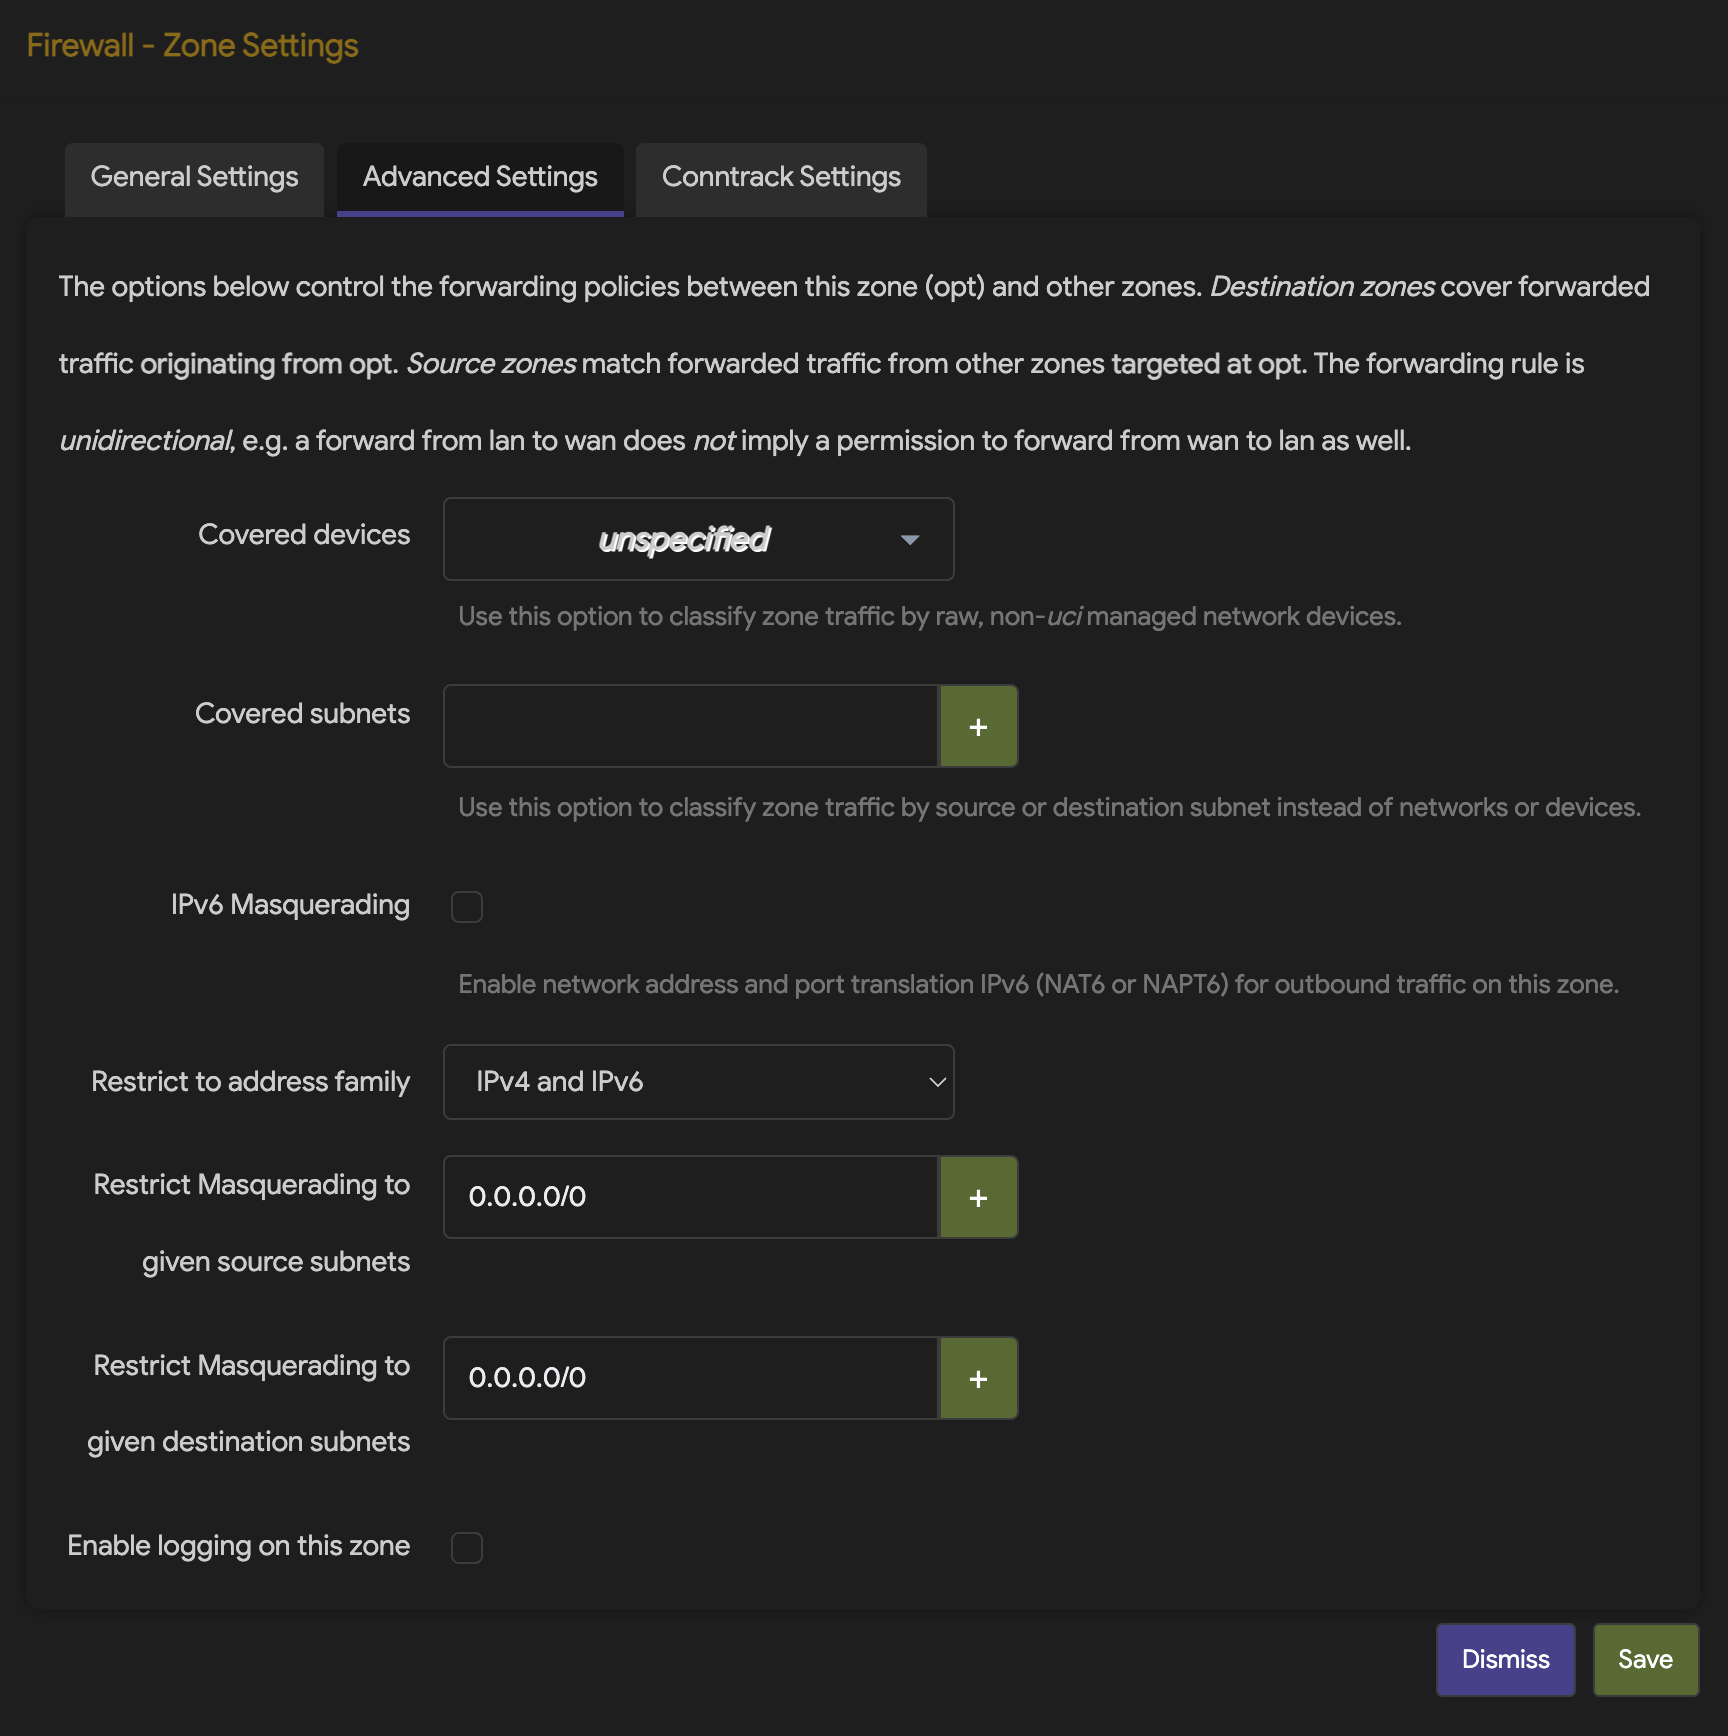
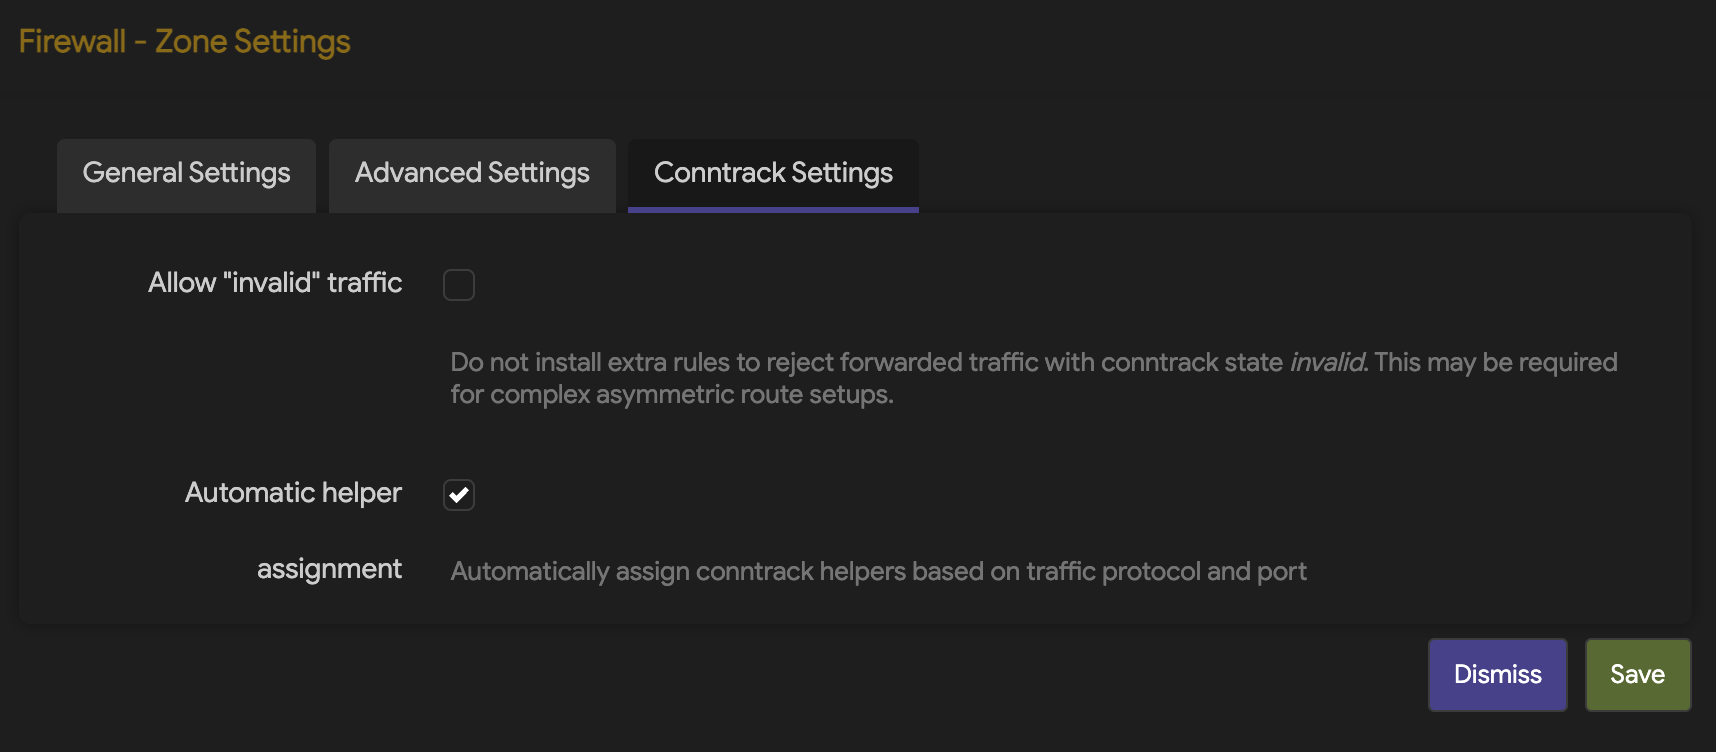
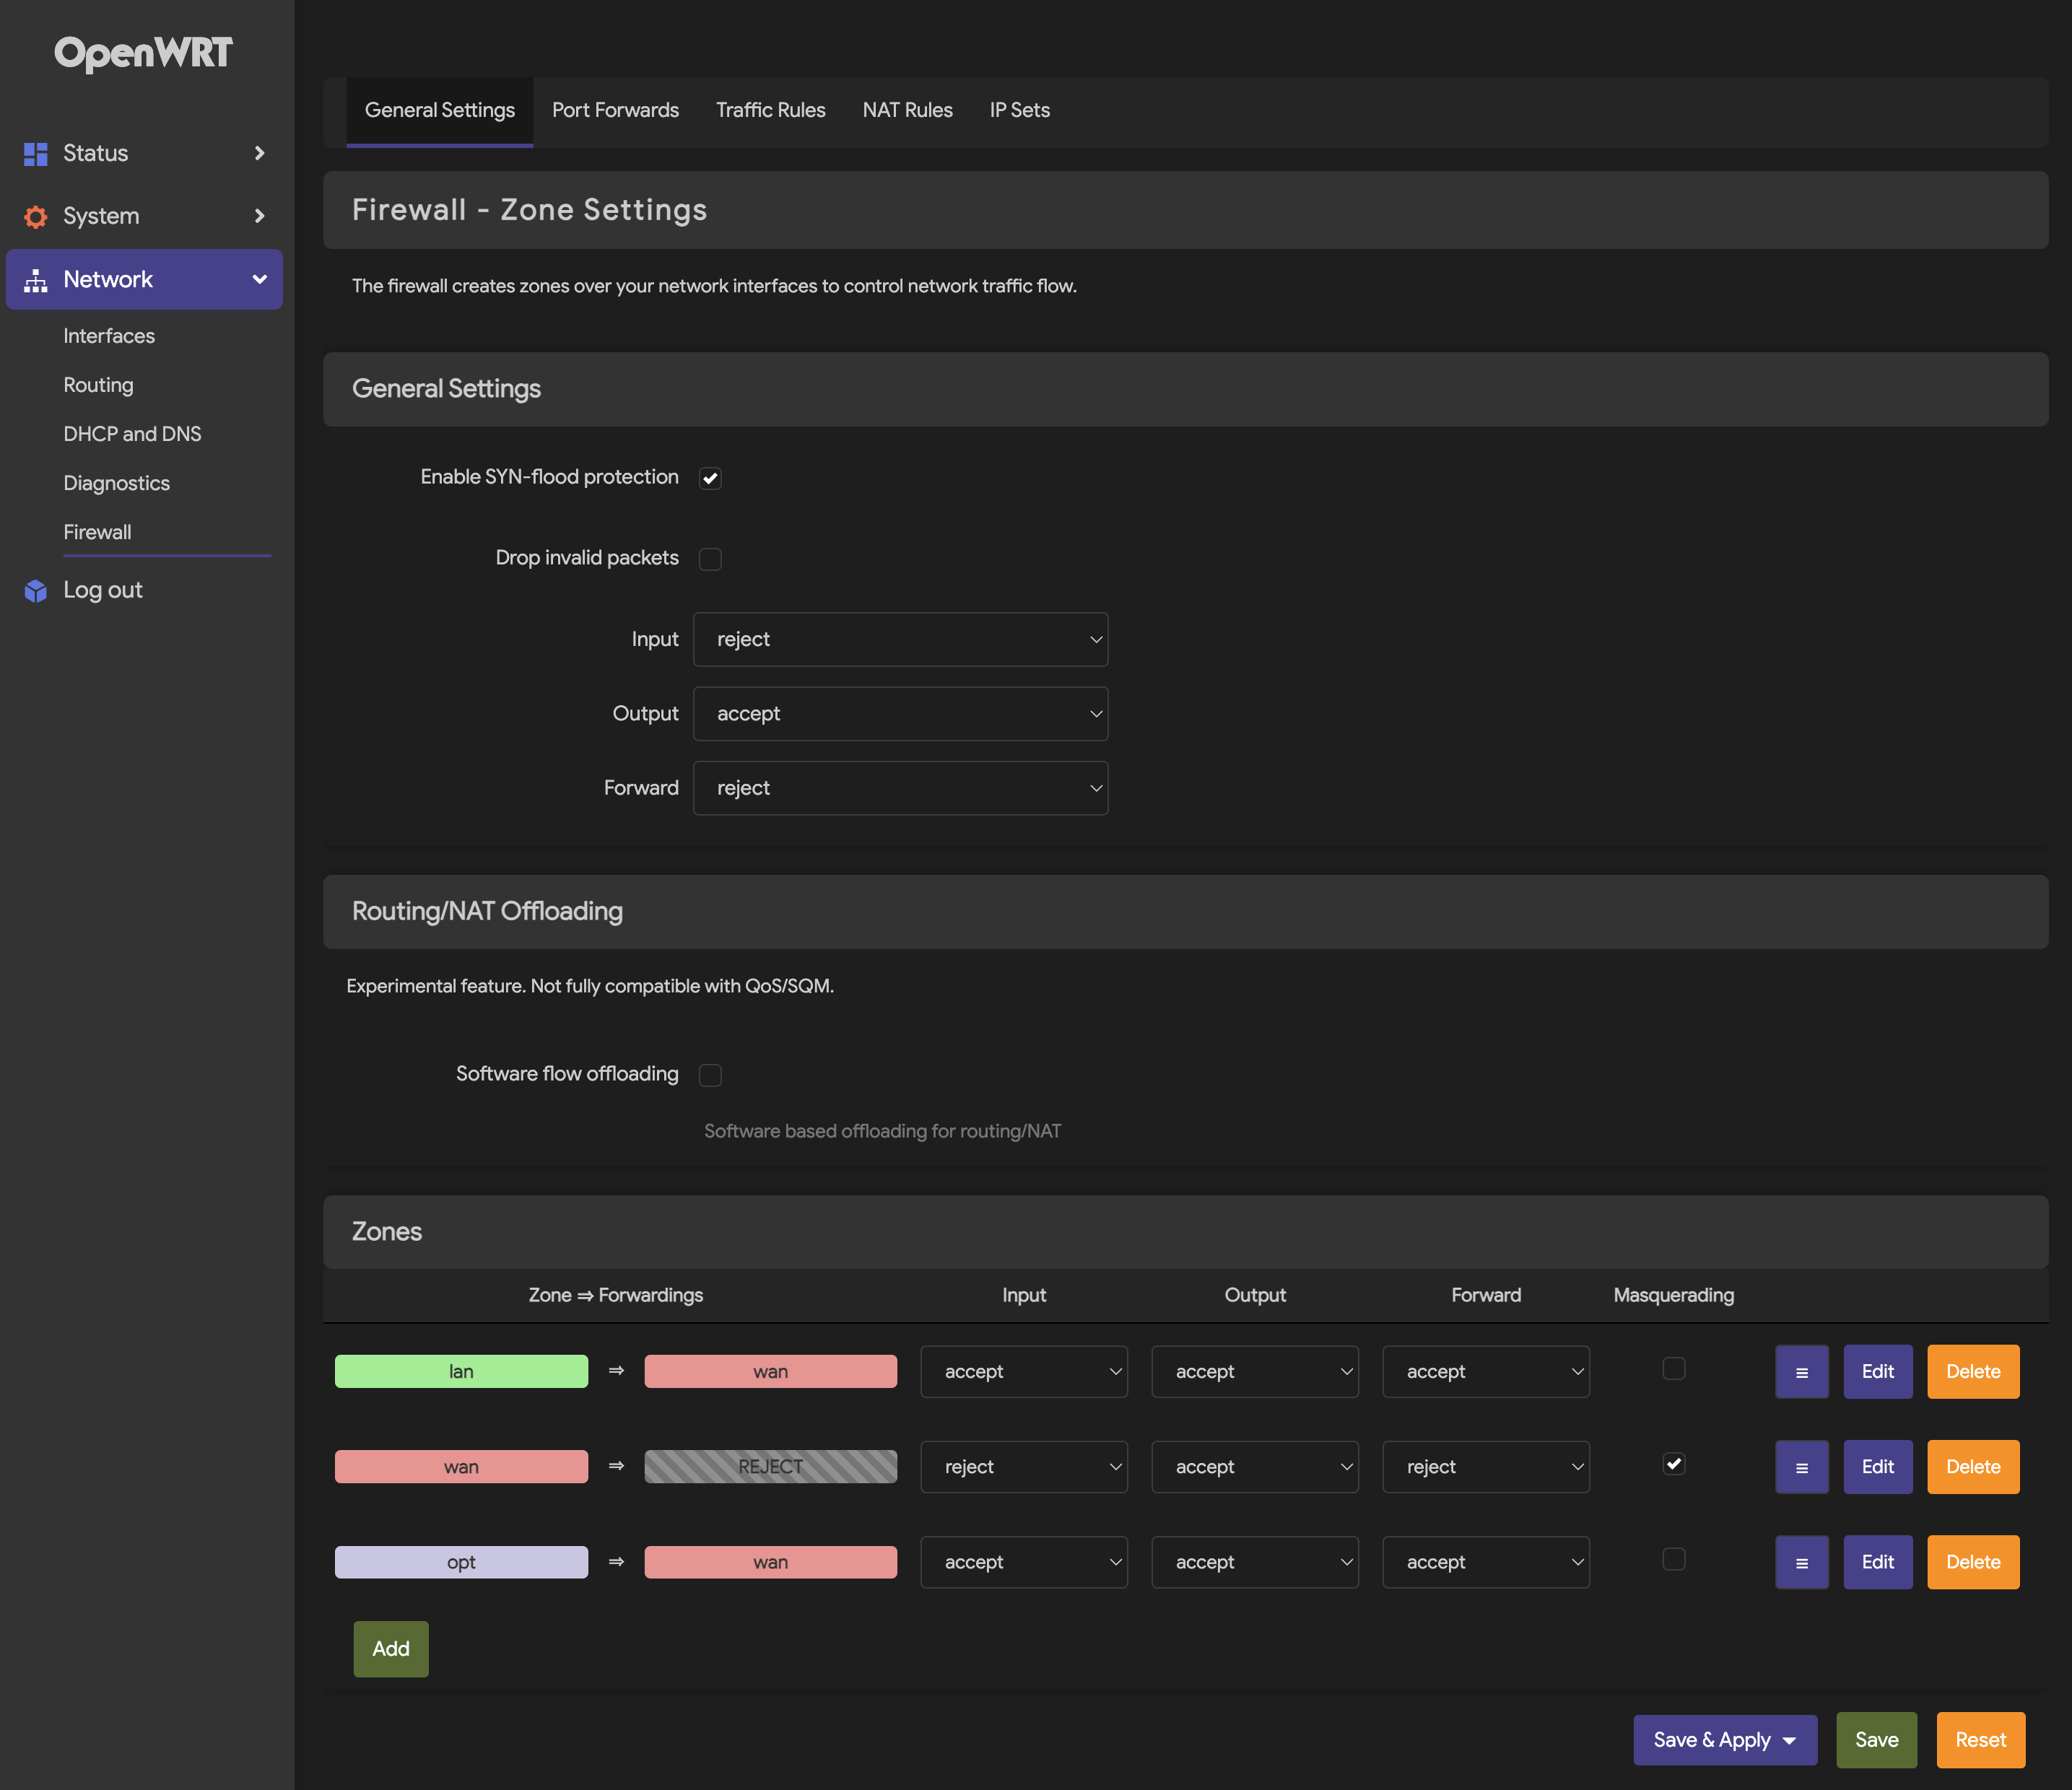
Create firewall for Tailscale virtual network interface in OpenWrt:
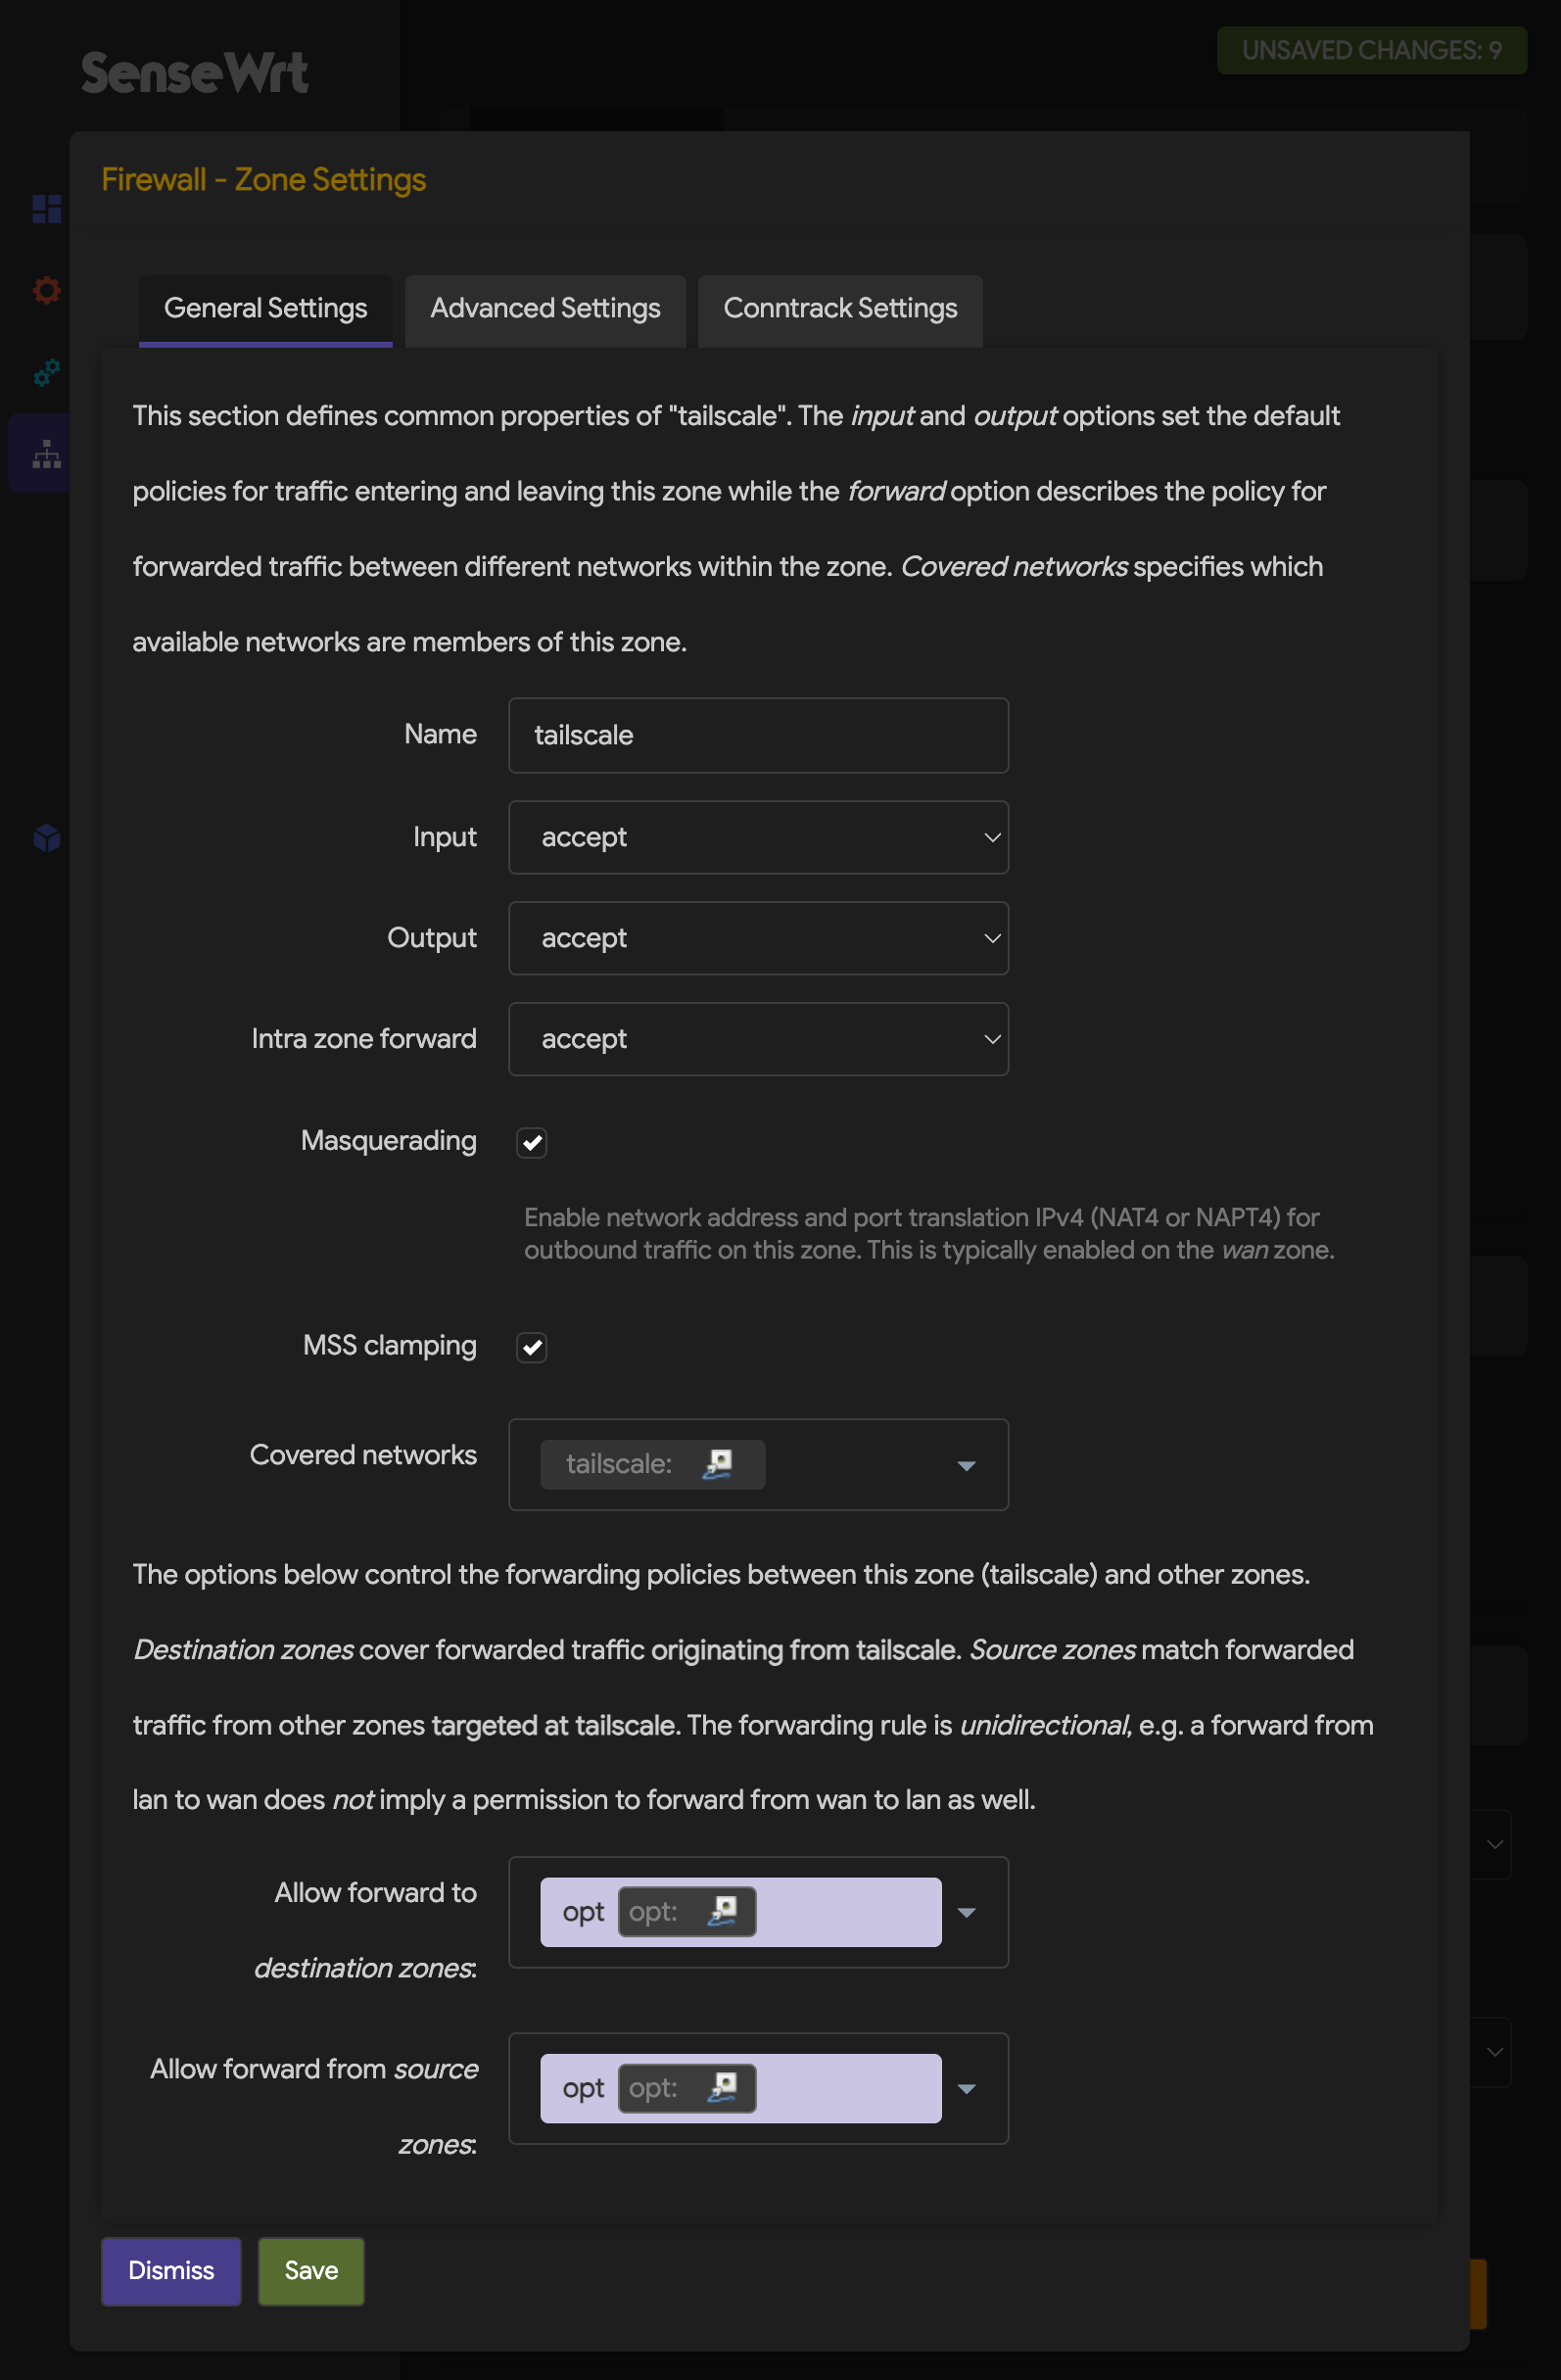
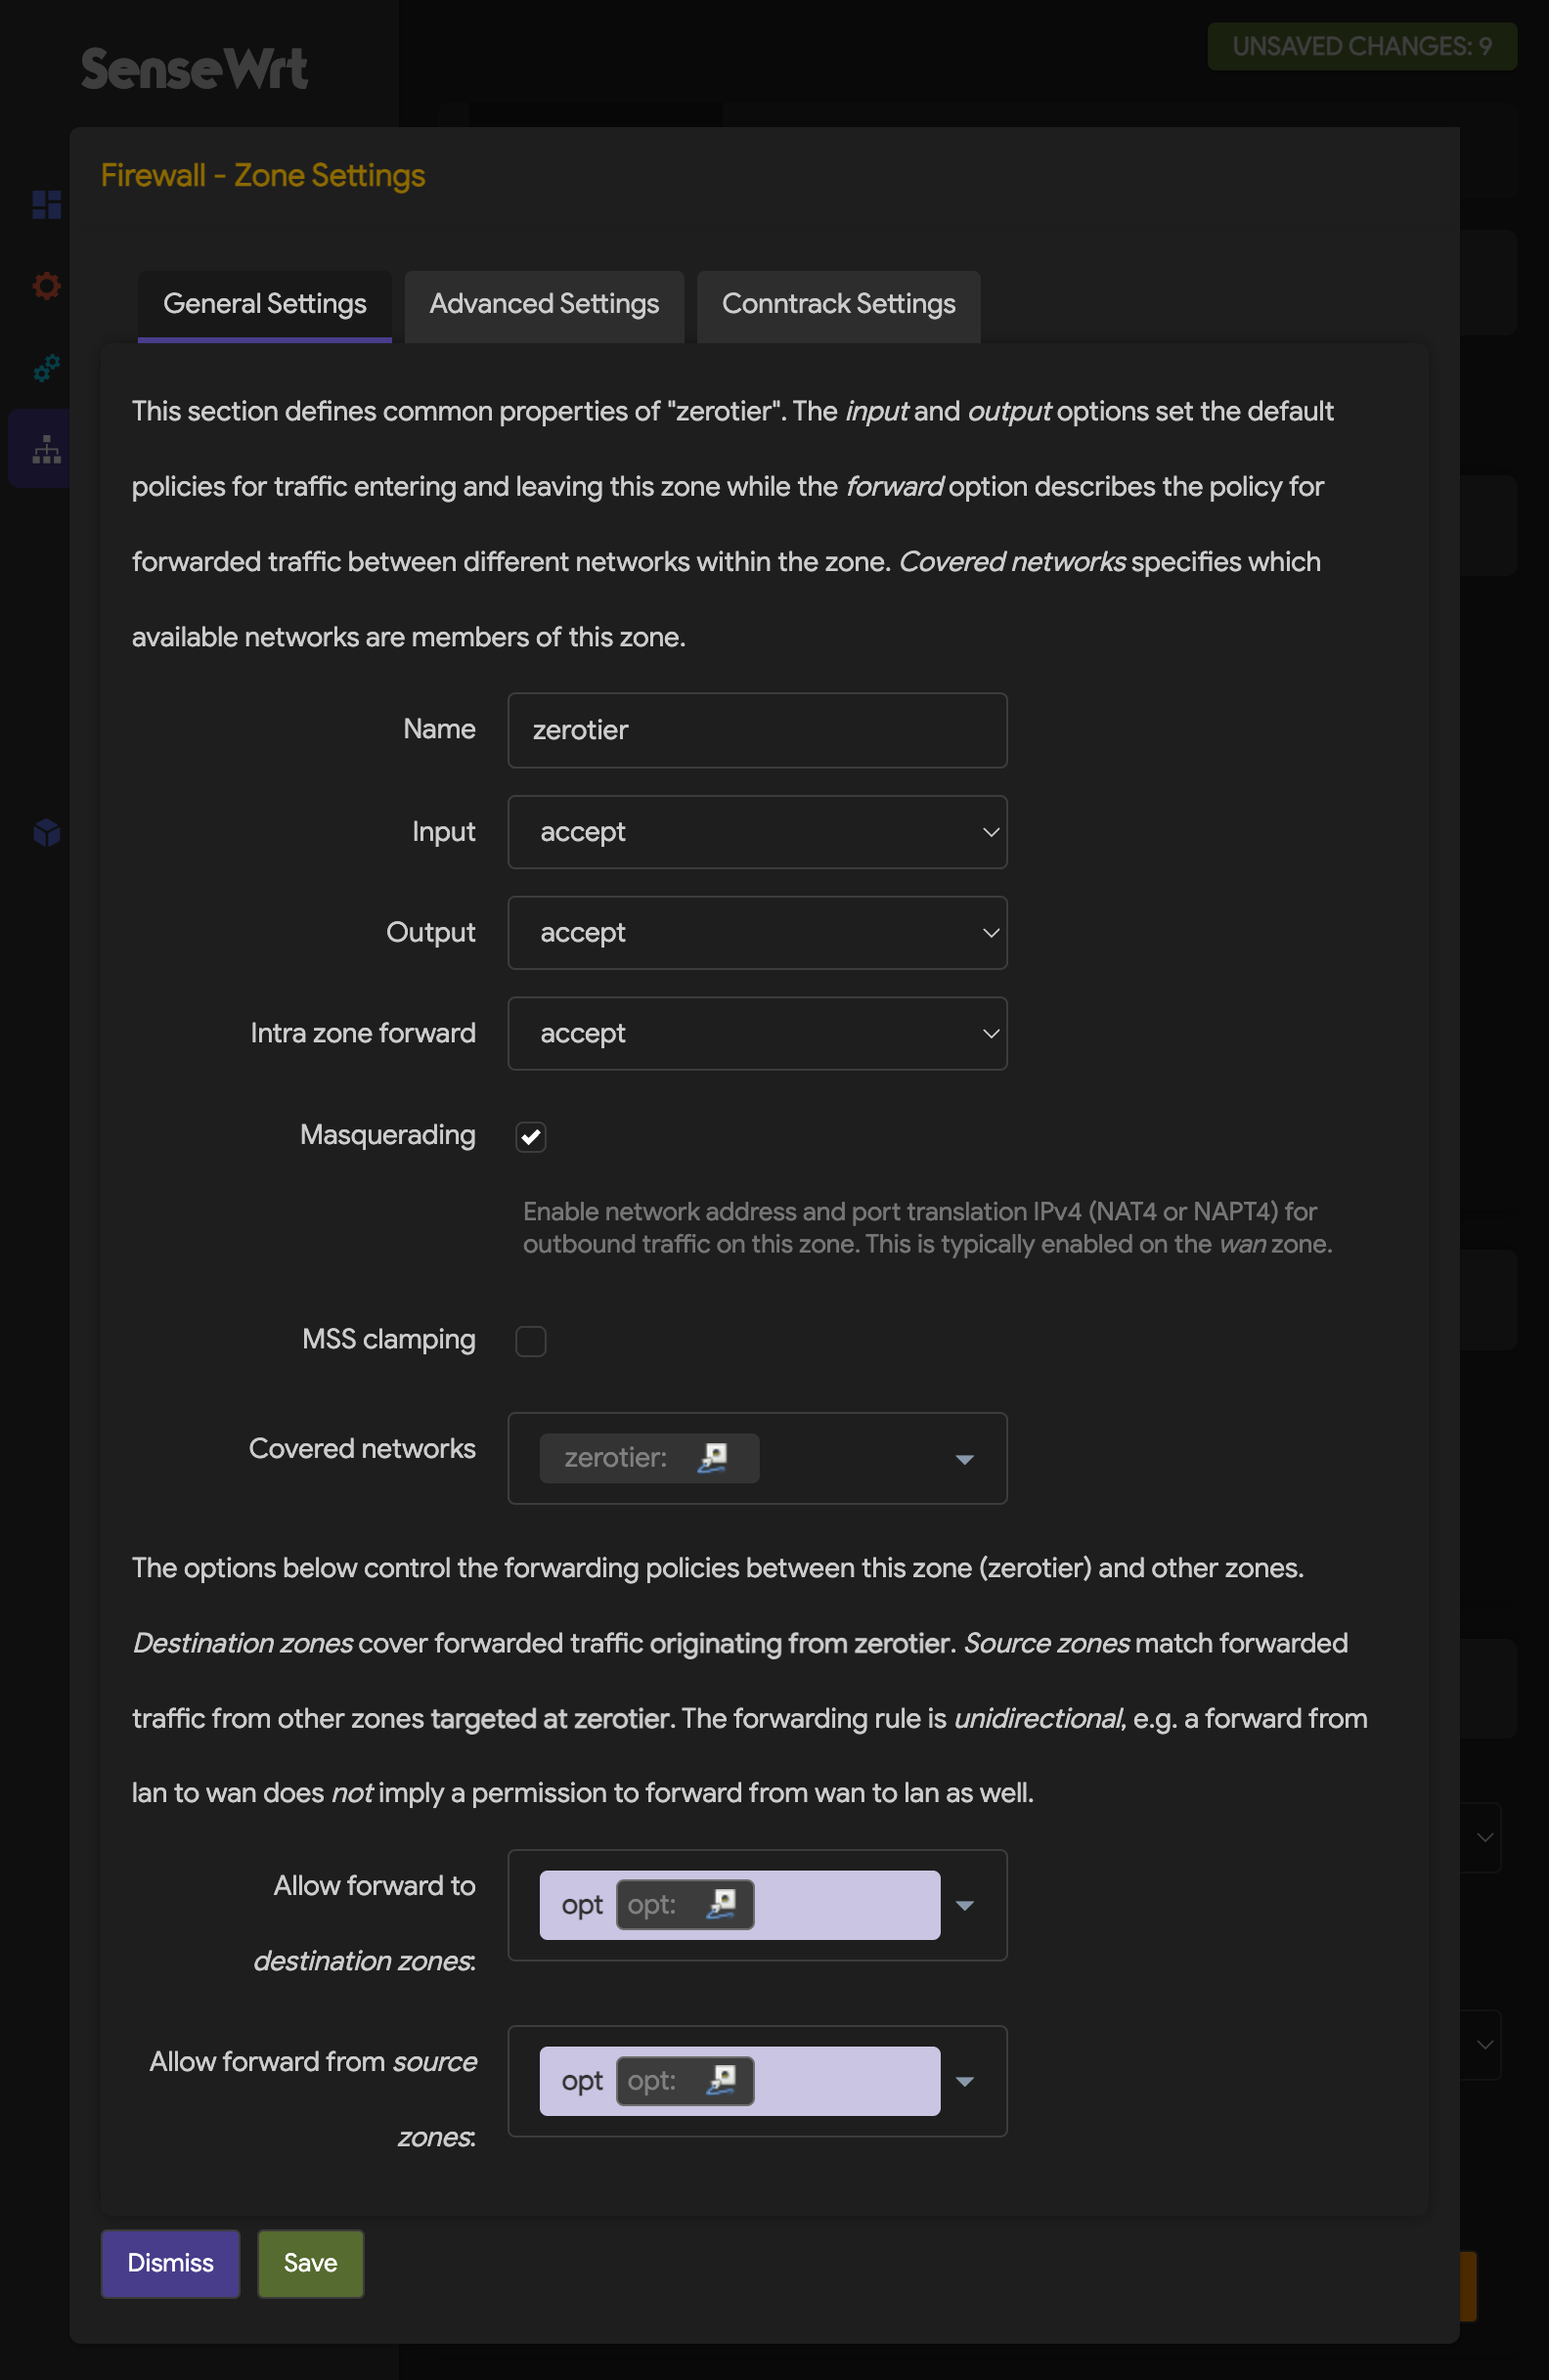
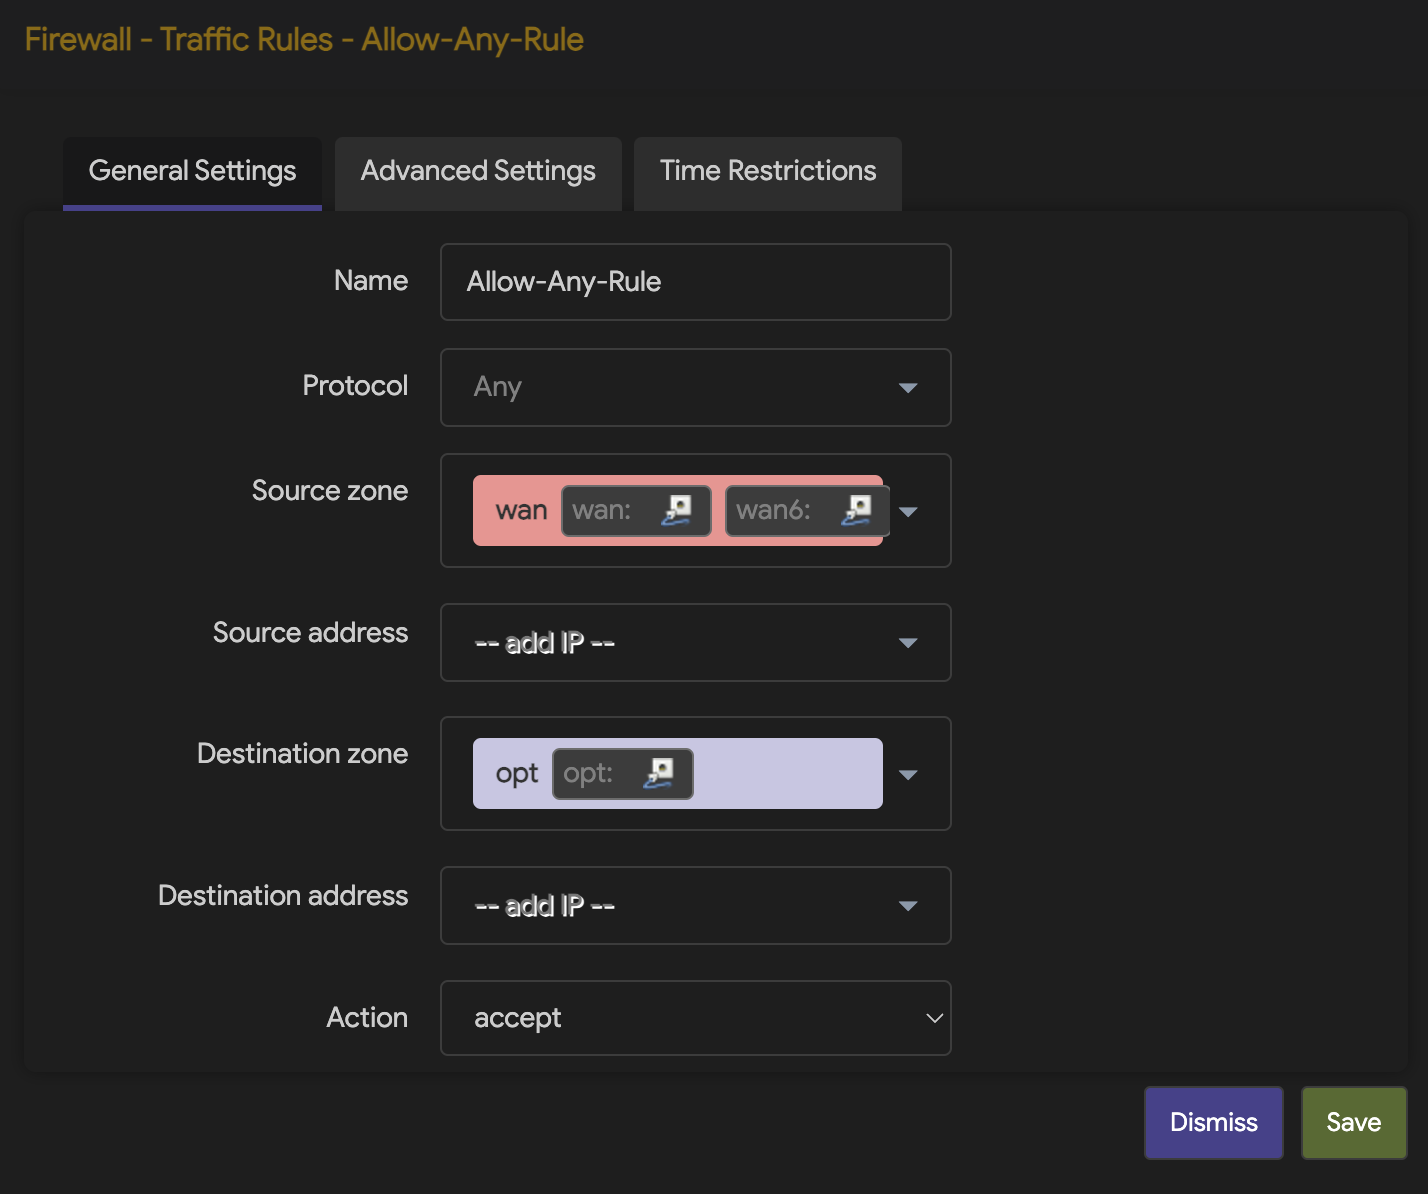
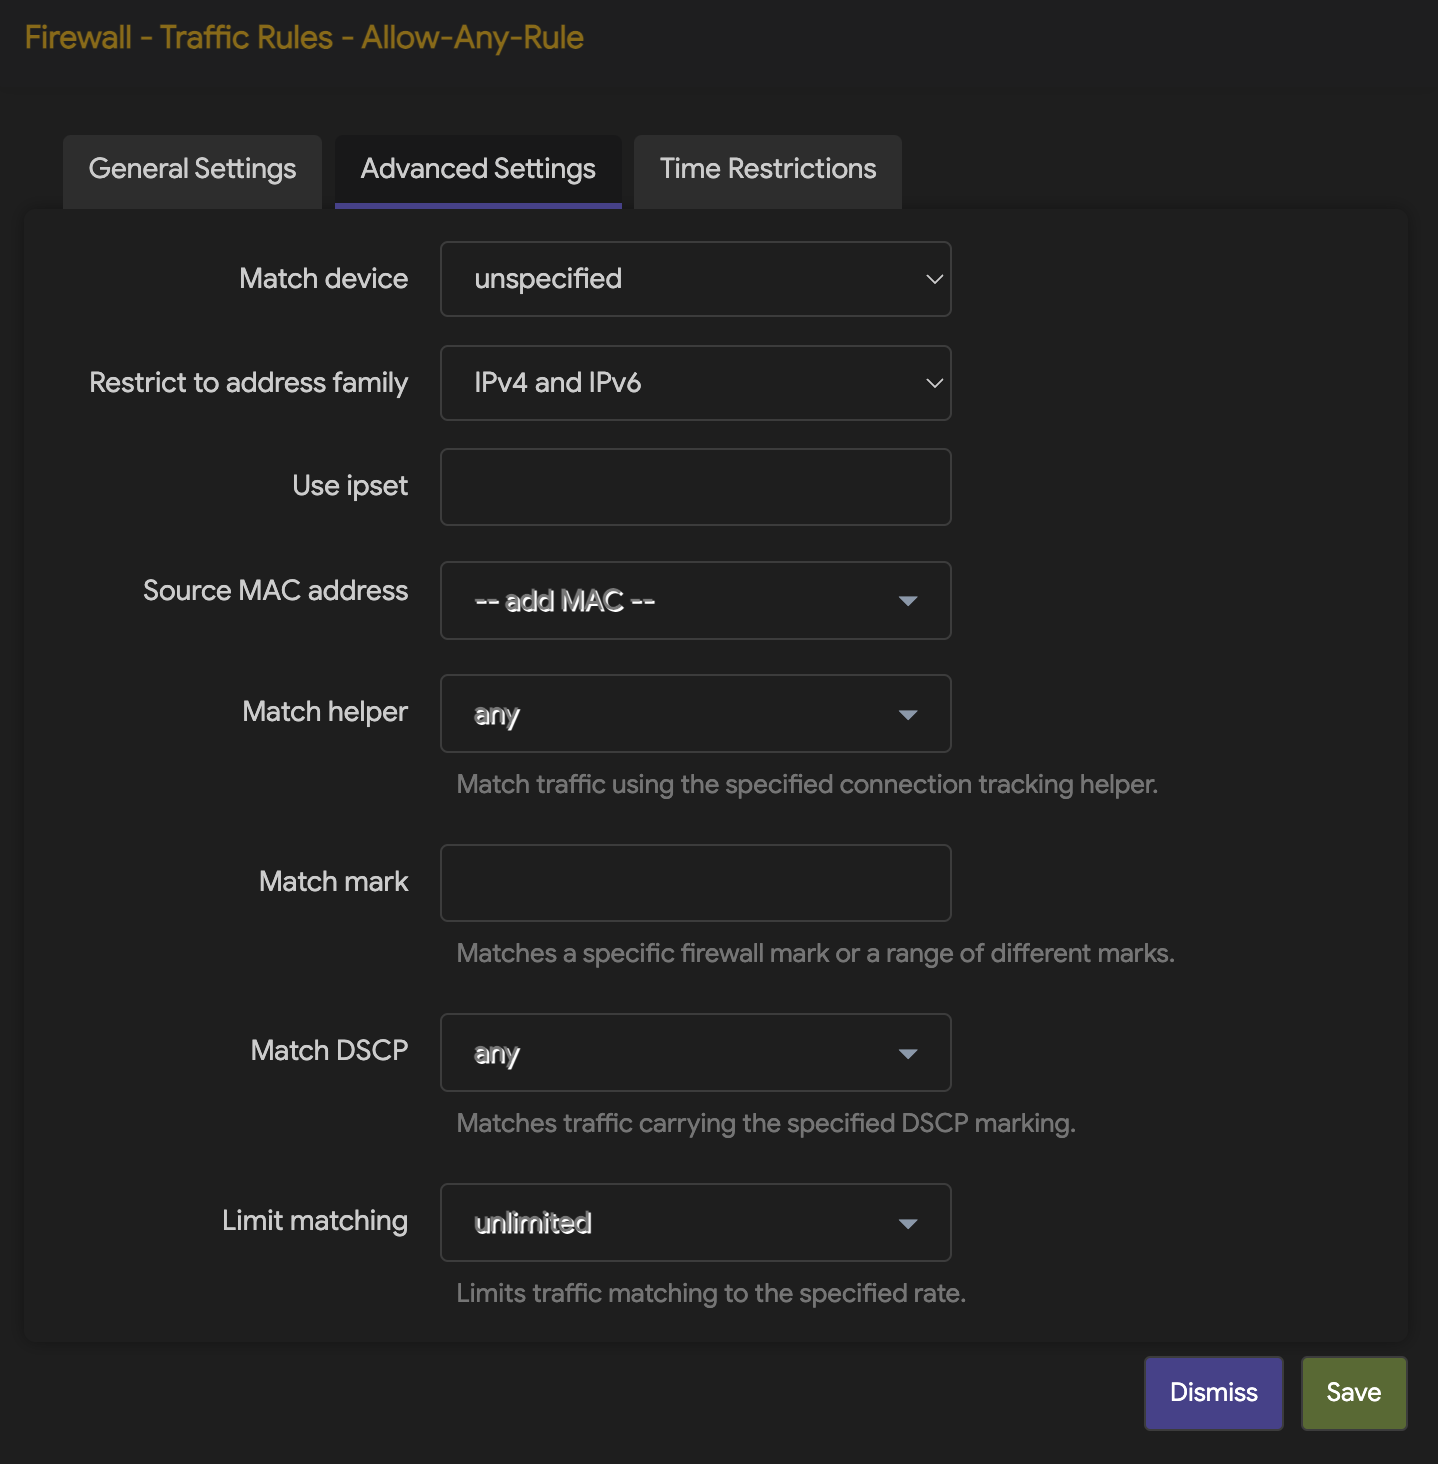
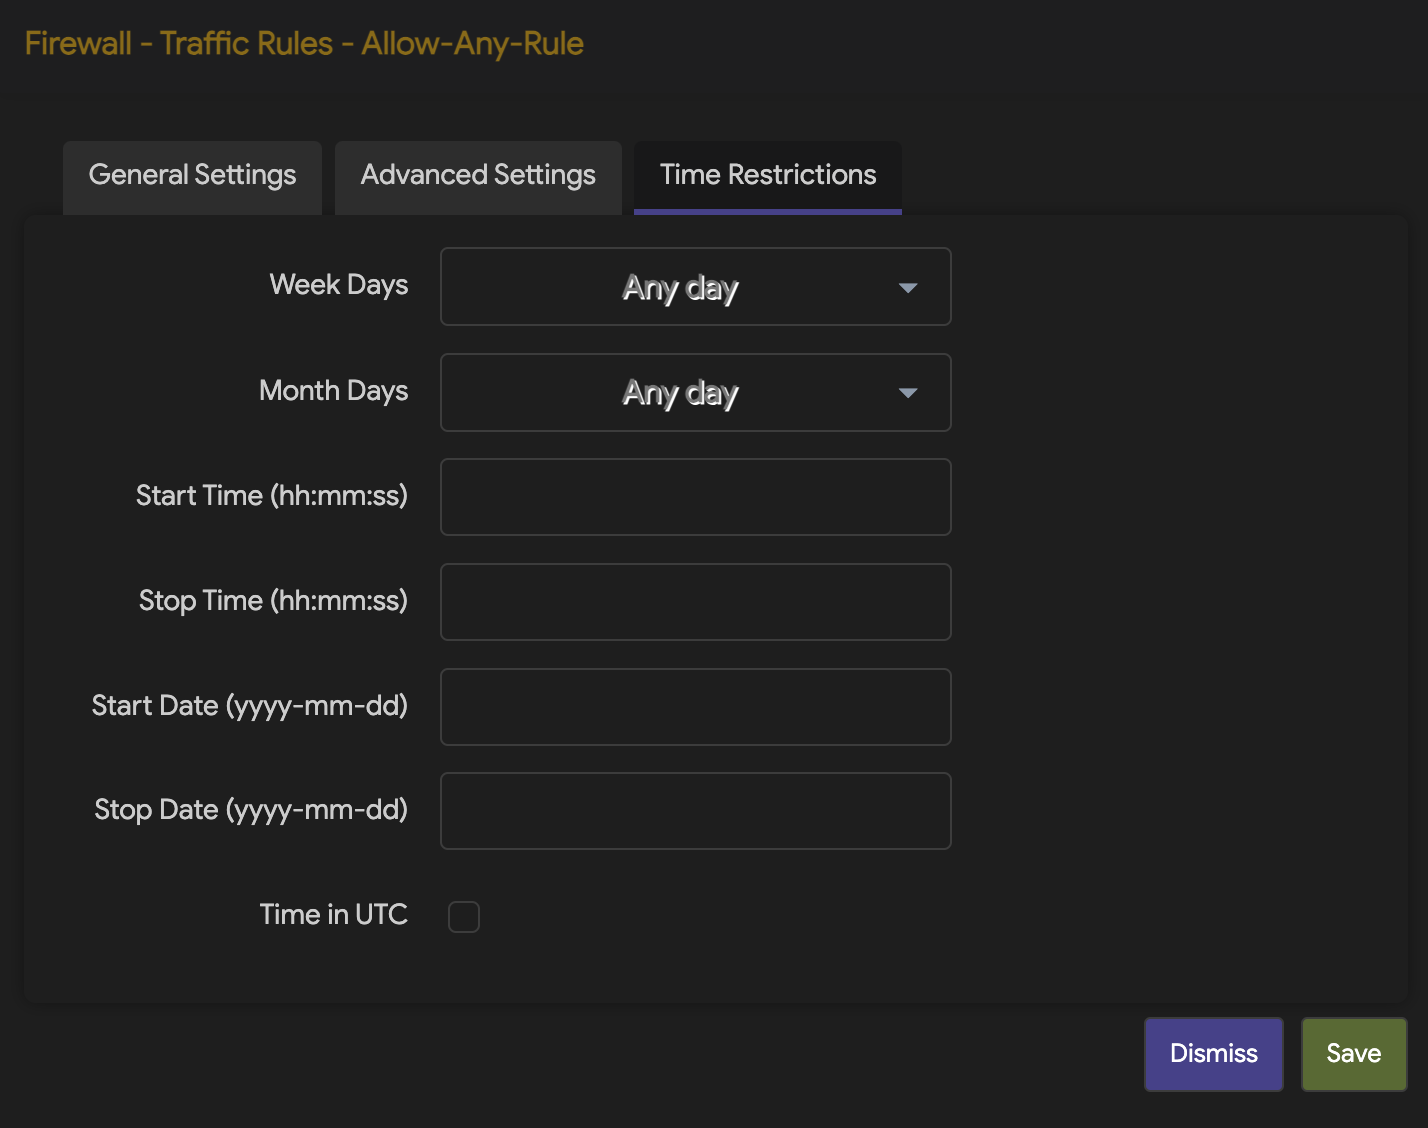
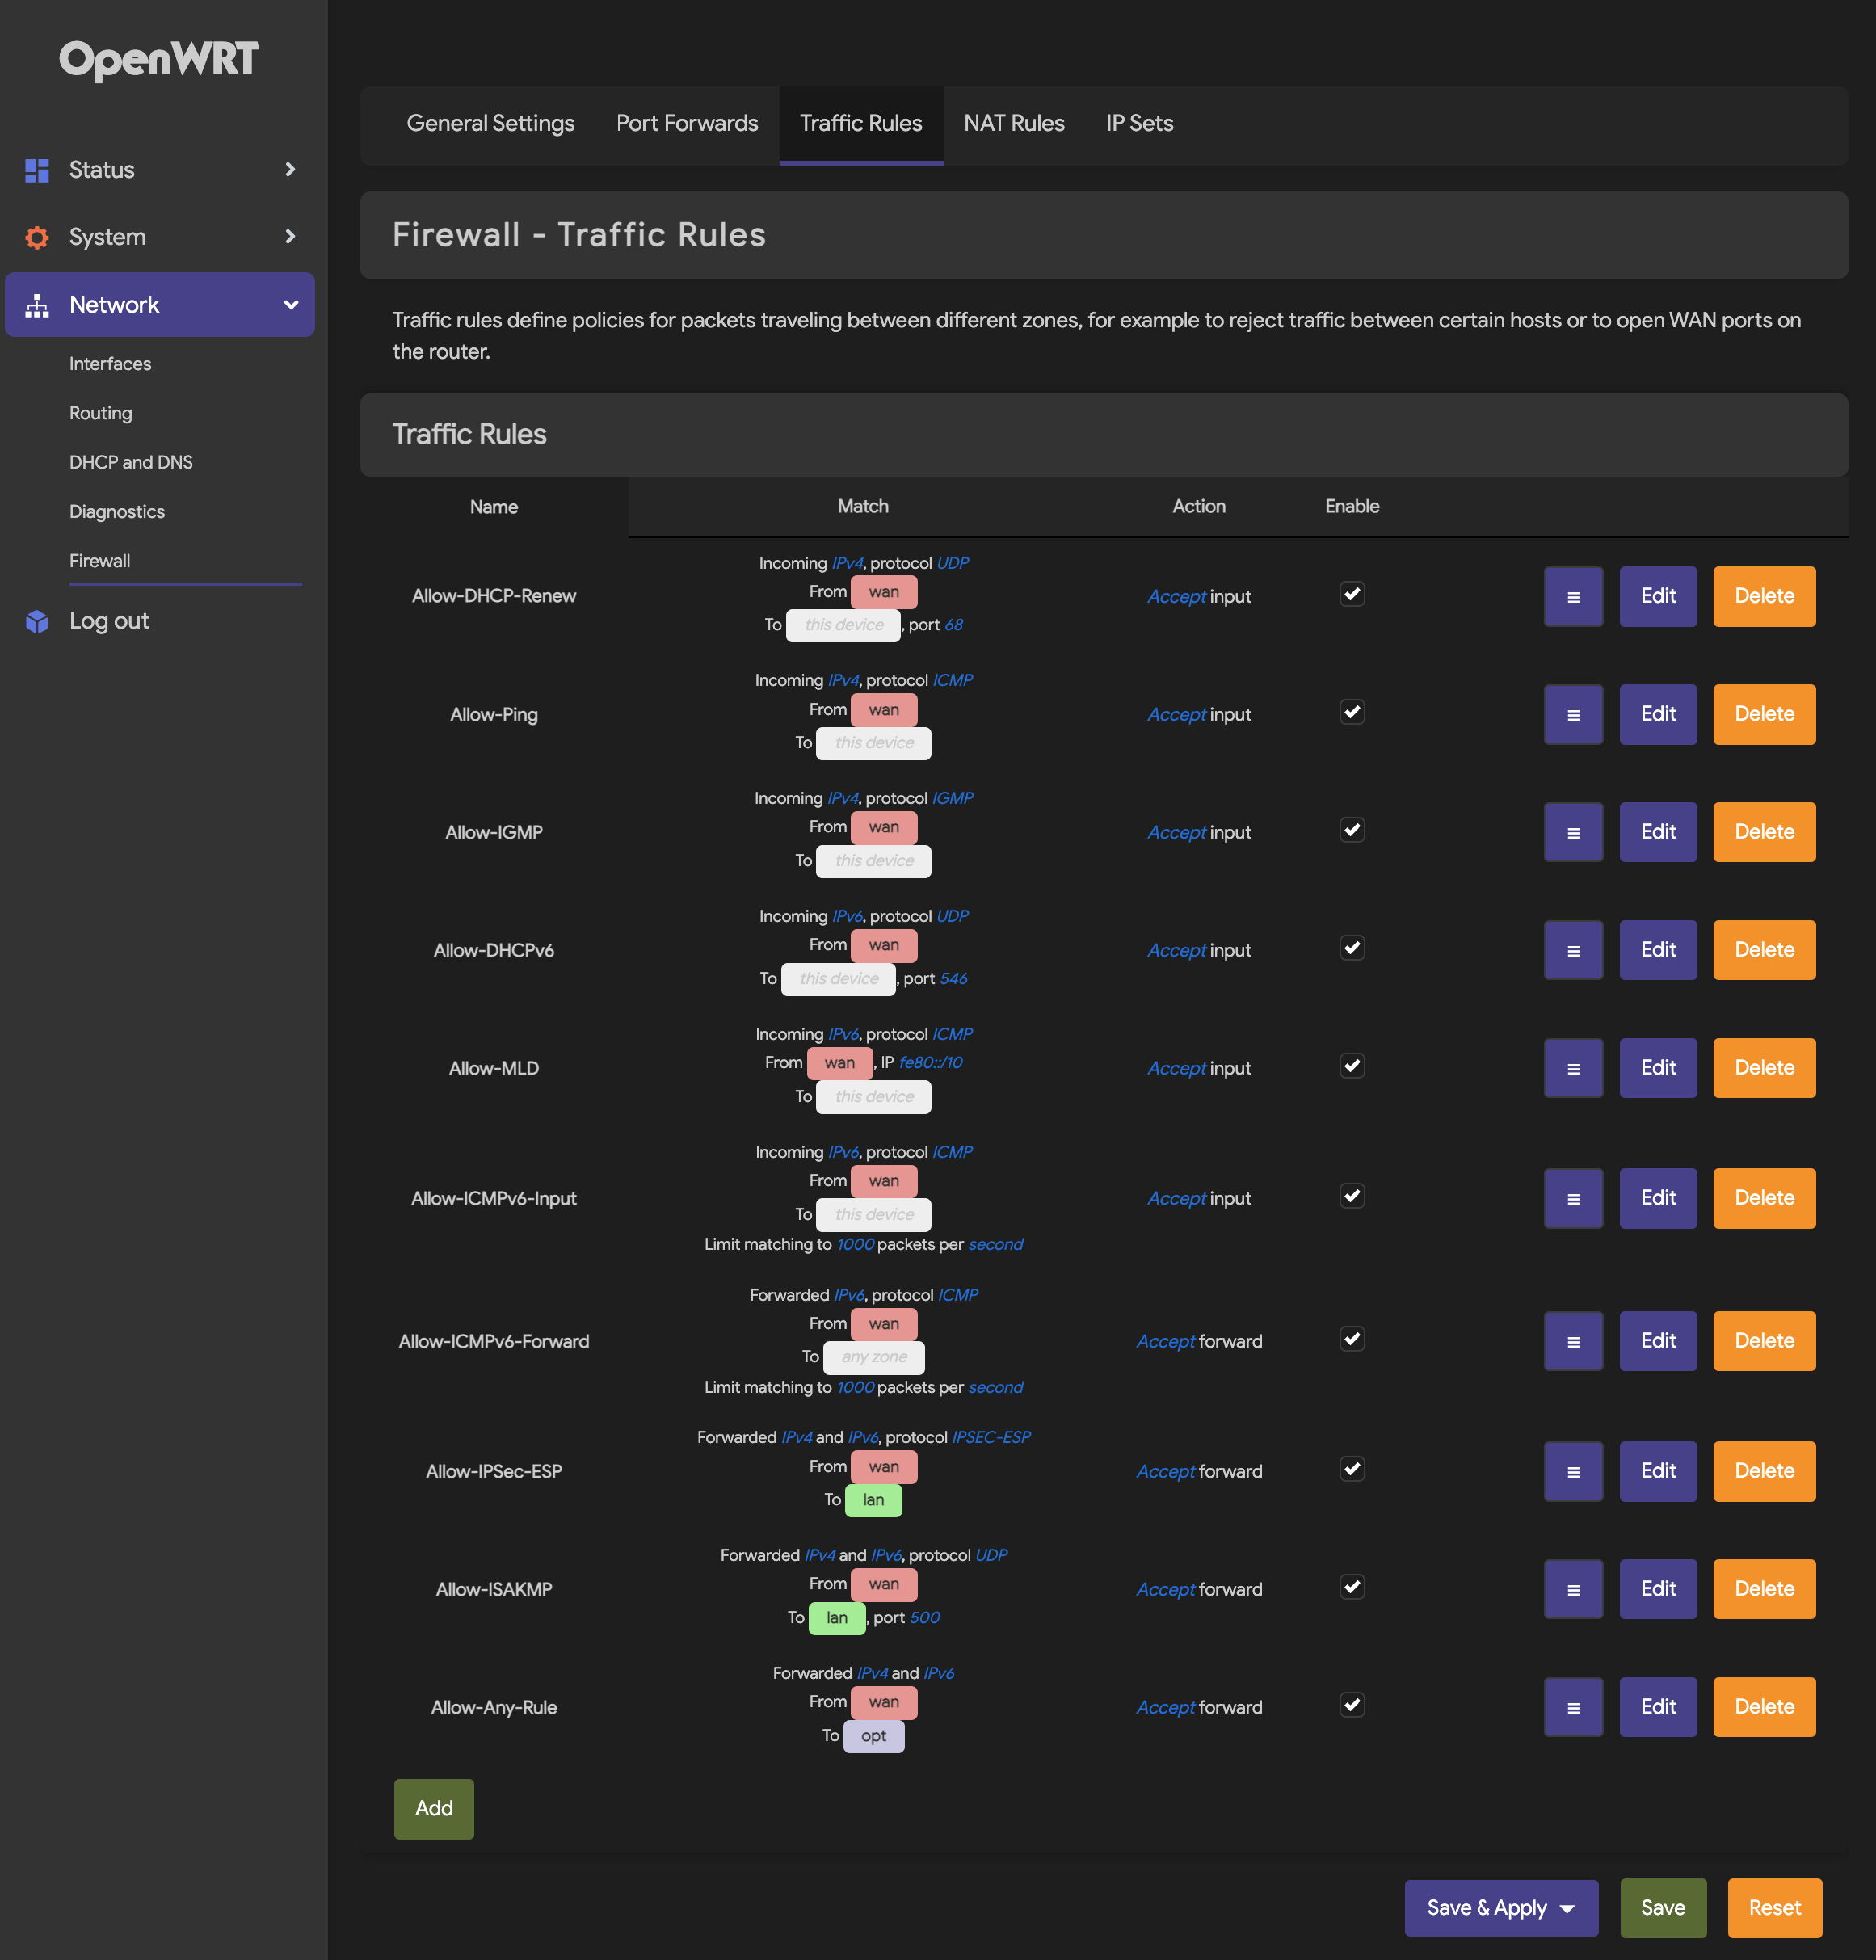
Configure firewall for Tailscale virtual network interface in OpenWrt:
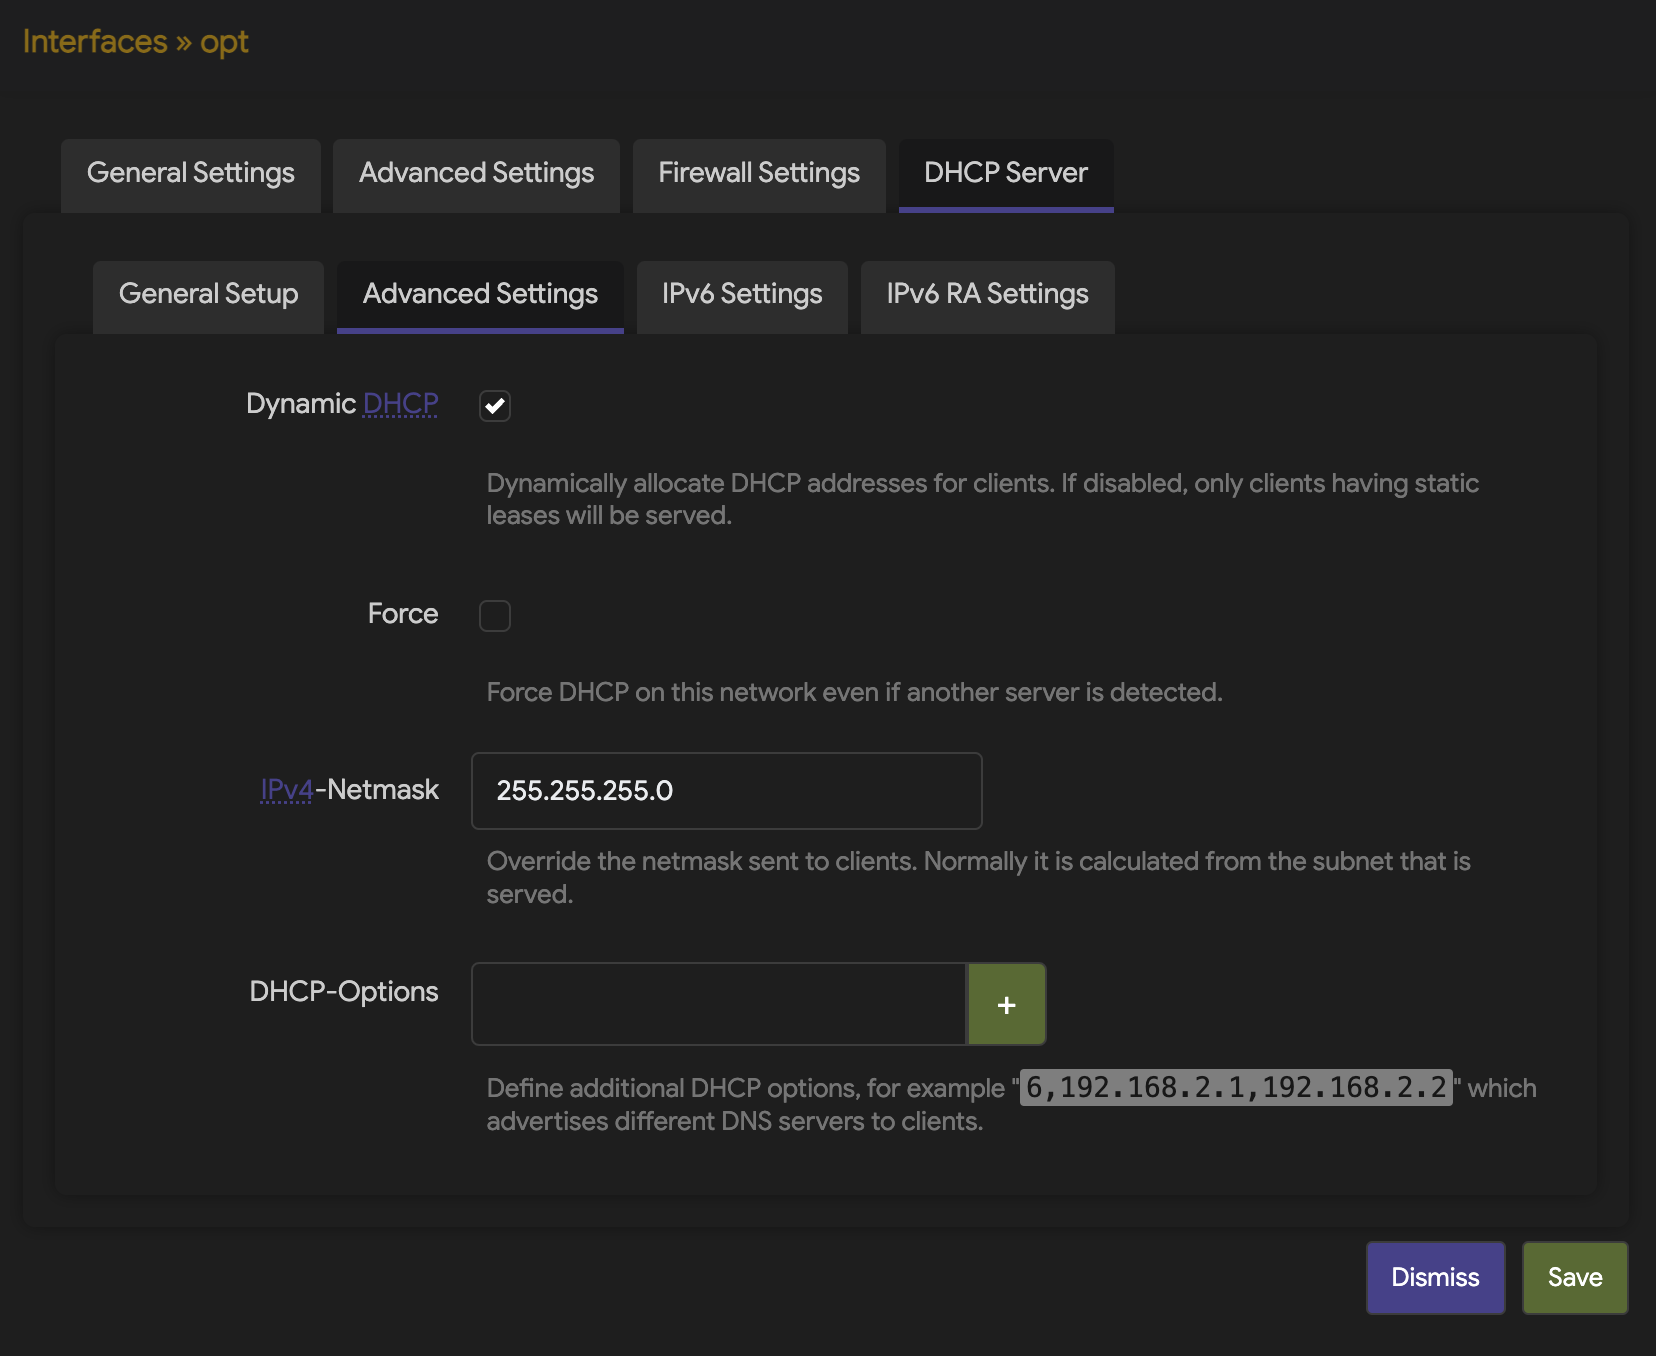
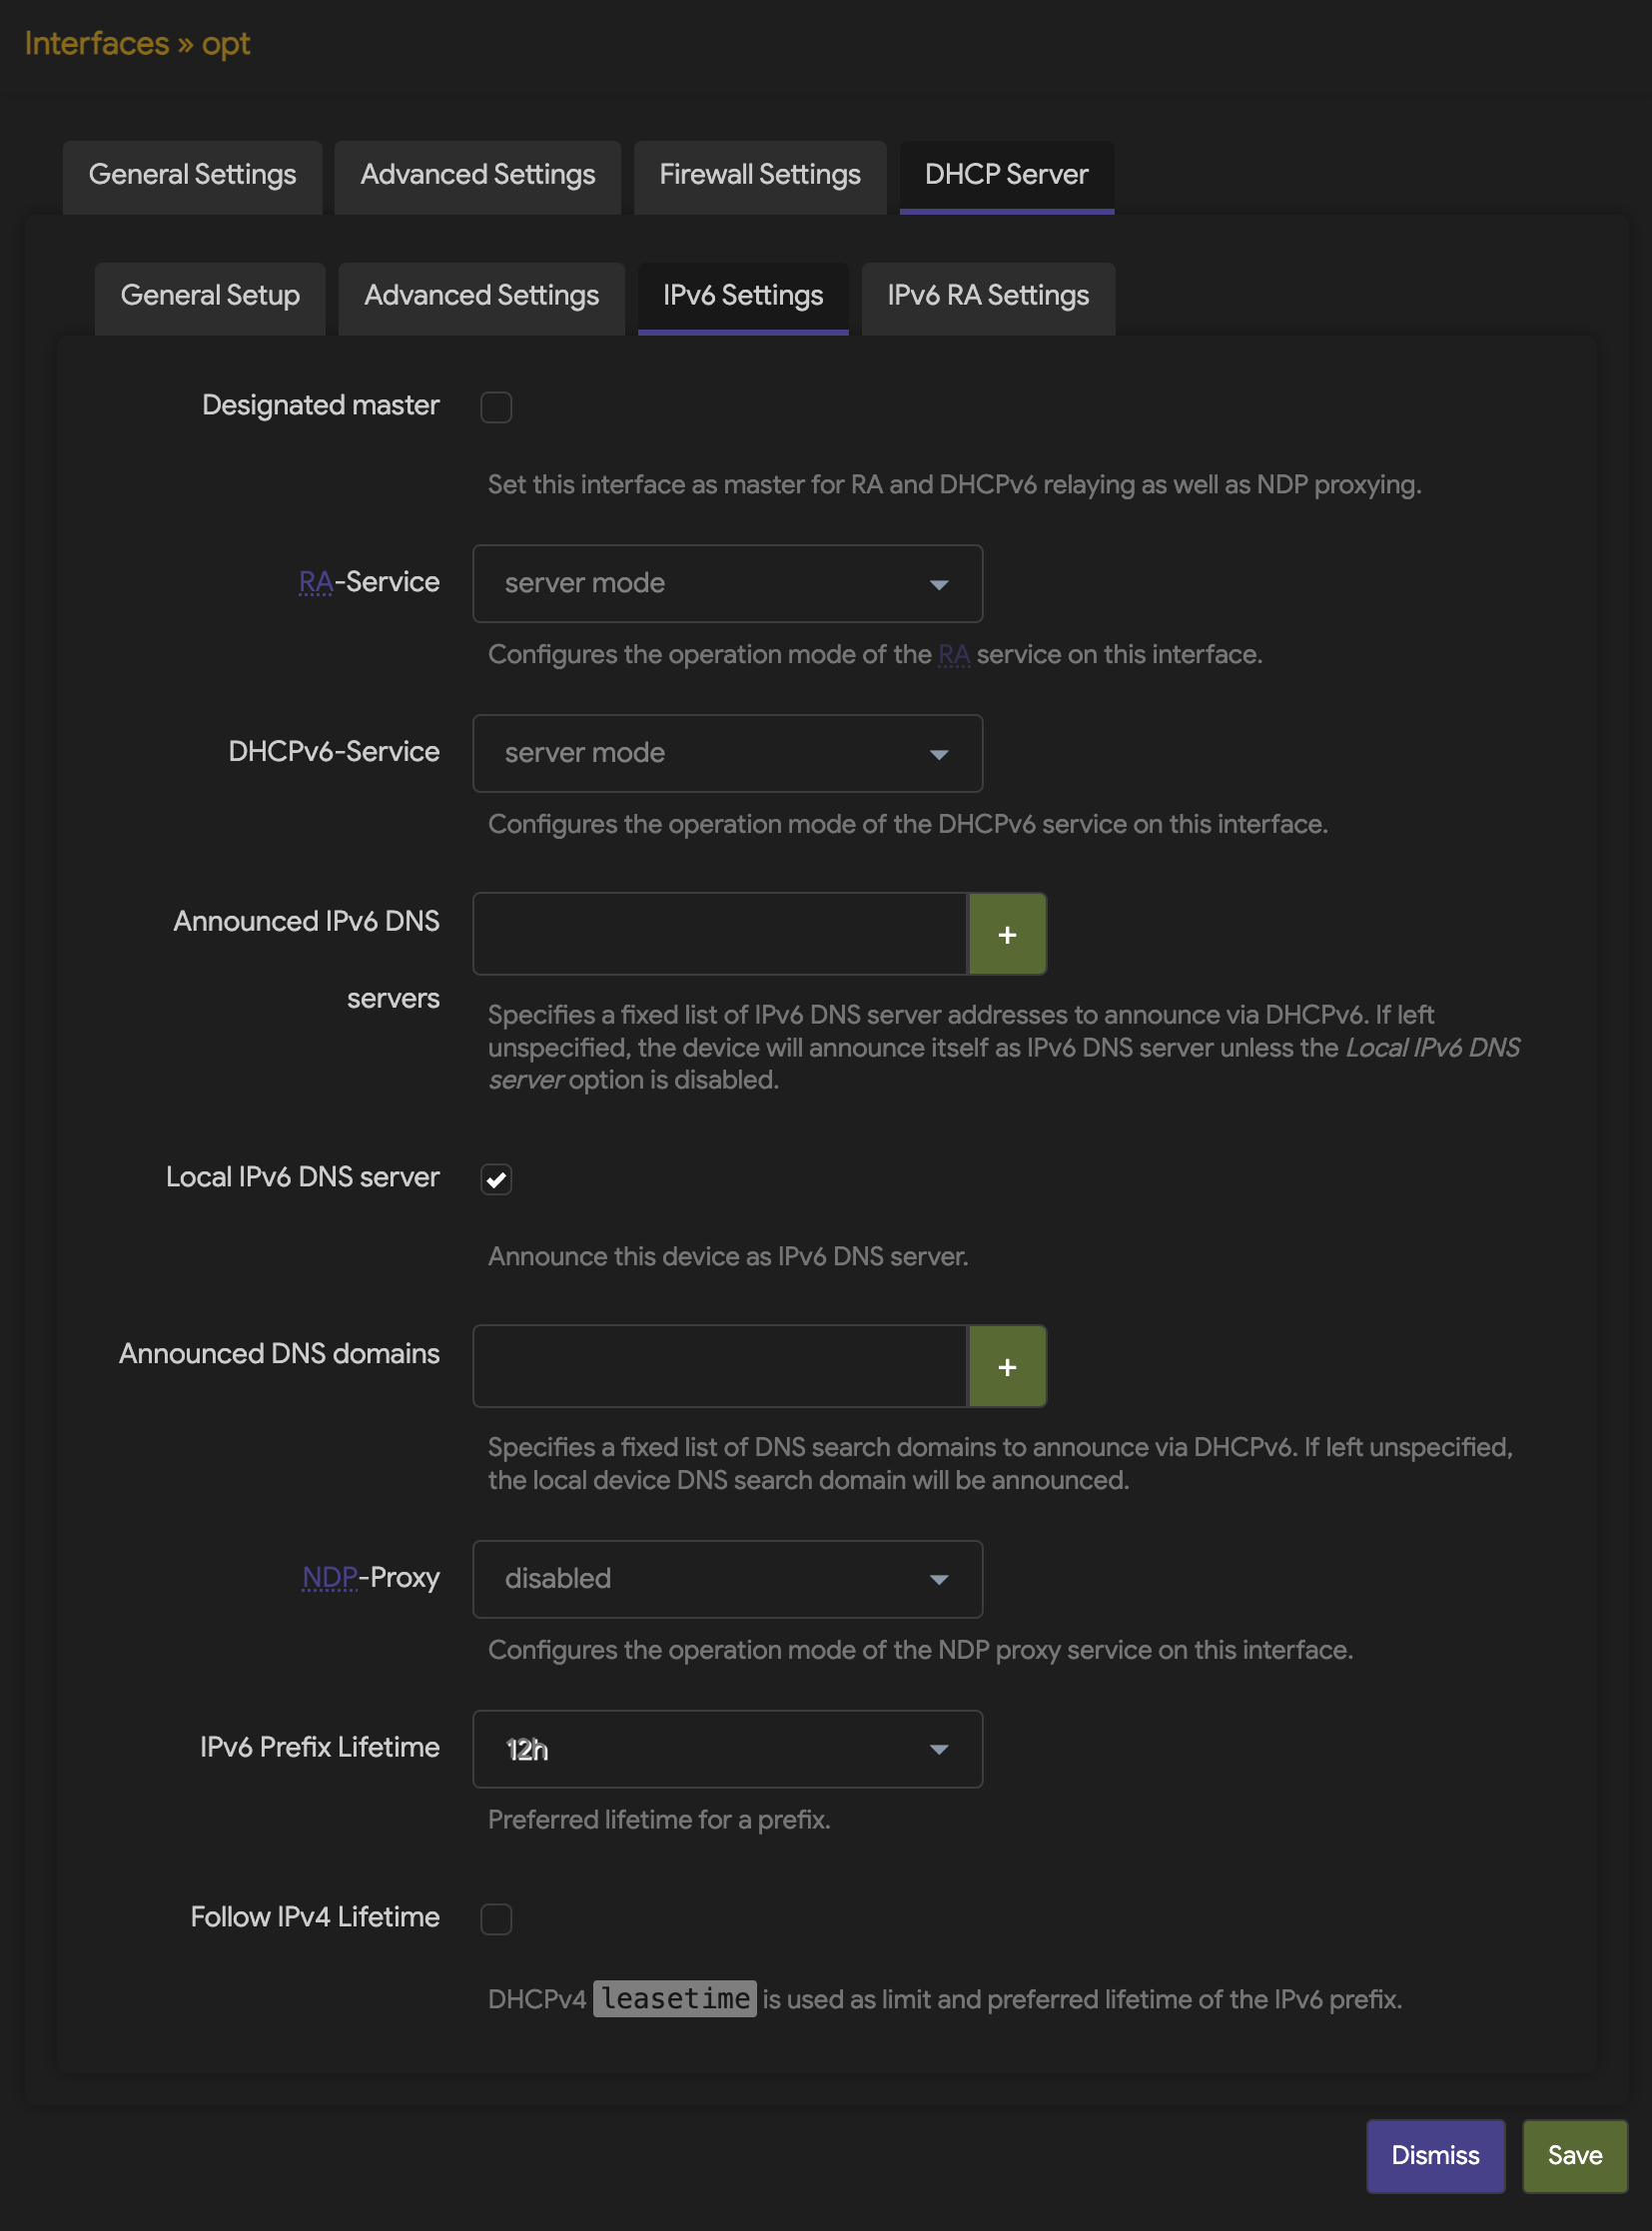
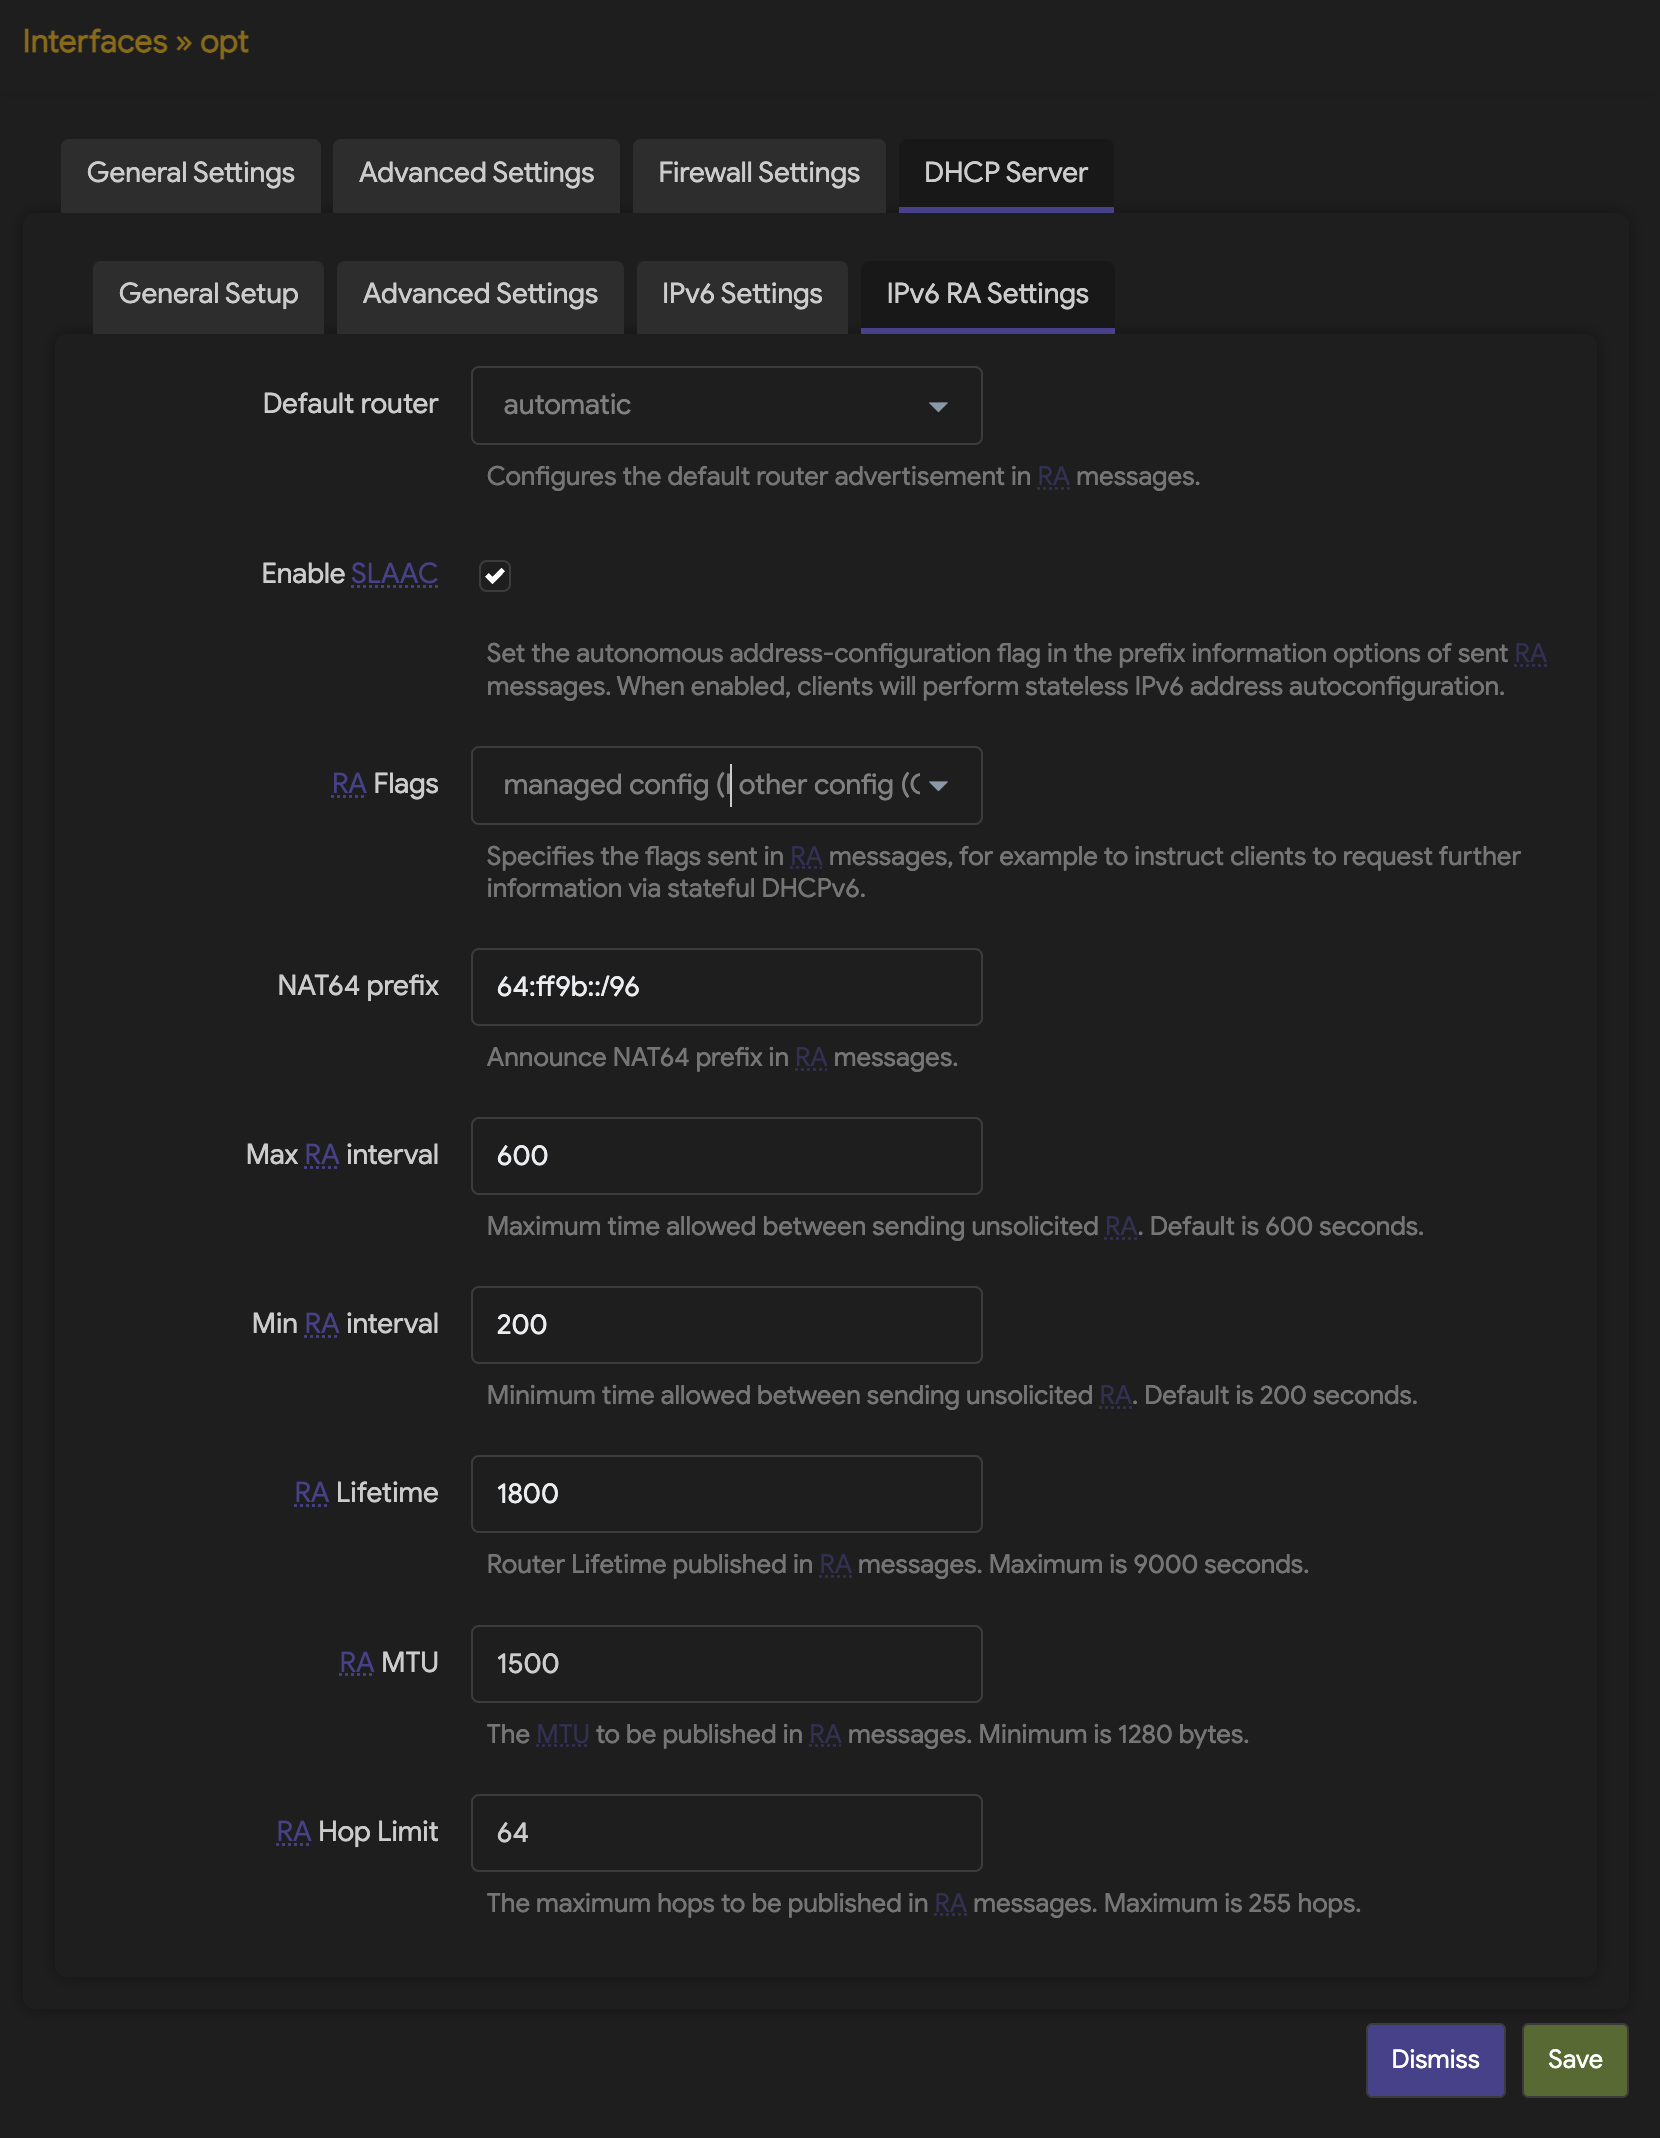
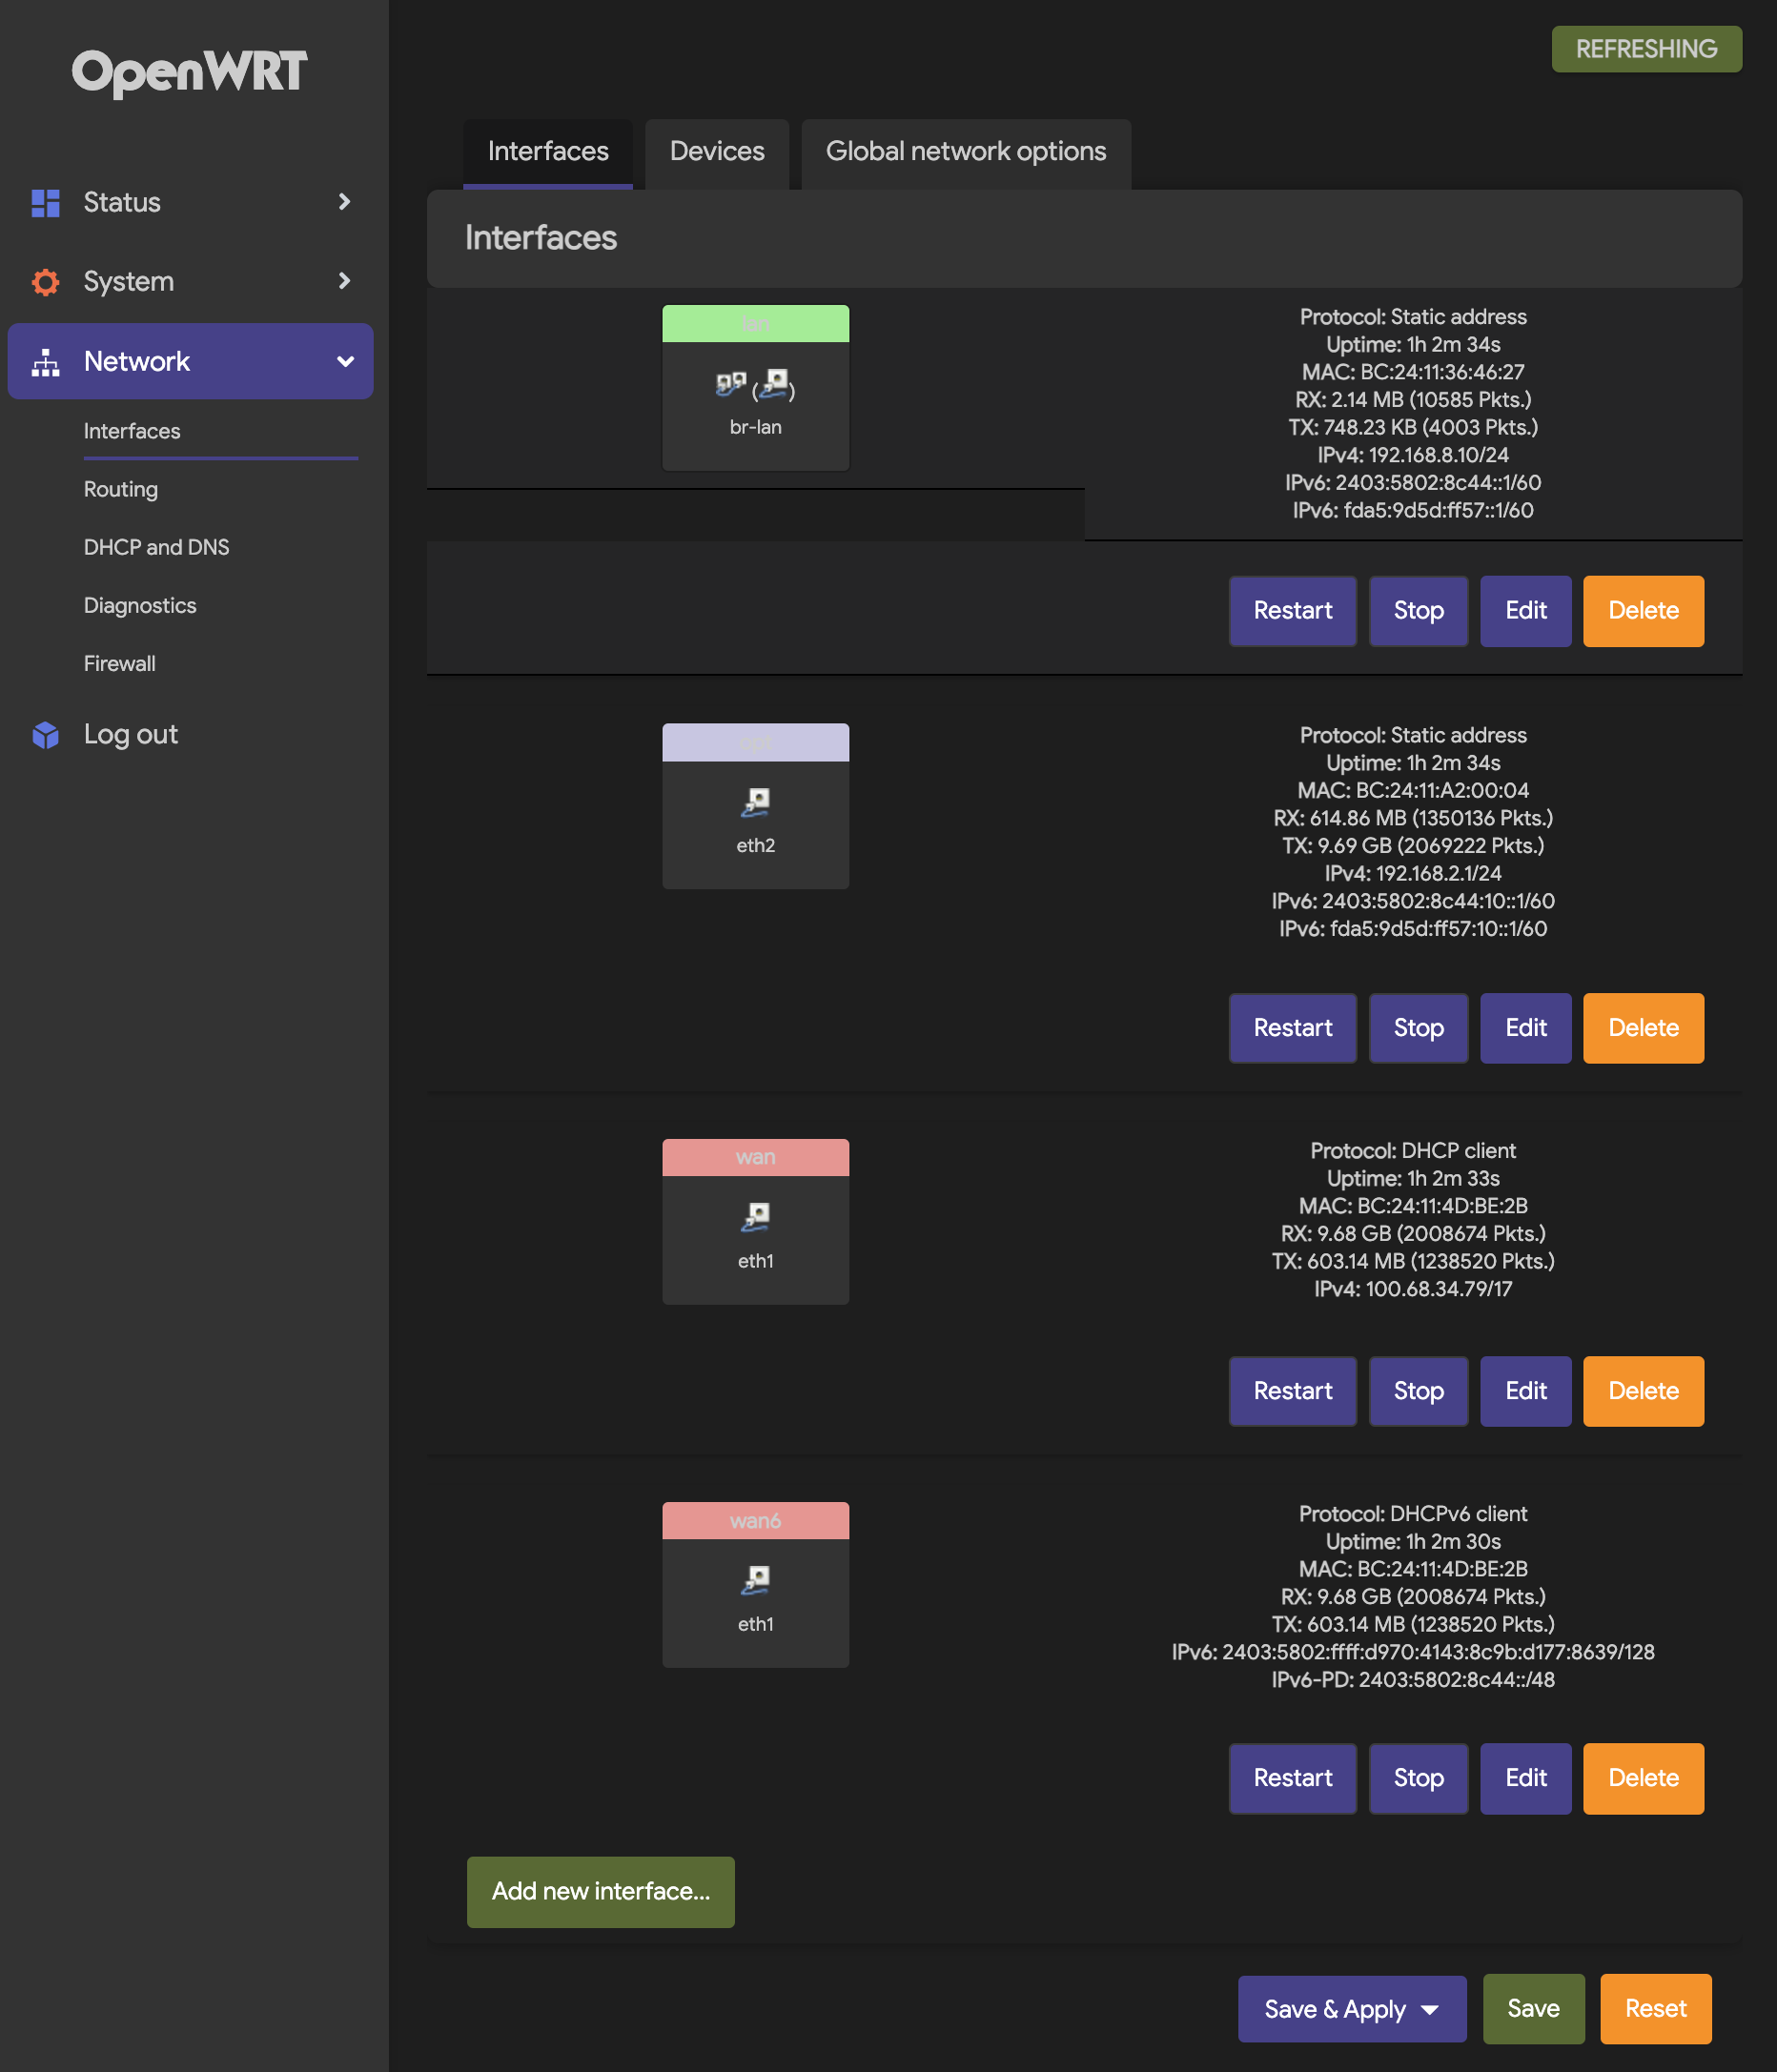
NOTE:opt network is for the downstream DHCP clients.
_______ ________ __ | |.-----.-----.-----.| | | |.----.| |_ | - || _ | -__| || | | || _|| _| |_______|| __|_____|__|__||________||__| |____| |__| W I R E L E S S F R E E D O M ----------------------------------------------------- OpenWrt 24.10.0-rc2, r28161-ea17e958b9 -----------------------------------------------------
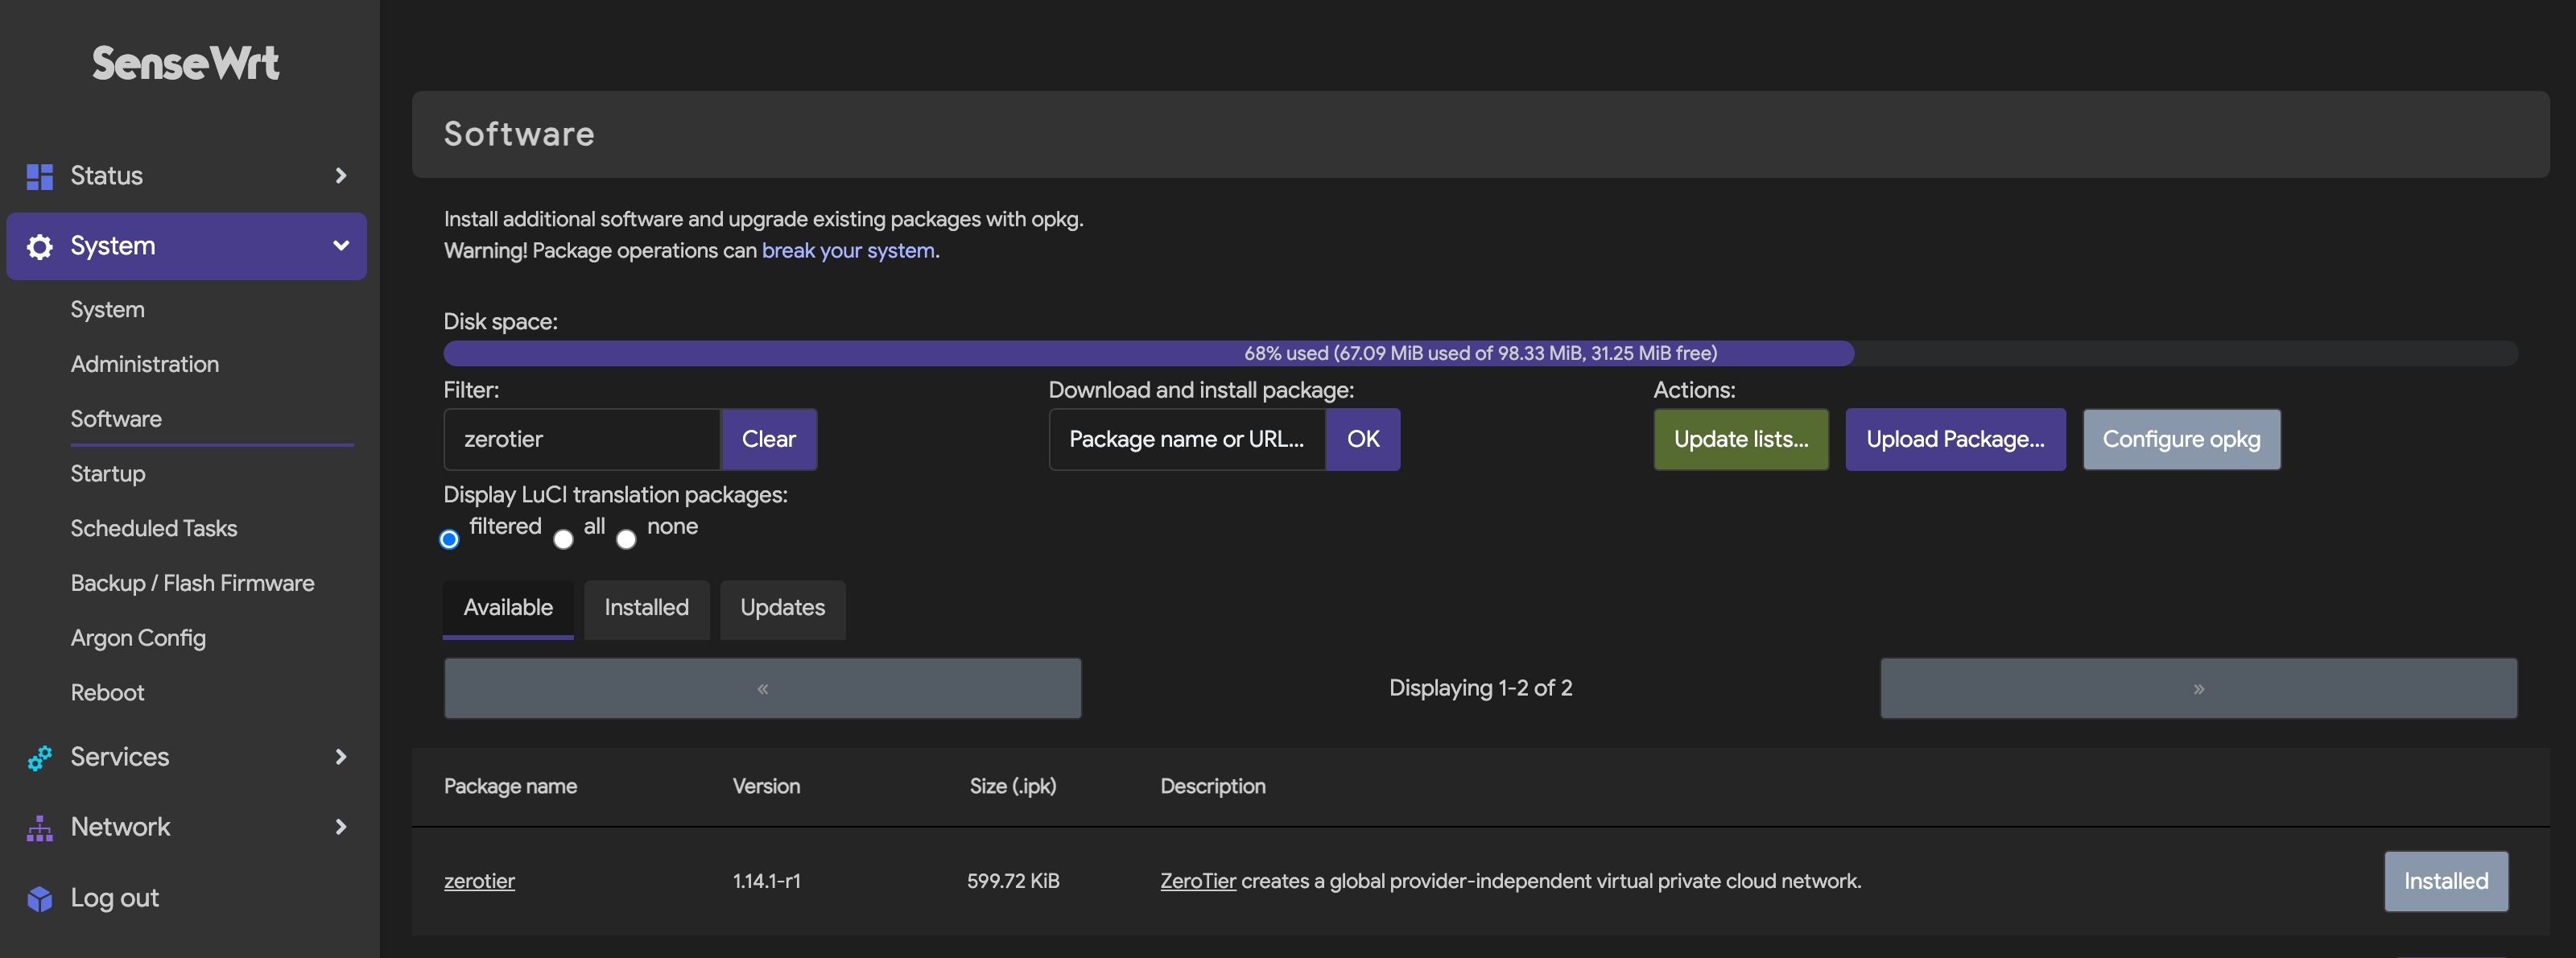
root@SenseWrt:~# cat /etc/config/zerotier
config zerotier 'global' # Sets whether ZeroTier is enabled or not option enabled 1 # Sets the ZeroTier listening port (default 9993; set to 0 for random) #option port '9993' # Client secret (leave blank to generate a secret on first run) option secret '' # Path of the optional file local.conf (see documentation at # https://docs.zerotier.com/config#local-configuration-options) #option local_conf_path '/etc/zerotier.conf' # Persistent configuration directory (to perform other configurations such # as controller mode or moons, etc.) #option config_path '/etc/zerotier' # Copy the contents of the persistent configuration directory to memory # instead of linking it, this avoids writing to flash #option copy_config_path '1'
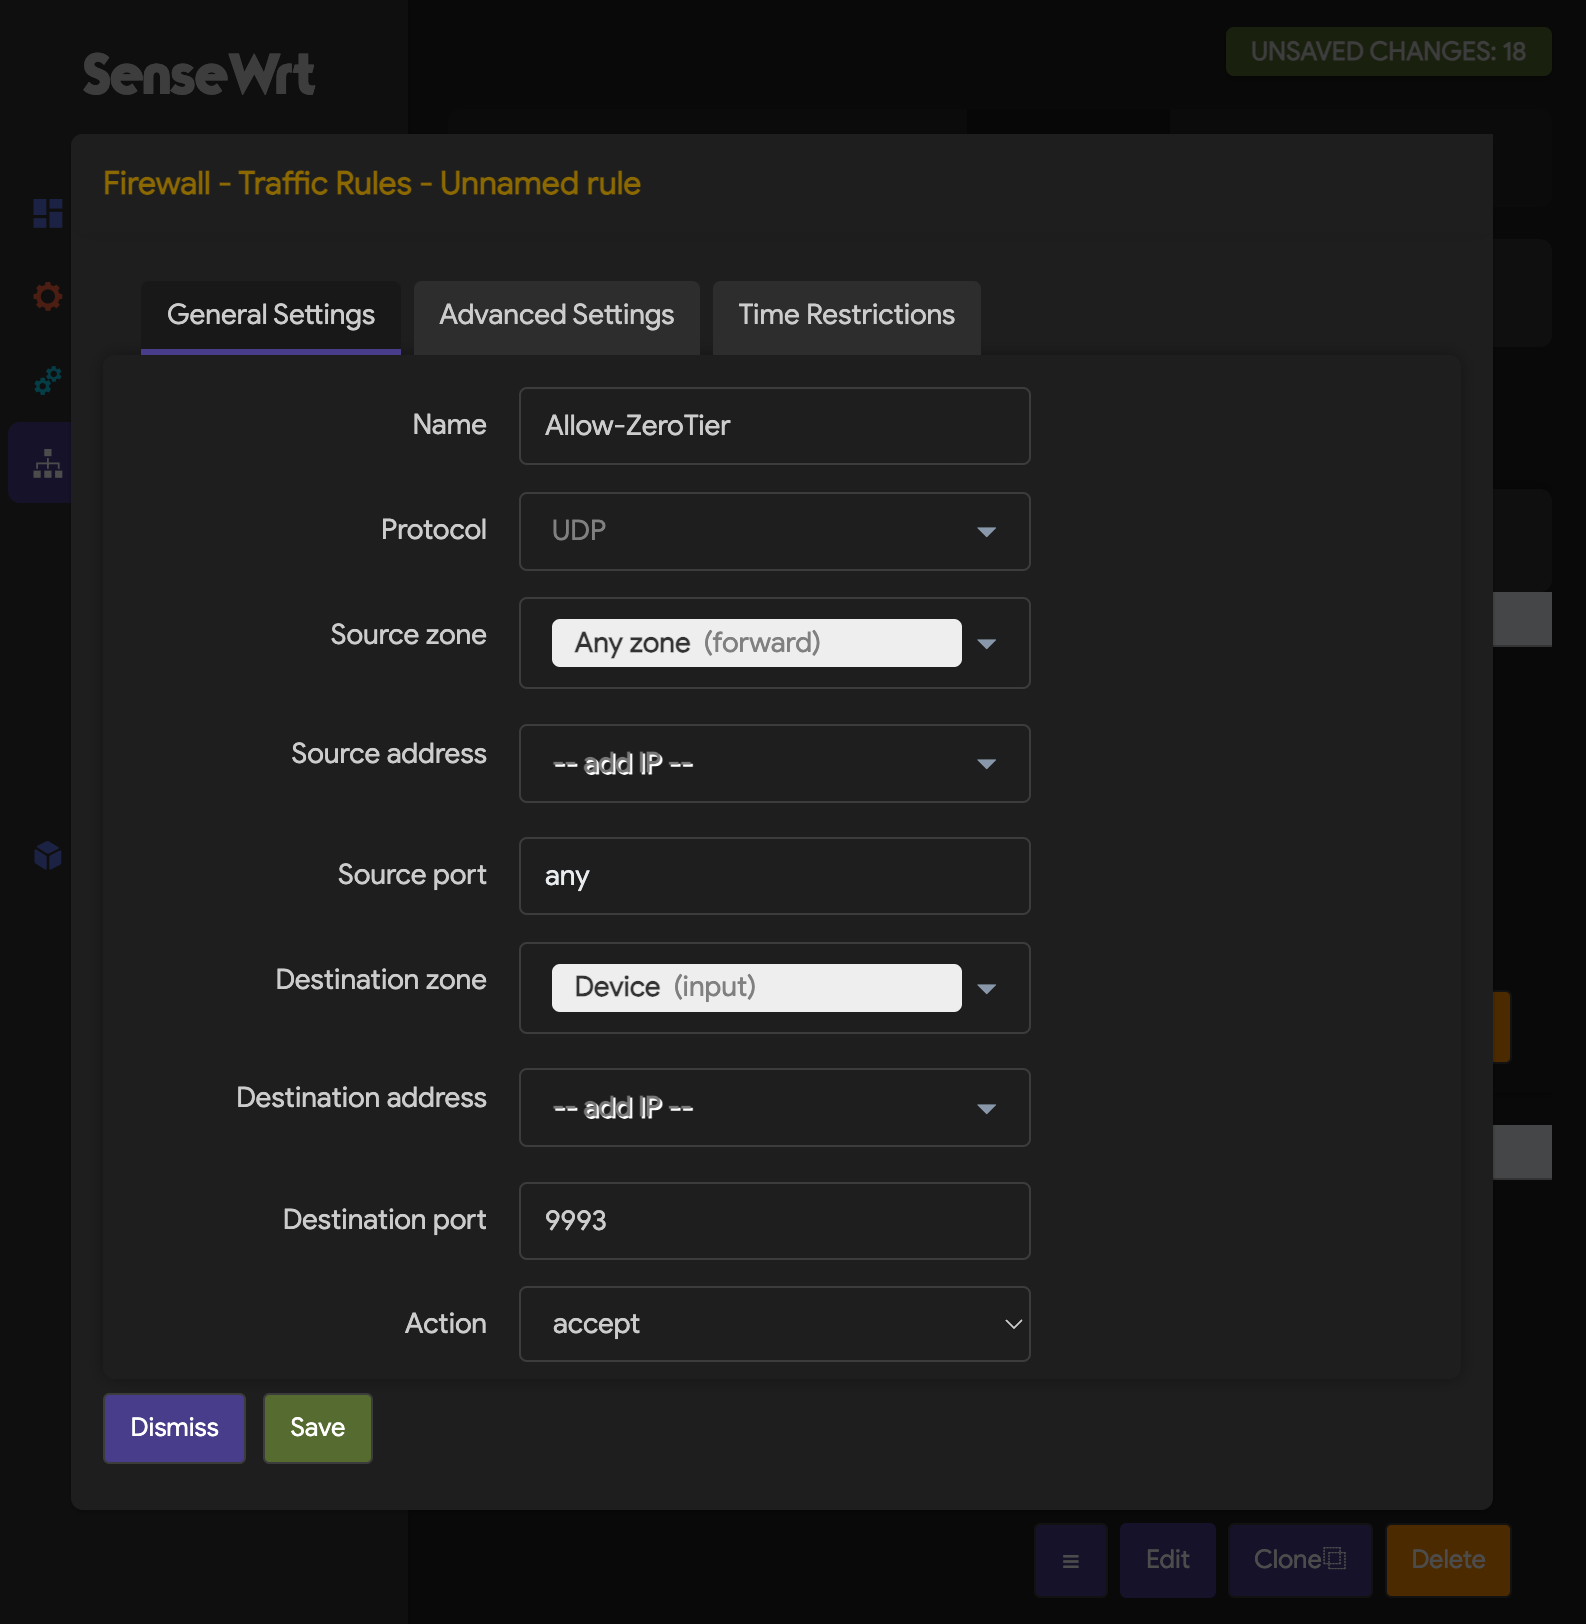
# Network configuration, you can have as many configurations as networks you # want to join (the network name is optional) config network 'earth' # Identifier of the network you wish to join option id '8ca917257083e297' # Network configuration parameters (all are optional, if not indicated the # default values are set, see documentation at # https://docs.zerotier.com/config/#network-specific-configuration) option allow_managed '1' option allow_global '0' option allow_default '0' option allow_dns '0'
# Example of a second network (unnamed as it is optional) #config network # option id '1234567890123456' # option allow_managed '1' # option allow_global '0' # option allow_default '0' # option allow_dns '0'
_______ ________ __ | |.-----.-----.-----.| | | |.----.| |_ | - || _ | -__| || | | || _|| _| |_______|| __|_____|__|__||________||__| |____| |__| W I R E L E S S F R E E D O M ----------------------------------------------------- OpenWrt 23.05.5, r24106-10cc5fcd00 -----------------------------------------------------